This tutorial gets you started using Event Portal to design an event-driven architecture (EDA). You'll use Designer to complete the following tasks:
- Create an Application Domain
- Create an Event
- Create an Application
- Import Objects
- Tour an Application Domain
- Edit an Application
- Find Objects in Catalog
Before You Begin
- Log into PubSub+ Cloud. For more information, see Accessing PubSub+ Cloud
-
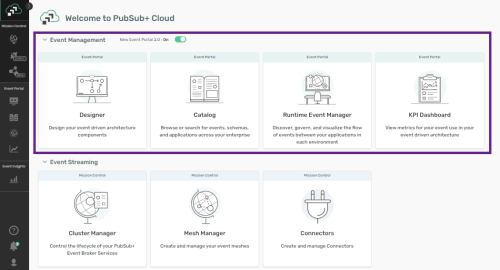
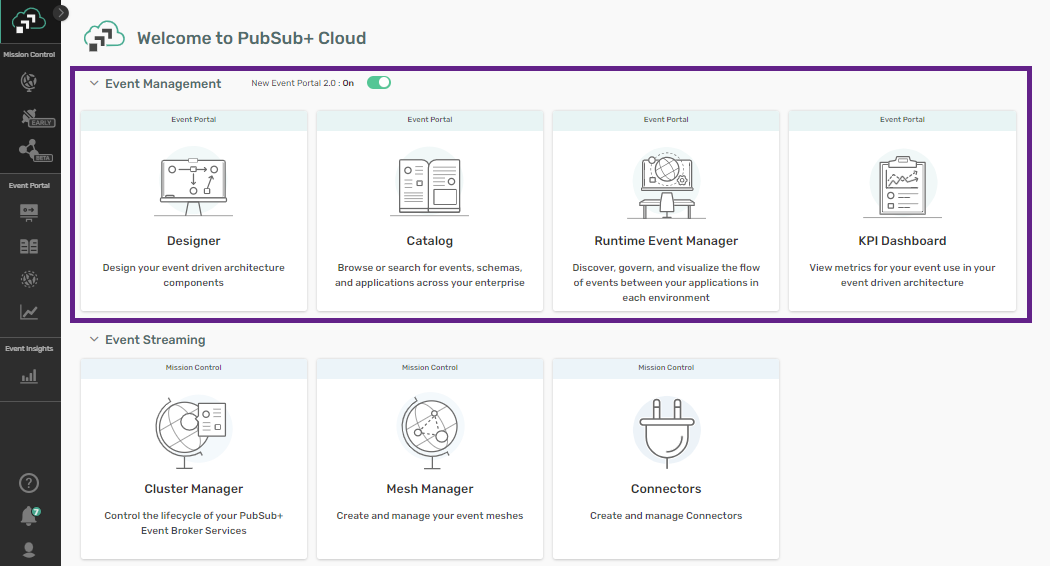
Ensure that your organization has access to Event Portal. When you log in you should see the Event Management tools.
- Ensure that you have a user role that gives you permissions for Event Portal. At minimum, you need the Event Portal Manager role to complete the tutorial. For more information, see Roles and Permissions. If you are unable to access Event Portal, contact an Administrator to update your permissions.
Create an Application Domain
To get started with Designer, you need an application domain to work in. Application domains generally represent different lines of business, development teams, or any other logical categories that makes sense for your EDA and development process.
When you create an application domain, you set one or more topic domains. Topic domains define the top level categories in your topic hierarchy. They can also be used as the root of an entire topic address for events within the application domain. To learn more, see Topic Addresses.
To create an application domain perform these steps.
- In the Cloud Console, click the Designer card or the icon
 on the left navigation bar.
 - Click Create Application Domain.
- In the Name field, type "Tutorial".
- In the Description field, add information about the application domain, for example: "Application domain for my tutorial".
- Select All topic addresses within this application domain must be unique. Using unique topic addresses for each event helps organize your topic hierarchy and your event data.
- To specify a topic domain, perform these steps:
- In the Broker Type list, select Solace.
- In the Topic Domain field, type "learn/designer".
- In the Broker Type list, select Solace.
-
Select All topic addresses within this application domain must use a topic domain to require the topic addresses for every event in the application domain to start with a topic domain. This option becomes selectable after you create a topic domain.

- Click Save.

Your application domain is created. Event Portal displays the list of application domains with your new application domain selected.
Create an Event
After you create an application domain you can open it and start creating objects. Let's start with creating an event:
-
In the list of application domains, click the name of application domain you just created.
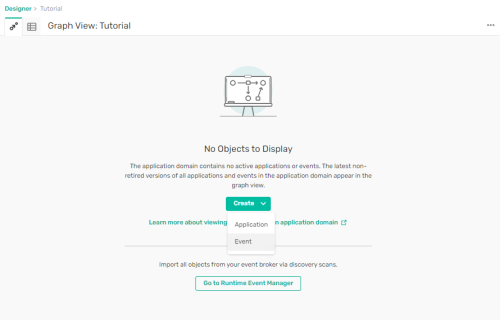
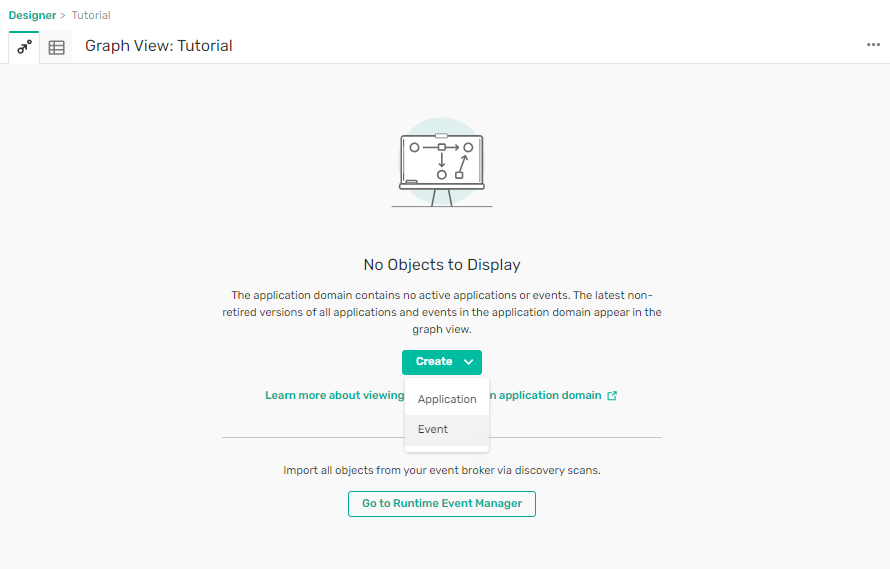
Because your application domain is brand new, it doesn’t contain any objects yet.
-
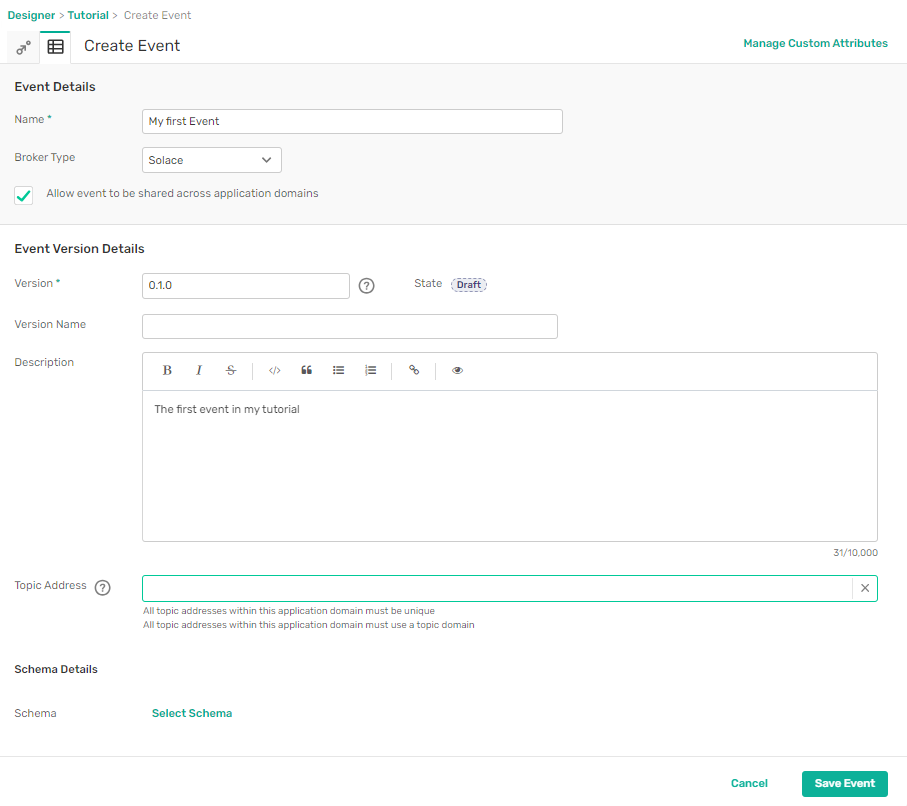
Click Create > Event.
- In the Name field, type "My First Event".
- In the Broker Type list, select Solace.
- Select Allow Event to be shared across application domains to make the event available to applications in other application domains.
- Leave the Version field set to 0.1.0. Each object can have multiple versions, allowing you to have different versions at different stages of your development cycle.
- Leave the Version Name field blank.
-
In the Description field, type "The first event in my tutorial".

-
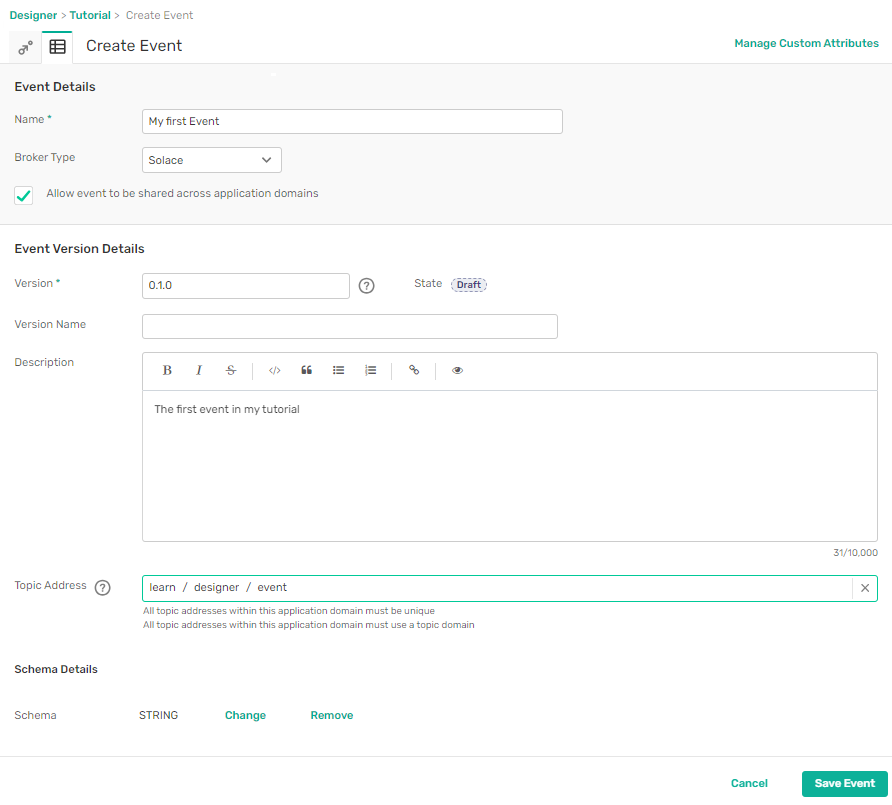
Click in the Topic Address field and select the topic domain learn/designer to add the topic domain to the address, then type "event" to complete the topic address.

- Click Select Schema. For this event we'll set a primitive schema.
-
Select Primitive and then select String from the list of Primitive types.
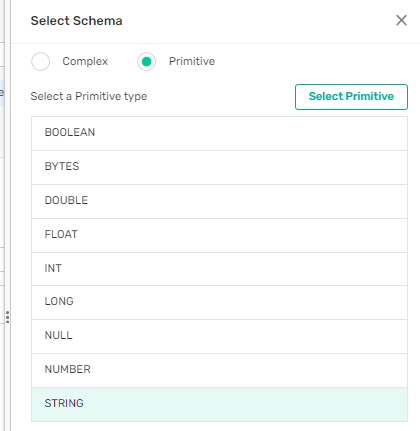
- Click Select Primitive.
-
Click
 to close the Select Schema panel.
-
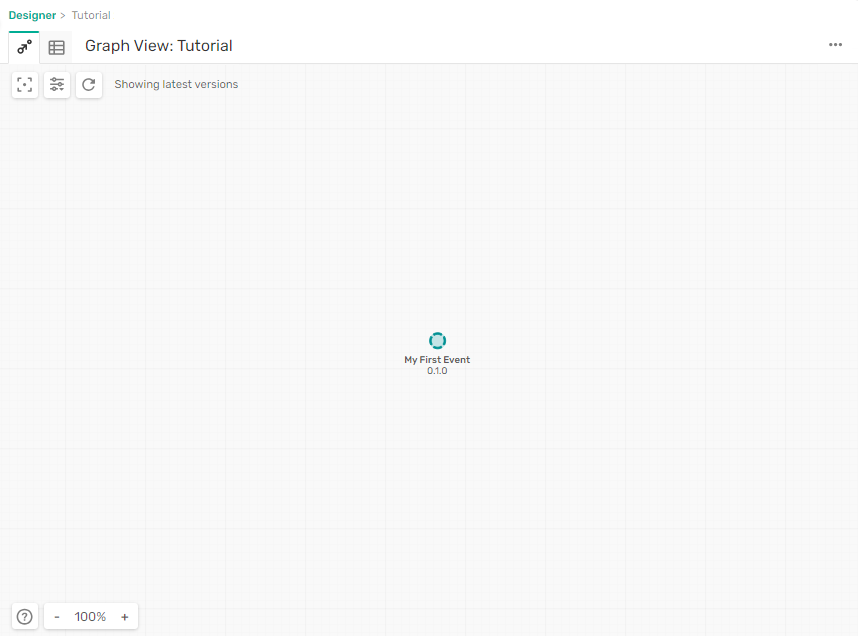
Click Save Event.
-
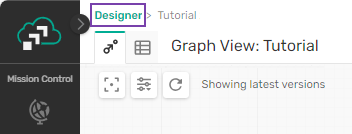
Click Graph View
 .
.
The event displays in the center of the graph view.
Create an Application
Now, let's create an application that publishes the event.
- Click Components
 to switch to the list view.
 - Select the Applications tab.
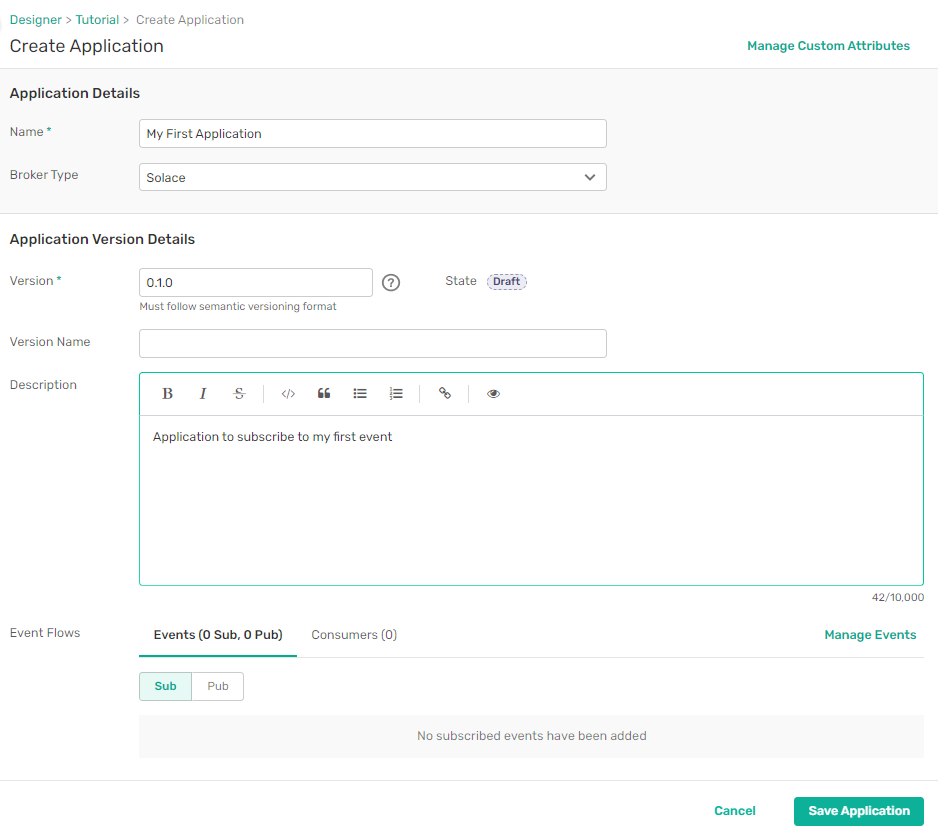
- Click Create Application.
- In the Name field, type "My First Application".
- In the Broker Type list, select Solace.
- Leave the Version field set to 0.1.0.
-
In the Description field, type "Application to publish my first event".

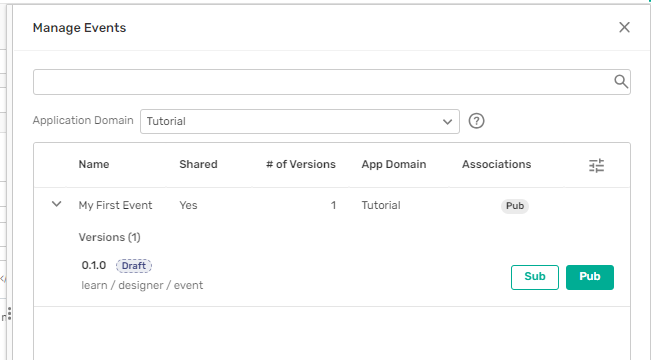
- In the Event Flows section, click Manage Events.
- Click Expand
 next to the event you created to see the list of event versions.
 -
Click Pub next to the event version.
- Click Save Application.
- Click Graph View in the top left corner to switch back to the graph view.
-
(Optional) If the event and application overlap each other, click Settings >
 Recalculate Graph Layout.
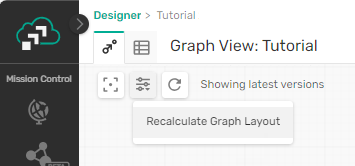
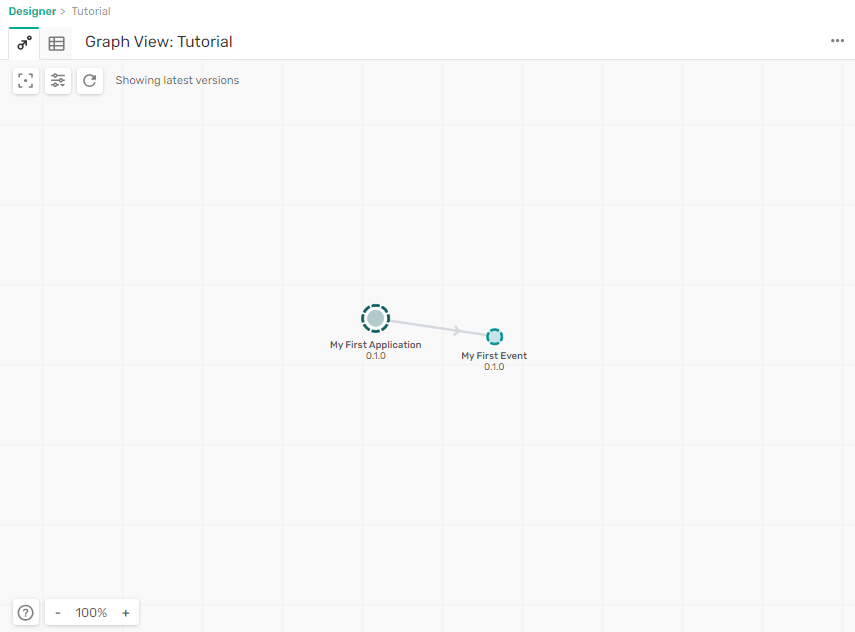
You can now see both the application and the event with a line connecting them. The arrow pointing towards the event indicates that the application publishes the event. Other applications can subscribe to published events to get the information in the event message.
Instead of creating another application to subscribe to our event, we're going to import a sample application domain to show you in more detail how event flows appear in Designer.
Import Objects
If you're brand new to EDA, you can create all of your objects in Event Portal from scratch as we've just done in Designer, but there are other ways to add objects to Event Portal.
-
If you have an existing EDA you can scan your existing event brokers and use your runtime data to import objects into Designer. For more information, see Discovering Runtime Data.
-
If you want to view sample EDA designs, you can import sample application domains into Designer.
To import a sample application domain:
- In a new browser tab, go to the Event Portal Samples page in GitHub.
- In the retail > solace > sample-domain folder, download the file solace_ep_acmeretail_storeoperations.json.
-
Click Designer in the breadcrumb at the top of the page to go to the list of application domains.
-
On the Application Domains page, click More Actions
 and select Import Application Domains.
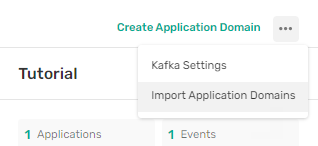
- Locate and select the JSON file you downloaded.
- Click Open.
After the import completes, you'll see four new application domains in Designer. We'll take a look around one of them so you can learn more about designing an event flow.
Tour an Application Domain
Let's tour around an sample application domain.
-
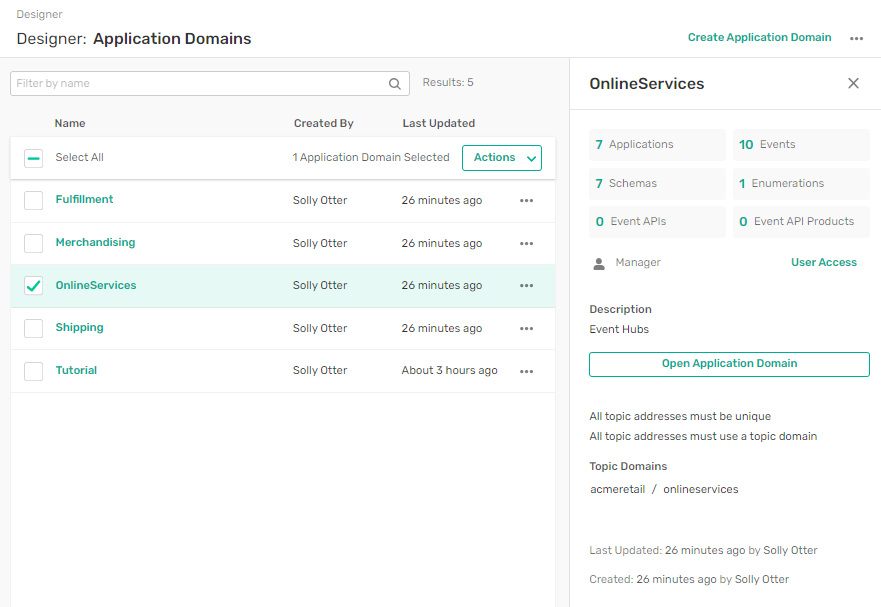
In Designer, on the Application Domains page, select the checkbox next to Online Services.
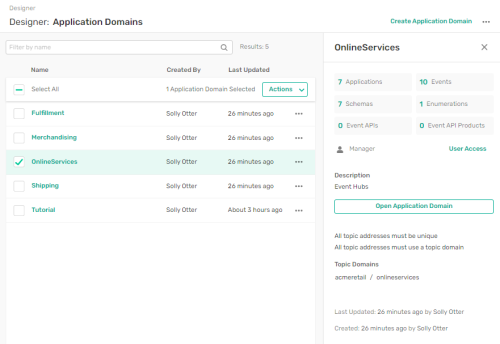
In the information panel you can see information about the application domain including:
- how many of each object type it contains
- the level of access you have
- the description
- the topic domain and topic address requirements
-
Click Open Application Domain.
The graph view displays the events and applications in the application domain and any other application domains that contain related objects.
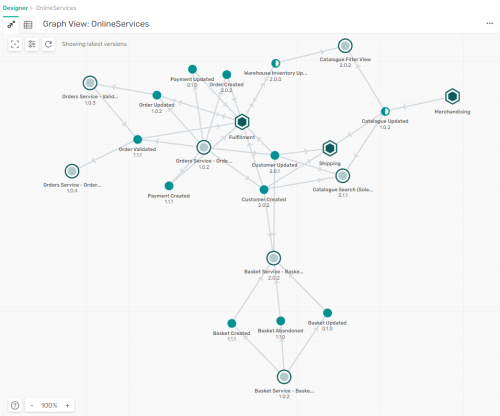
-
Click
 in the bottom right corner to display the legend for the graph view to learn what the icons mean.
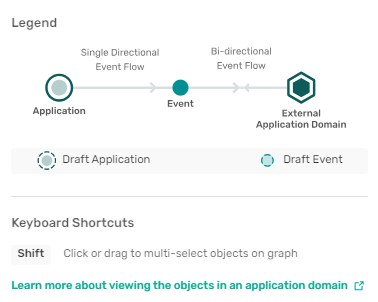
-
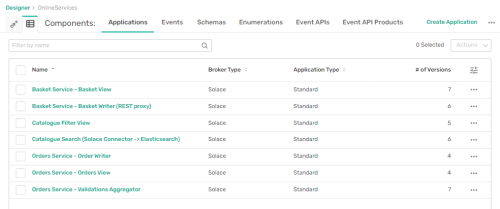
Click Components
to switch to the list view.Across the top of the page you can select tabs for each type of object that you can create in Designer.

When you switch an application domain to the list view, you can see the list of applications in the application domain. You can click the other tabs to see the lists of each type of object.
Object Type Description Application
An application in Event Portal represents client software that produces and consumes events. Within an application, a consumer represents a queue on an event broker
Event
In Event Portal, an event defines the properties that describe and categorize the actual event instances published by client applications. You create events in Designer to define the messages that applications publish for every instance of an event as it happens in real-time.
Every event has a topic address that defines the topic for each event instance at runtime. Topic addresses can include variable values to represent data specific to an event instance. To learn about creating and updating events, see Events.
Schema
Events in Event Portal references a schema that describes the payload of the event. To learn about creating and updating schemas, see Schemas.
Enumeration
An enumeration is a variable with a limited set of literal values. You can use enumerations to define values for a level in a topic address or topic domain. To learn about creating and updating enumerations, see Enumerations.
Event APIs
You can use event APIs to curate your event data into packages that you can share with others to use to build new runtime applications. You can share event APIs with application developers by generating and sharing an AsyncAPI document. To learn about creating and updating event APIs, see Event APIs
Event API Products
You can bundle one or more event APIs into an Event API Product that you can provide to other organizations so they can consume the events that you have included in your event APIs. An Event API Product contains one or more event APIs plus service plan details for deploying the product to allow others to consume the events. To learn about creating and updating Event API Products, see Event API Products.


Tour an Application
Let's take a closer look at an application:
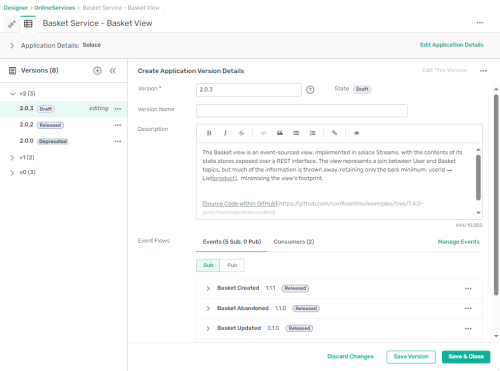
- On the Application tab, click Basket Service - Basket View.
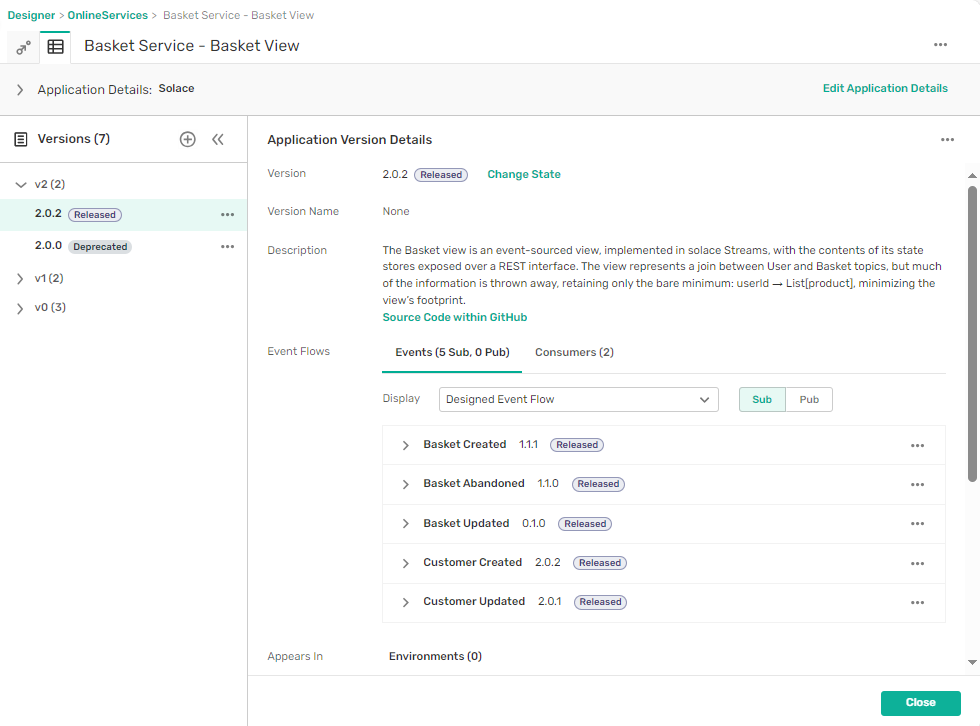
The Application Details page shows the list of versions for the application. The most recent version is selected and information about the selected version displays.
The Versions panel includes these options and details:
- The version list shows every version of the application. Clicking a version displays the version details.
- The version state displays next to the version number. The state can be one of Draft, Released, Deprecated, or Retired. For more information, see Object Versions and Lifecycle States.
- Click More Actions for a version to see additional options for the version.
- Click Add New Version
 at the top of the panel to create a new version
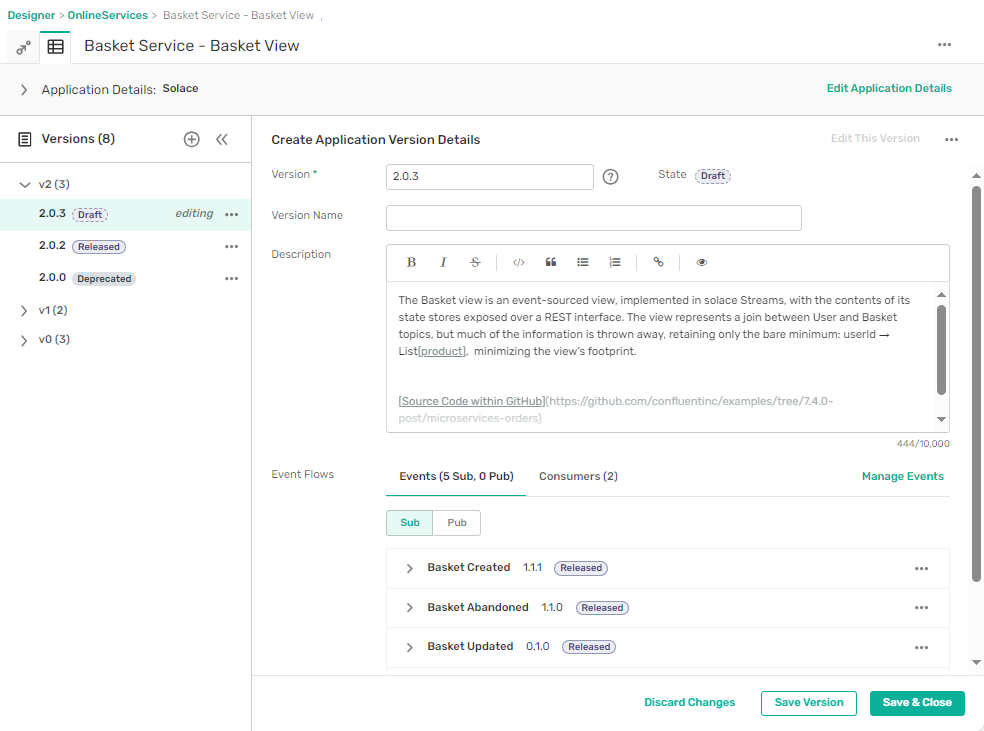
The Application Version Details panel includes these options and details:
- Version—the version number and state. Clicking Change State allows you to update the state.
- Version name—optional name given to the version
- Description—optional description given to the version
- Event Flows—the list of events that the application publishes and consumes. We'll discuss event flows more in the next task.
- Appears In—the list of environments that the application has been added to. We'll cover this in the next tutorial: Creating a Model of Your Event-Driven Architecture.
Edit an Application
You can edit a version of an application only if it is in Draft state. For the Basket Service - Basket View application, all versions are Released, Deprecated, or Retired. Although you can change a Released version back to Draft, it's best practice to create a new version.
- In the Version panel, select the most recent Released version.
- Click More Actionsin the version list or the version details.
-
Select Duplicate. Designer creates a new Draft version of the application with all of the same settings as the Released version and opens it for editing.
-
Let's take a closer look at the Event Flows while the application version is open for editing.
Event flows in the application specify events that the application can publish, subscribe to, and consume. For more information, see Creating an Application in Designer
- Published events are events generated by the application and consumed by other applications.
- Subscribed events indicate the intention of at least one consumer to consume the event. You might specify subscribed events early in the design process when you're not ready to specify all of the consumer details.
- Consumers represent runtime Solace event queues, Solace direct clients, and Kafka consumer groups that the application gets event messages from..
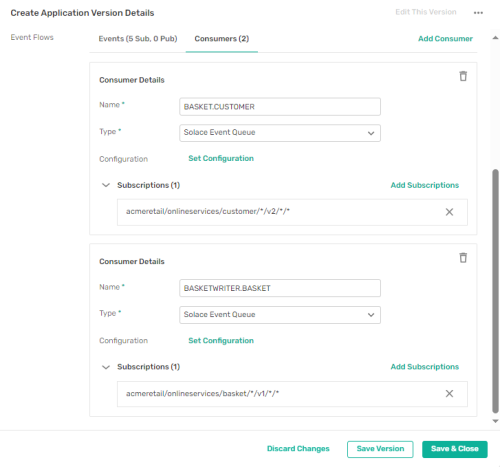
-
Click the Consumers tab. You'll see the details for two consumers including the name, type, and topic subscription. Each consumer represents a queue on an event broker. Each one has a topic subscription that attracts events with matching topics. The subscriptions include wildcard characters that enable it to attract events with multiple related topics. For more information, see Topic Subscriptions
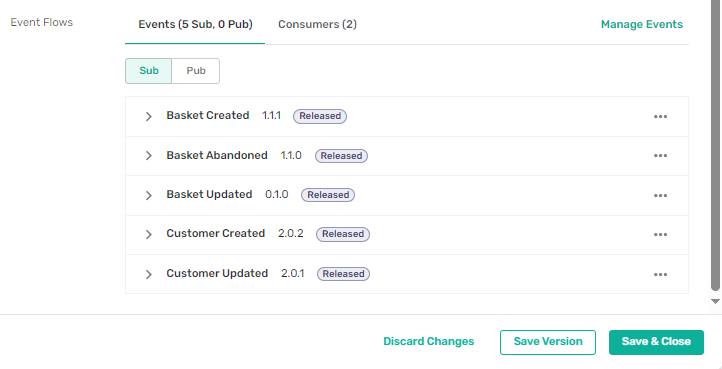
-
Click the Events tab and then click Sub. You'll see subscriptions for five events. All five events are also attracted by the topic subscriptions for the two consumers.
- Click Save Version to save the new application version. You can still view the application details even though it is no longer open for editing.
- Now, we're going to open one of the subscribed events. Under Event Flows, click More Actionsfor the Basket Created event and select Open Event.

Tour an Event
Now let's take a closer look at the event we opened from the application. You can see that application and event pages are laid out in a similar way.
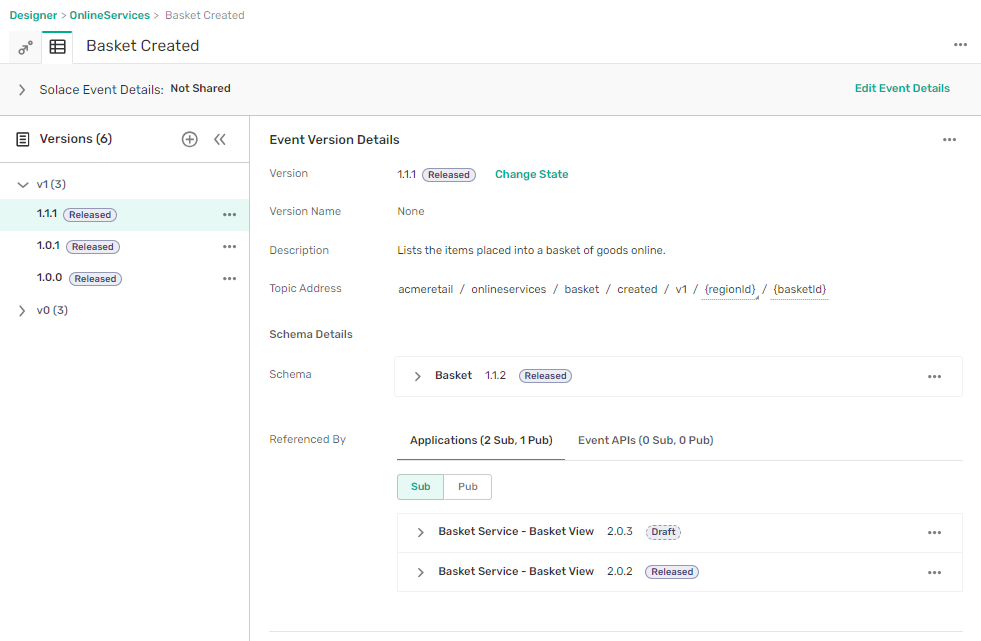
The Event Version Details panel includes some details that are specific to events:
- Topic Address—shows the topic address for the event.
- Schema—specifies the schema that the event references. If the event references a complex schema, you can click Expand to view the schema or More Actions> Open Schema to open the schema object.
- Referenced By—lists all of the applications and event APIs that publish or subscribe to the event.
Now we'll create a new draft version and take a look at topic addresses:
-
In the Version list for the Basket Created event, click More Actions
next to the most recent version and select Duplicate. Designer creates a new Draft version of the event and opens it for editing.In the new event version, examine the topic address field. Each hierarchical level in the address is separated by a slash /.

The first five levels of the address are literal values. If you click either of the first two levels you can see that acmeRetail/onlineservices is the topic domain for events in the application domain.

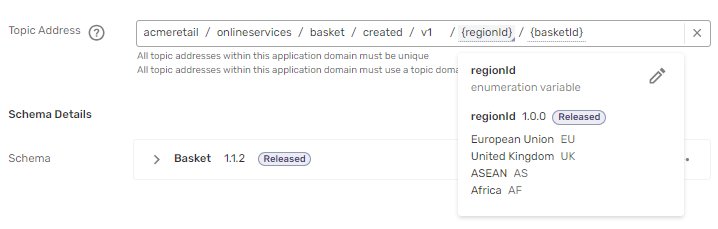
The final two levels are variable values, meaning they will be replaced by a value specific to the event instance in the runtime.
-
Hover the mouse over the basketId variable. The tool tip tells you that the variable is unbounded, which means there are no limitations on the potential values.

-
Hover the mouse over the regionId variable has a limited set of values. The tool tip provides information about the enumeration that sets the available options. For more information, see Enumerations.
-
To add a variable to a topic address, click in the Topic Address field after the final slash and type {, then click Configure Variable. You can select an Enumeration and Version or type a Name for an unbounded variable.

- In the name field, type "productId" and click Update to add the variable to the topic address.
- Click Save & Close to save the new version of the event.
Find Objects in Catalog
Catalog is a tool in Event Portal that provides library for all of the objects and object versions created in Event Portal. All objects created in Designer and objects imported using Runtime Event Manager are automatically available in Catalog. You can see shared objects in all application domains and all objects in the application domains that you have access to. If you have access to the application domain, you can open the objects to view or update them in Designer.
Lets find the event we were just touring using Catalog:
- In the Cloud Console, click the Catalog icon
 on the left navigation bar.
 - Select the Events tab. You can see all of the events in Event Portal, with their topic addresses.
-
Click Filter
 . You can filter objects by application domain, by objects with at least one version at a particular state, and other criteria, depending on the type of object. Since the list of objects is short we don't need to apply a filter to find the event.
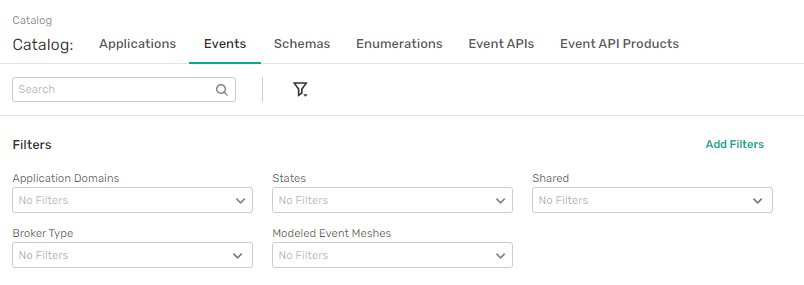
- Click anywhere below the filter area to hide the filters.
- Click the search field and start typing "Basket". The list of objects updates as you type to display only the objects that contain matching content. The list displays all objects that have at least one version that matches the search results.
-
Click More Actions
for the Basket Created event and select Open in Designer.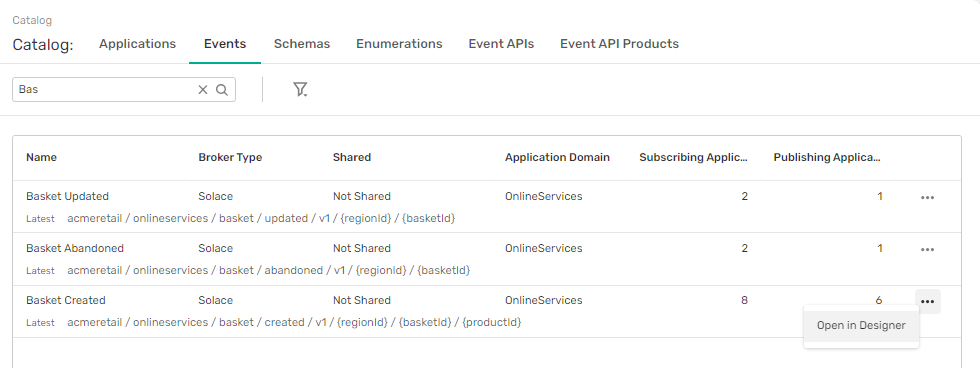
Next Steps
You should now understand the basics of working in Designer and how to use applications, events, schemas, and enumerations. You can take any of these next steps:
- Start the next tutorial: Creating a Model of Your Event-Driven Architecture to learn how to use your applications and events to create a modeled event mesh.
- Learn more about using Event APIs and Event API Products.