Configuring the Geneos Gateway for Event Brokers
Use the Gateway Setup Editor in an ITRS Active Console to configure the Geneos Gateway that manages the connection to your Solace event broker.
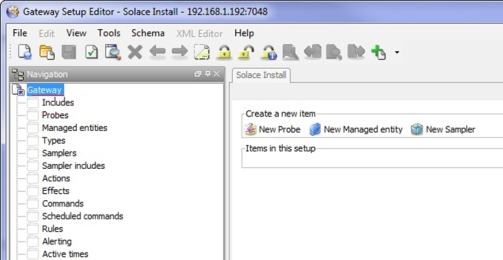
To access the Gateway Setup Editor, launch Active Console, then, in the Gateways area, double-click your Geneos Gateway for an event broker.
Using the Gateway Setup Editor, you must perform the following steps to configure the Geneos Gateway for the event broker:
- Step 1: Install Include Files
- Step 2: Copy Event Log Samplers and Rules to Main Setup File
- Step 3: Copy FKM Tables to Main Setup File
- Step 4: Create Solace Sampler
- Step 5: Create a NetProbe
- Step 6: Create the Managed Entity
Step 1: Install Include Files
To install the include files provided with the Solace Geneos Agent package, do the following:
- From the Solace Geneos Agent package that was extracted to the
/usr/swdirectory on the event broker, copy the following files to a location where they can be read by the Gateway process.solgeneos/loads/<version>/templates/eventlogsampler/solace_event_log_sampler_config.xmlsolgeneos/loads/<version>/templates/eventlogsampler/solace_fkm_config.xmlsolgeneos/loads/<version>/templates/eventlogsampler/solace_event_log_sampler_config_VMR.xmlThis file is required to monitor a software event broker.
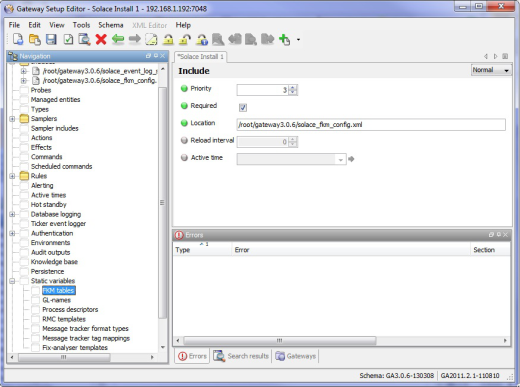
- In the Gateway Setup Editor, click Includes in the Navigation area.
- A Confirmation dialog box appears to ask whether you want to include files, click Yes.
- In the Includes view, click the Advanced tab, and then click Add New.

- In the Priority box, enter a priority level of 2, and in the Location box, enter the full path and file name for the
solace_event_log_sampler_config.xml(or thesolace_event_log_sampler_config_VMR.xmlfile for a software event broker).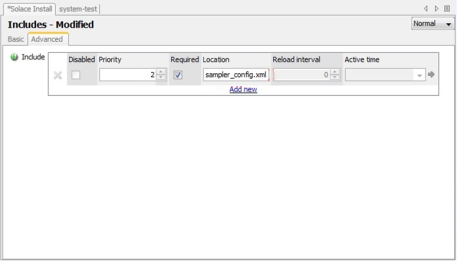
- Click Add New, and in the new row, enter a priority level of 3 in the Priority box, and in the Location box, enter the full path and file name for the
solace_fkm_config.xml. - Click File > Save to save the updates.
- Click File > Exit.
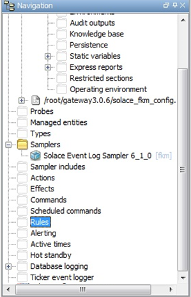
Step 2: Copy Event Log Samplers and Rules to Main Setup File
After including the configuration files, the event log samplers and rules that they provide must be copied to the Samplers and Rules folders.
To copy the sampler and rules to the main setup file, do the following:
- In the Gateways area of the Active Console, double-click the Geneos Gateway that manages the connection to your event broker.
The Gateway Setup Editor appears.
- In the Navigation area of the Gateway Setup Editor, navigate to the Solace Event Log Sampler file that is located in the Samplers folder of the included
solace_event_log_sampler_config.xmlfile (or thesolace_event_log_sampler_config_VMR.xmlfile for a software event broker), and copy the Solace Event Log Sampler file.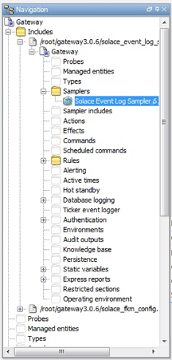
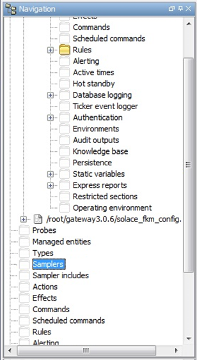
- Scroll down to the Samplers folder, and paste in the Event Log Sampler file.
- Navigate to the Rules folder of the included
solace_event_log_sampler_config.xmlfile (solace_event_log_sampler_config_VMR.xmlfile for a software event broker), and copy all of the rules in that folder.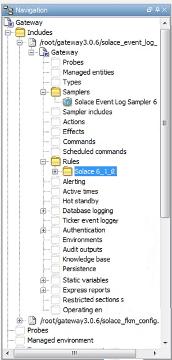
- Scroll down to the Rules folder, and paste in the copied rules.
- Click File > Save.
Step 3: Copy FKM Tables to Main Setup File
After including the config files, you must copy the contents of the included solace_fkm_config.xml file and paste it to the FKM section for the main setup file.
To copy the solace_fkm_config.xml file to the main setup file, do the following:
- In the Navigation area of the Gateway Setup Editor, open the Includes folder, and click the
solace_fkm_config.xmlfile to load the file.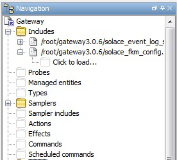
- Under the newly loaded
solace_fkm_config.xmlfile, navigate to the Solace <version> folder that is located in the FKM subdirectory of Static Variables, and copy the files in the Solace <version> folder.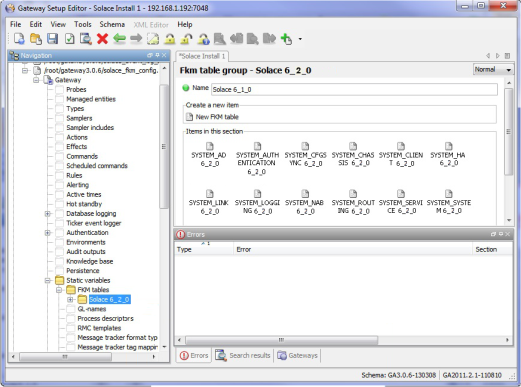
- Navigate to the FKM subdirectory of Static Variables that is located in the main setup file, and paste in the files copied from the included Solace <version> folder.
- Click File > Save.
Step 4: Create Solace Sampler
A Sampler Object defines a set of views that a NetProbe gathers from a particular managed entity. The Solace Sampler exposes all of the Solace views.
To create the Solace Sampler in the Gateway Setup Editor, do the following:
- In the Navigation area, select the Samplers folder.
The Sampler view displays.
- In the Sampler view, click New Sampler.
- In the Name box, type SolaceSampler.
- Select Plugin, and choose API from the list.
- Click File > Save.
Step 5: Create a NetProbe
A NetProbe is the data collection point for the system and is associated with Gateway objects. At least one NetProbe is required per managed event broker.
To create a NetProbe in the Gateway Setup Editor, do the following:
- In the Navigation area, select the Probes folder
The Probes view displays.
- In the Probes view, click New Probe.
- On the Basic tab, type the event broker name in the Name box.
- In the Hostname box, type the IP address of the event broker, specified in the dotted decimal notation form (nnn.nnn.nnn.nnn).
- In the Port box, type the NetProbe port number of the event broker’s NetProbe service. The default setting is 7036.
- Click File > Save.
Step 6: Create the Managed Entity
Managed entities represent any hardware or software component being monitored. The user is responsible for creating and naming the event broker managed entity on the Gateway, and associating it with a NetProbe running on that event broker or off the event broker.
At least one managed entity is required per managed event broker.
To create a managed entity for the event broker in the Gateway Setup Editor, do the following:
- In the Navigation area, select the Managed Entities folder.
The Managed Entities view displays.
- In the Managed Entities view, click New Managed Entity.
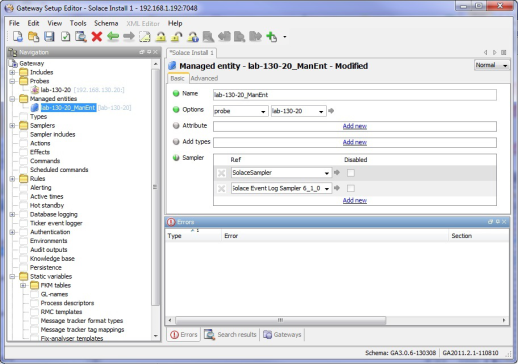
- On the Basic tab, type the Managed Entity’s name in the Name box.
This name must precisely match the string on the
managedEntitiesline in the event broker’ssolgeneosagent.propertiesfile (for example,managedEntities=[np0,lab-130-20_ManEnt]). - For Options, select Probe and the hostname of the event broker that is being monitored by the associated NetProbe.
- For Sampler, select the listed Samplers that you want to use with the Managed Entity.
For software event broker event log sampling, you must use the appropriate Solace Event Log Sampler.
- Click File > Save.