Step 2: Install Chassis in the Slide Assemblies
- A minimum of two people are required to properly install an appliance event broker in a rack.
- Never pull more than one component out of the rack on its slide assemblies at one time. The weight of more than one extended component could cause the rack to tip over and injure someone.
To install the appliance event broker chassis in the slide assemblies, perform these steps:
- Fully extend both of the slide assemblies installed in Step 1: Install Slide Assemblies in the Rack.
To avoid personal injury and the possibility of bending the slide assemblies, be careful not to walk into the extended slide assemblies.
- Using a server lifter or the assistance of another person, lift the appliance event broker chassis into position above the slide assemblies.
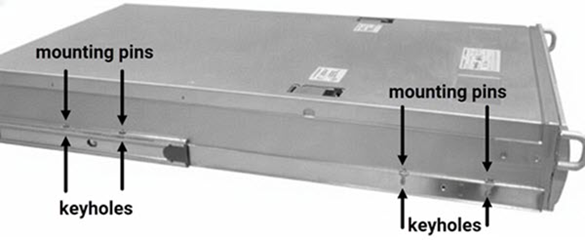
The four flanged mounting pins on both sides of the chassis must be vertically aligned with the keyhole slots in the left and right slide rails.
Align Mounting Pins and Rail Keyholes
- Carefully lower the chassis down, and ensure that the flanged mounting pins on the side of the chassis positively engage with the keyhole slots in the slide rails.
Lowering the Chassis into Slide Assemblies
When lowering the chassis, it is helpful to press the inner rails in tight to the chassis to ensure that the chassis mounting pins are properly slotted in the keyhole openings. This may require a third person when hand-lifting the chassis.
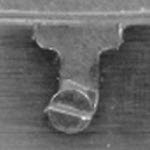
- Confirm that all eight mounting pins are firmly seated at the bottom of each keyhole. The figure below shows properly seated mounted pins for the slide assembly provided by Solace.
Properly Seated Mounting Pins
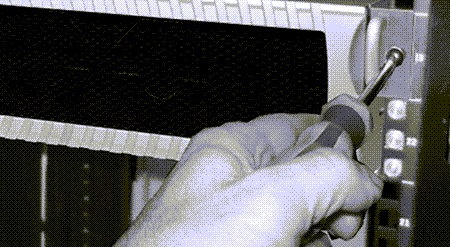
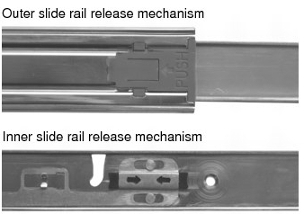
- To push the chassis into the rack, you must release the slide rail lockouts. The slide assembly uses a lockout release mechanism on the outer slide rails.
Slide Rail Lockout Release Mechanism
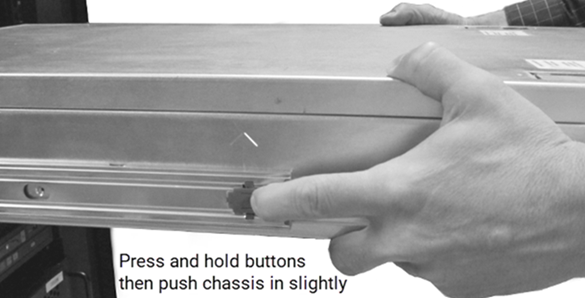
- To push the chassis into the rack, simultaneously press and hold the lockout release buttons on each extended slide rail as shown below. Then push the chassis forward into the rack a small amount and let go of the release buttons. The chassis should now move freely without holding the release buttons.
Outer Slide Rail Lockout Mechanisms
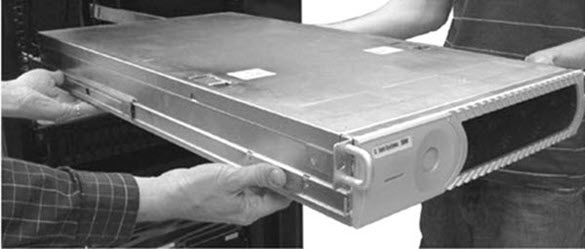
- Push the chassis from the front to finish sliding it into the rack. Ensure that the chassis is square to the rack and not skewed as you push it in.
Sliding the Chassis Into the Rack

Ensure that ventilation holes at the rear of the chassis are not obstructed. There must be enough space around the appliance event broker for adequate ventilation or equipment can overheat and damage can occur.
- Secure the chassis’s mounting‑bracket flanges to the rack with suitable fasteners (not provided). Fully tighten the fasteners.
Securing Mounting Brackets to the Rack