Step 2: Configure Your LLM Provider
You've completed Step 1: Install Agent Mesh.
Solace Agent Mesh supports multiple large language model (LLM) providers. Bring your own model from Anthropic, OpenAI, Azure, Google, Amazon Bedrock, or any OpenAI-compatible API endpoint. You can change providers without reconfiguring agents.
This tutorial uses a Custom provider configuration with LiteLLM, which provides a unified API endpoint for accessing multiple LLM providers. For other provider options, see Model Configuration.
Launch Agent Mesh for the First Time
Launch Solace Agent Mesh Desktop from your Applications folder (macOS) or Start menu (Windows). On first launch, a setup wizard guides you through configuring your LLM provider credentials. The configuration is saved and reused for subsequent launches. If the setup wizard doesn't appear (for example, you're relaunching after completing initial setup, or recovering from an interrupted setup), select Builder > Models in the navigation bar to configure your LLM provider directly.
Built-in Model Configurations
Solace Agent Mesh includes two model aliases that must be connected to an LLM provider:
-
general — The model that agents use for reasoning and built-in AI features like Quick Build, the agent-creation tool you'll use starting in the next step.
-
planning — The model the Orchestrator uses to analyze requests and decide which agents to call.
Following initial setup, both aliases point to the same provider. Later, you can configure them separately under Builder > Models. For example, you can use a faster model for general tasks and a more capable model for complex planning.
Configure a Custom LLM Provider
Now configure your LLM provider in the setup wizard:
-
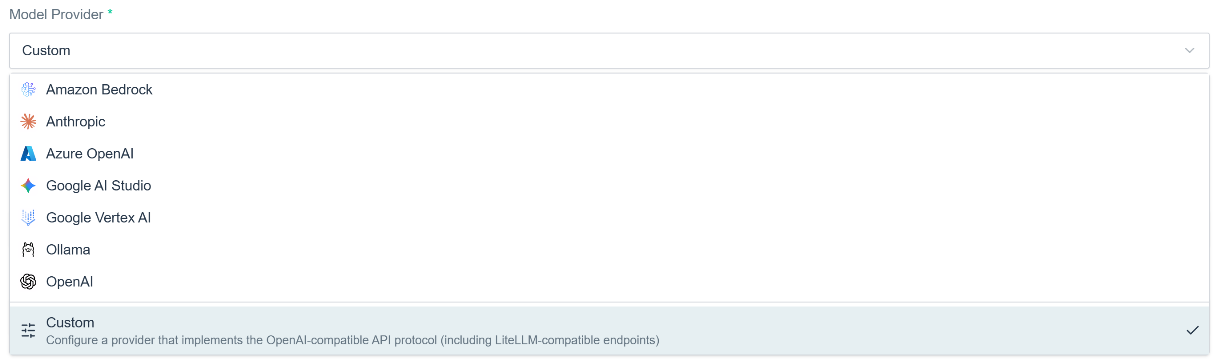
Under Model Provider, select Custom.
-
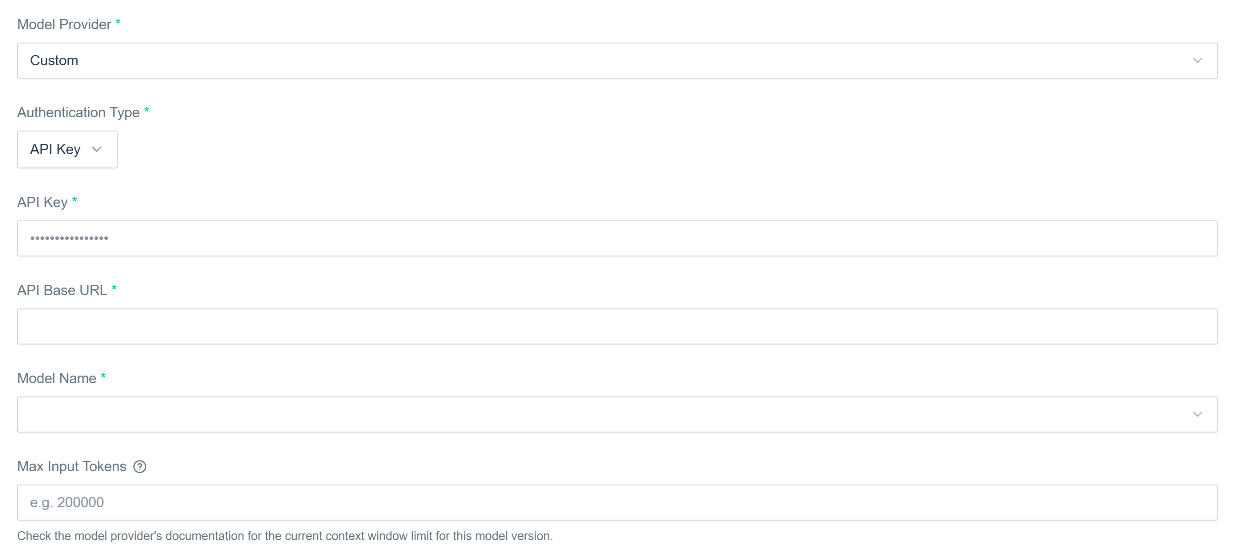
In API Base URL, enter the API endpoint URL for your LiteLLM instance or custom provider.
-
For Authentication Type, select API Key.
-
In API Key, enter your LiteLLM API key (for example,
sk-...). -
In Default Model, select your model of choice from the drop-down list. This sets both the general and planning aliases described above.
-
For Max Input Tokens, leave the field blank. This optional field controls the context usage indicator in the chat interface. If blank, the application uses LiteLLM's registry value.
-
Click Save to complete the configuration.
The application validates your API key by making a test connection. If successful, Solace Agent Mesh Desktop opens to the main chat interface.
Your LLM provider settings are stored locally in the application's configuration directory: %AppData%\sam on Windows, ~/Library/Application Support/sam on macOS, or ~/.config/sam on Linux.
Verify Your Configuration
To confirm your LLM provider is working, send a test message to the Orchestrator agent:
-
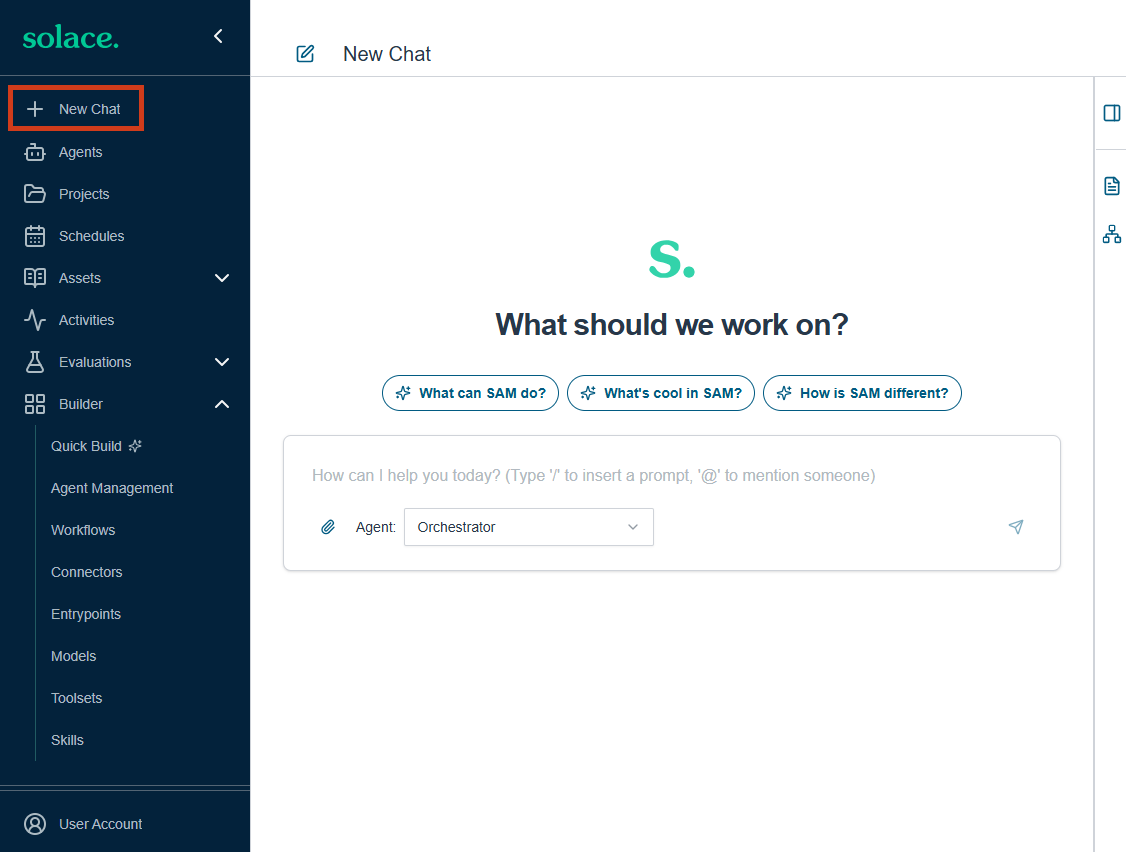
In the navigation bar, select New Chat.
-
Below the message input field, locate the Agent selector drop-down list and ensure Orchestrator is selected.
The Orchestrator is a built-in agent that coordinates work across multiple agents. When you're unsure which agent to use, the Orchestrator analyzes your request and delegates to the appropriate specialist.
-
Type
what time is itand press ENTER.The Orchestrator calls a time tool and returns the current time.
A successful response confirms your LLM connection is working. If you don't see a response, check that your API key is valid and you have an internet connection.
Now that you have Solace Agent Mesh installed and your LLM provider configured, the next lesson shows you how to create agents and see how they work together.
Tutorial Steps
You've completed step 2 of the tutorial. Click Next Lesson to continue.
| Step | Description |
|---|---|
|
|
Install Solace Agent Mesh - Complete |
|
|
Configure Your LLM Provider - Complete |
|
|
Build Multi-Agent Orchestration - Next Lesson |
|
|
Add a Connector |
|
|
Create a Workflow |
|
|
Test Agent Competence with Evaluations |
|
|
Add an Entrypoint |
|
|
Next Steps |


You can return to the main Tutorial page at any time.