Configuring SSO with MuleSoft AnyPoint Platform
If your organization uses MuleSoft AnyPoint Platform, you can configure single sign-on (SSO) so that users in Anypoint Platform can log in to the Solace Cloud Console. Anypoint Platform acts as the OpenID Connect (OIDC) identity provider (IdP) when you configure a connected app.
SSO with MuleSoft AnyPoint Platform is similar to the way other OIDC-based identity providers work with Solace Cloud. For more information, see Configuring Single Sign-On with OpenID Connect.
Before You Begin
Before you can configure SSO, you require:
-
access to MuleSoft AnyPoint Platform through an invitation email from MuleSoft
-
access to your Solace Cloud organization with the Administrator role
To configure SSO for your Solace Cloud account with Anypoint Platform, you perform the following tasks:
- Create a connected app in Anypoint Platform.
- Get your MuleSoft information to configure Solace Cloud.
- Configure, test, and enable SSO in Solace Cloud.
- Verify that you can log in from Anypoint Platform.
- (Optional) Configure group management to dynamically add users to groups with assigned roles based on the user claims received from Anypoint Platform. For more information, see Configuring Group Management.
If you have issues with your configuration, seeTroubleshooting SSO Integration Between MuleSoft AnyPoint Platform and Solace Cloud.
Creating a Connected App in Anypoint Platform
You must create a connected app that provides the client ID and client secret required to configure the SSO settings in Solace Cloud. As part of creating the connected app, you need to know the correct web URL and redirect URL based on your Solace Cloud account.
When you configure the connected app, use the web URL for the region of your Solace Cloud account:
| Regional Site for Home Cloud | Cloud Console URL |
|---|---|
| United States | https://console.solace.cloud/ |
| Australia | https://console.solacecloud.com.au/ |
| European Union | https://console.solacecloud.eu/ |
| Singapore | https://console.solacecloud.sg/ |
The following table lists the MuleSoft-specific redirect URLs for each Solace Cloud region:
| Home Cloud Region | SSO-enabled Redirect URL for MuleSoft |
|---|---|
| United States |
|
| Australia |
|
| European Union |
|
| Singapore |
|
To create the connected app, perform these steps:
- Log in to Anypoint Platform.
- On the main page, on the Management Center pane, click Access Management.
- On the Access Management page, select Connected Apps, and click Create app.
- On the Create App page, enter the following information:
- Name — Enter a name for your app, such as
my-first-mulesoft-app. - Type — Select App acts on behalf.
- Grant types — Select Authorization Code.
- Website URL — Enter the region-specific URL for your Solace Cloud account, such as
https://console.solace.cloud/(United States) orhttps://console.solacecloud.eu/(European Union). - Redirect URI — Enter the redirect URL for your Home Cloud region from the table above, such as
https://mulesoft.solace.cloud/sso/login(United States) orhttps://mulesoft.solacecloud.eu/sso/login(European Union). - Who can use this application — Select Members of this organization.
- Name — Enter a name for your app, such as
- Click Add Scopes. In the dialog, enter
opento filter the scopes, select the following scopes, and then click Add Scopes:- Identity
- Profile
- (Optional) View User Roles in Groups, if you use group mappings
- Click Save.
A connected app is now created in Anypoint Platform. For more information about connected apps, see theMuleSoft documentation.
Getting Your MuleSoft Information to Configure Solace Cloud
Solace Cloud uses your MuleSoft Org ID and the client ID and secret from the connected app you created to configure single sign-on (SSO). To find the region that your Solace Cloud account uses, check the URL of your account.
To get your MuleSoft Org ID, perform these steps:
-
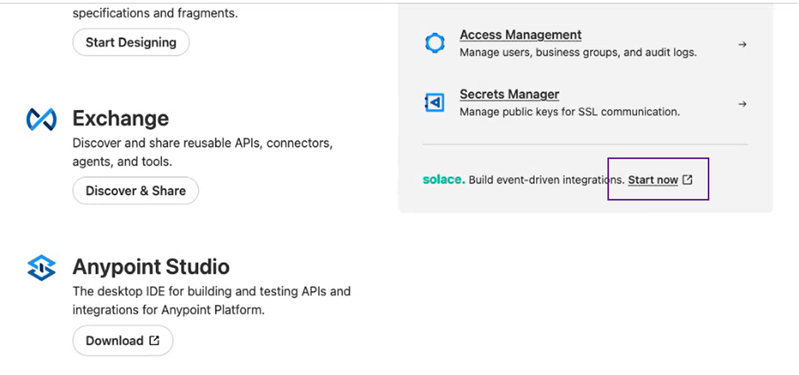
In Anypoint Platform, navigate to the main page, right-click the Start Now link, and select Copy Link.
-
Retrieve the MuleSoft Org ID from the link:
Paste the URL that you copied in the previous step into a text editor. The Org ID is the string after
?ext-org-id:. For example, if your URL ishttps://mulesoft.solace.cloud?ext-org-id:abcdef-ghi123-lmno789, your MuleSoft Org ID isabcdef-ghi123-lmno789. Save the Org ID for later reference. - On the main page, on the Management Center pane, click Access Management.
- On the Access Management page, select Connected Apps and locate the application that you created, such as
my-first-mulesoft-app. - Click Copy Id and save it for later reference.
- Click Copy Secret and save it for later reference.
Store the Org ID, client ID, and secret securely. You need them to configure SSO in Solace Cloud.
Configuring and Enabling SSO in Solace Cloud
You need the following information to configure your SSO settings:
- client ID from the connected app in Anypoint Platform
- secret from the connected app in Anypoint Platform
- MuleSoft Org ID
You don't need to enter the OIDC Discovery URL. Solace Cloud fills it in with the default Anypoint Platform discovery URL for your region.
To configure and enable SSO for your Solace Cloud account, perform these steps:
- Log in to the Solace Cloud Console if you have not done so yet. The URL to access the Cloud Console differs based on your
- On the navigation bar, select User & Account
 and then select Account Details.
- On the Account Settings tab, click Configure Settings.
-
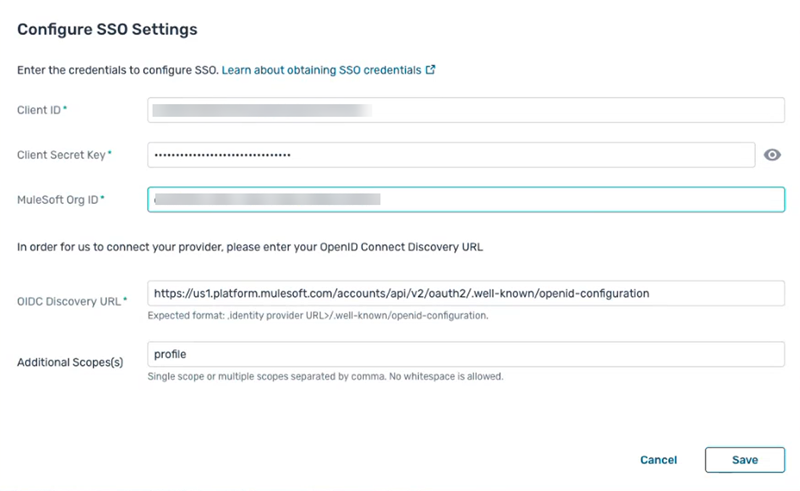
In the Configure SSO Settings dialog, enter the following settings from MuleSoft:
-
Client ID — Enter value you saved for client ID from the connected app you created in Anypoint Platform.
-
Client Secret Key — Enter the value of the secret from the connected app you created in Anypoint Platform.
-
MuleSoft Org ID — Enter the value derived from the Anypoint Platform URL.
If you don't have the client ID, secret, or MuleSoft Org ID, see Getting Your MuleSoft Information to Configure Solace Cloud.
-
-
The OIDC Discovery URL and Additional Scopes(s) fields are prefilled.
Do not modify the OIDC Discovery URL or Additional Scopes(s) fields unless Solace instructs you to. An incorrect URL or missing
profilescope prevents users from logging in. -
Review your settings and click Save.
-
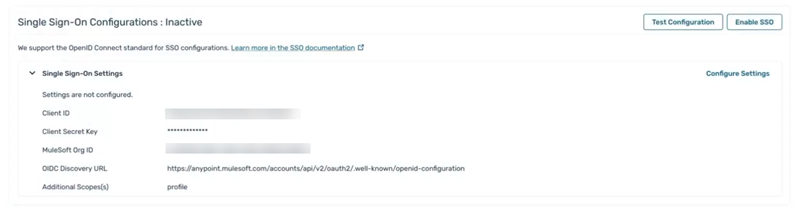
After you save the SSO settings, click Test Configuration and then click Test.
-
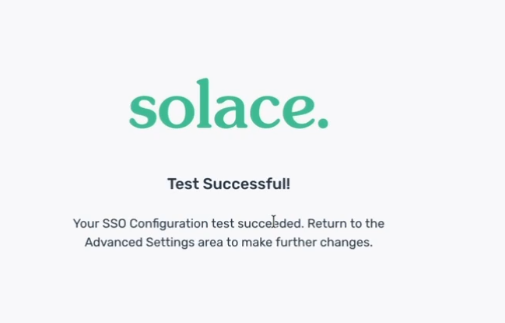
The test opens a new window and shows a success message.
-
Return to the Cloud Console and click Enable SSO, and then click Activate.
If you can't activate SSO after you click Enable SSO, see Troubleshooting SSO Integration Between MuleSoft AnyPoint Platform and Solace Cloud.
Verifying SSO Using the MuleSoft AnyPoint Platform
After you enable SSO, you can verify that users can open Solace Cloud from Anypoint Platform. To verify that users can log in, log in to Anypoint Platform, navigate to Solace Cloud on the main page, and click Start now.
If SSO is configured and enabled correctly, you're logged in to the Cloud Console in Solace Cloud. If you see a Solace marketing page that offers a Solace Cloud trial instead, SSO isn't configured correctly. For more information, see Troubleshooting SSO Integration Between MuleSoft AnyPoint Platform and Solace Cloud.
Troubleshooting SSO Integration Between MuleSoft AnyPoint Platform and Solace Cloud
If you experience issues setting up SSO with Anypoint Platform and Solace Cloud, review the following troubleshooting tips for potential reasons and solutions:
- You can't click Enable SSO in the Cloud Console. For Anypoint Platform, Enable SSO is available only after a successful test.
- Click Test Configuration, wait for the success message, and then click Enable SSO.
- Clicking Start Now in Anypoint Platform opens a Solace marketing page instead of logging you in. Solace Cloud didn't find an enabled SSO configuration for your MuleSoft organization.
-
Ensure that you have:
- tested the configuration and clicked Enable SSO
- verified that the MuleSoft Org ID in your SSO settings matches the MuleSoft Org ID from the Anypoint Platform URL
- When you configure SSO in Solace Cloud, you see the error
An entity of type ssoConfiguration was passed in invalid format. - The MuleSoft Org ID you entered is already bound to an existing Solace Cloud organization. Verify that you have the correct MuleSoft Org ID.
- The test fails because the organization ID, client ID, or secret doesn't match. The test compares the organization ID that Anypoint Platform returns with the MuleSoft Org ID that you entered.
- Copy the link from the Anypoint Platform main page again, extract the Org ID, and make sure that you didn't include extra characters from the link, client ID, or secret, such as slashes, query parameters, or spaces. Save your settings and test again.
- Anypoint Platform shows a redirect error after you log in or grant access. The redirect URL in your connected app doesn't match the URL for your Solace Cloud regional site.
- In Anypoint Platform, edit the connected app and make sure that the redirect URL matches the URL for your regional site in the table in Creating a Connected App in Anypoint Platform.
- Login fails or users aren't added to the expected groups. Connected apps have no scopes by default.
- Ensure that the connected app includes the Email, Identity, and Profile scopes. If you use group management, also add the View User Roles in Groups scope, and then save the connected app and test again.
Contact Solace if these troubleshooting tips don't resolve your configuration issues.