Eavesdropping Application Example
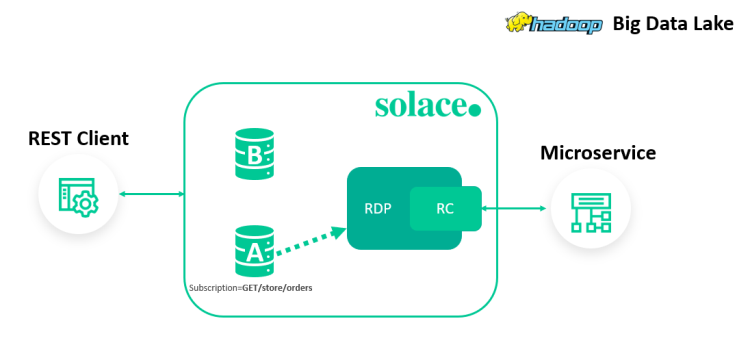
The following sections provide an example of how to add an eavesdropping application to an existing Microgateway deployment with the Solace Event Broker CLI.
- Step 1: Create a Queue for the Eavesdropping Application
- Step 2: Add Topic Subscriptions to the Queue
- Step 3: Enable the Queue
Before you begin
The example provided in the following sections assumes that the following parameters are already configured on the Solace event broker:
- Client authentication and authorization settings for the eavesdropping application to connect to the Message VPN used in the Microgateway deployment. For details, refer to Client Authentication and Client Authorization.
- All components of the Microgateway deployment. For details, refer to Microgateway Configuration.
Step 1: Create a Queue for the Eavesdropping Application
When you add an eavesdropping application to a Microgateway deployment, Solace recommends that you create a separate queue to receive, store, and deliver messages for the application. This allows you to handle message persistence with more flexibility, and provides greater control over the selection of requests and responses you want directed to the application, without interfering with the service configuration.
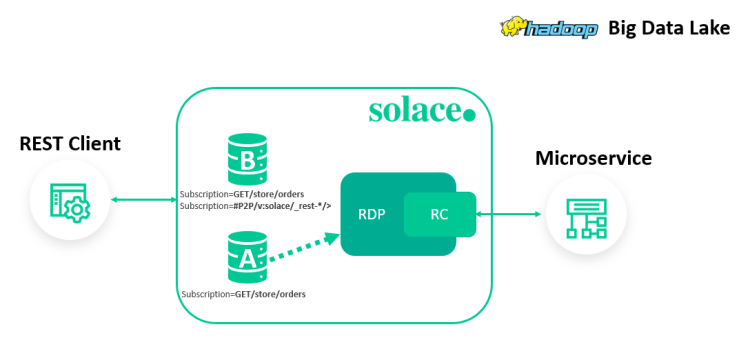
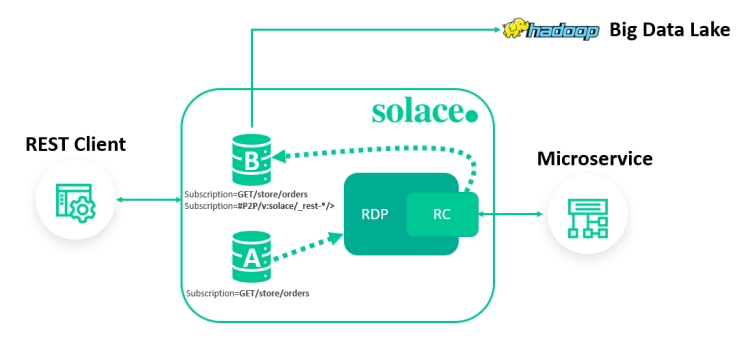
In this example, a dedicated queue (Queue B) is created for the eavesdropping application, and the application is permitted to read and delete messages from it.

solace(configure)# message-spool message-vpn rest-microgateway
solace(configure/message-spool)# create queue B
solace(configure/message-spool/queue)# permission all consume
Step 2: Add Topic Subscriptions to the Queue
In order for the eavesdropping application to receive requests and responses propagated by the Microgateway, you must add the following types of topic subscriptions to the queue:
- One or more subscriptions that match existing subscriptions used to receive requests from REST clients.
- One or more subscriptions that correspond with the reply-to topics generated by the event broker. These topics are generated according to the following format:
#P2P/<virtual-router-name>/_rest-<tsid>/<request-method>/<request-path>.
In this example, two topic subscriptions are added to the queue. The first matches the subscription used in the existing deployment to attract incoming requests from the REST client, and the second attracts all responses from the remote microservice.

solace(configure/message-spool/queue)# subscription topic GET/store/orders
solace(configure/message-spool/queue)# subscription topic #P2P/v:solace/_rest-*/>
Step 3: Enable the Queue
Before the queue can process requests, you must enable it. Once the queue is enabled, you can configure the eavesdropping application to connect to it in order to retrieve and process the stored requests and responses.

solace(configure/message-spool/queue)# no shutdown