Blade Replacement in 3560AC-08 Appliance Event Brokers
This section describes how to remove and replace blades in Solace CHS-3560AC-08 appliance event brokers. For instructions describing how to remove and replace blades in Solace 3530, CHS-3560AC-05, and CHS-3560AC-06 appliance event brokers, see Blade Replacement in Solace 3560s and Solace 3530s.
Depending on the type of blade you are replacing, see one of the following sections before attempting the replacement:
- Network Acceleration Blade (NAB): See NAB Replacement.
- Assured Delivery Blade (ADB): See ADB Replacement.
- Host Bus Adapter (HBA): See HBA Replacement.
Some videos that supplement the instructions are also available.
ESD/Safety Precautions
Before replacing a system blade, review the following safety warning.
To prevent equipment damage from ESD, always ensure that the appliance event broker chassis is electrically connected to earth ground. Always follow ESD prevention procedures when removing and replacing power supplies. Use an anti-static wrist strap, or another anti-static device. If no wrist strap or mat is available, ground yourself by touching the metal part of the chassis.
Tool and Equipment Requirements
The following tools and equipment are required to replace system blades in deployed Solace CHS-3560AC-08 appliance event brokers:
- No. 2 Phillips head screwdriver or a slotted screwdriver
- electrostatic discharge wrist strap
- anti-static mat
- replacement system blade (ordered from Solace)
Prerequisites
Before attempting any blade replacement procedure, ensure you complete these mandatory steps:
-
Unplug all power cords from the appliance event broker.
-
Remove the appliance event broker chassis from the rack.
-
Remove the chassis top cover using a No. 2 Phillips screwdriver. See Replacing Solace 3530/Solace 3560 Top Covers for details.
Failure to disconnect power before servicing could result in serious injury or equipment damage.
Replacing an ADB
Perform the following steps to physically replace an ADB in a CHS-3560AC-08 appliance event broker:
Step 1: Prepare the Chassis
-
Locate the ADB blade cartridge (identified by ADB on the label).
-
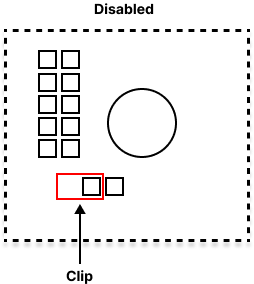
Move the red jumper clip to the disabled position as described by the label on the ADB blade cartridge (the additional clip stored on the motherboard is a spare).
Disabling the ADB Blade Cartridge
-
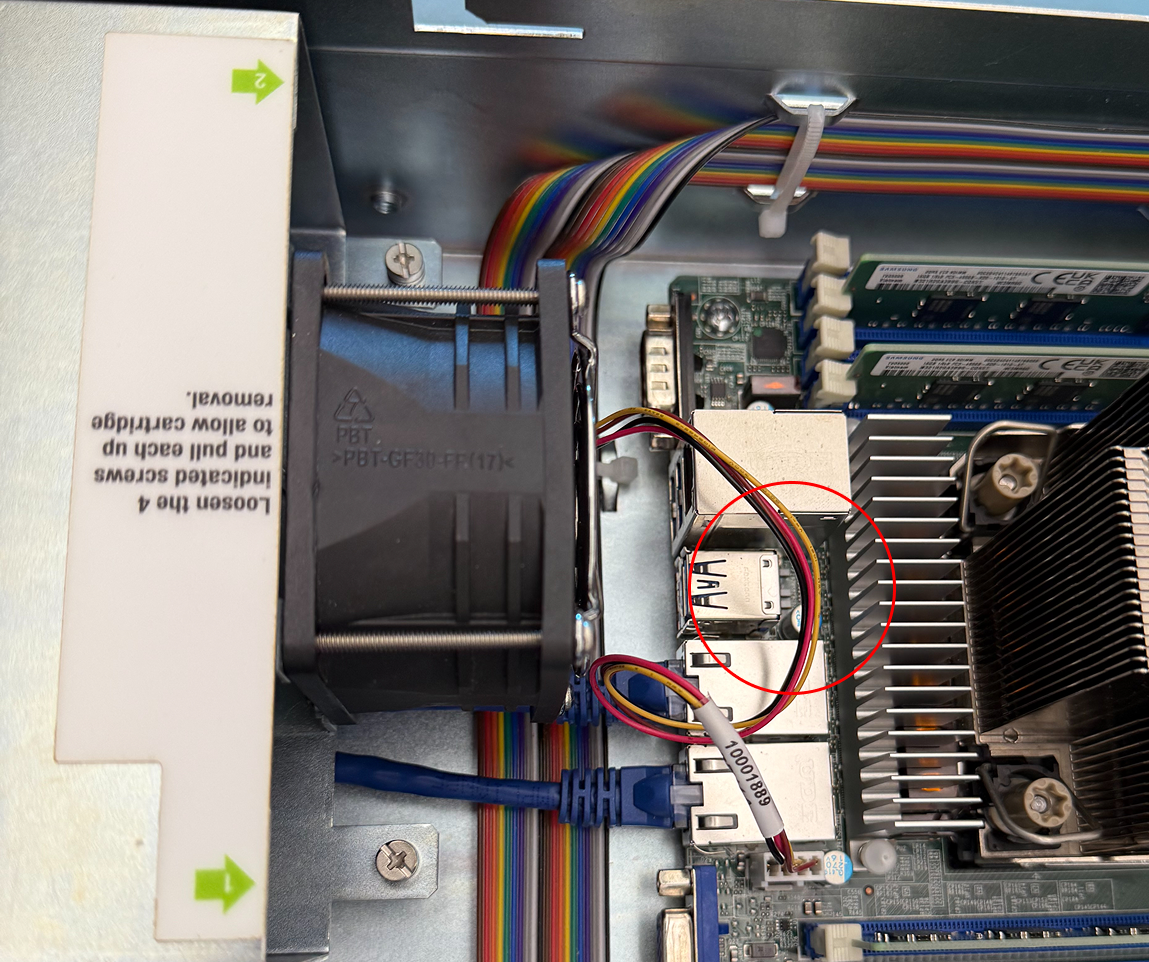
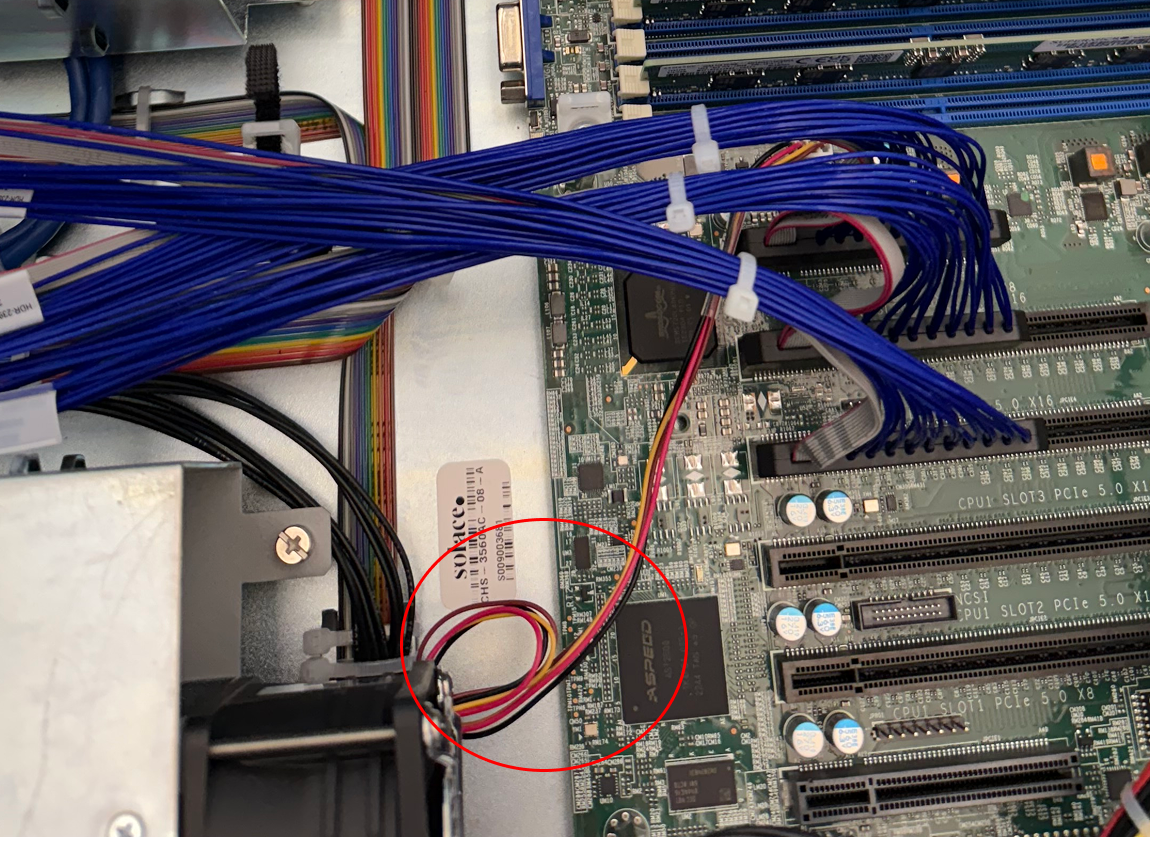
Disconnect the fan cable from the motherboard.
Disconnecting the ADB Blade Cartridge Fan Cable
-
Undo the Velcro straps that secure the Slot 1 and Slot 2 PCI cables.
Step 2: Remove PCI Cables
For both Slot 1 and Slot 2 PCI cables (starting with Slot 1):
-
Unscrew the thumb screw.
-
Grip the cable by the plastic connector (avoid using the cable itself).
-
Gently wiggle the plastic connector to disconnect the cable.
-
Carefully hang the cable over the side of the chassis to keep it out of the way.
Step 3: Remove the Blade Cartridge
-
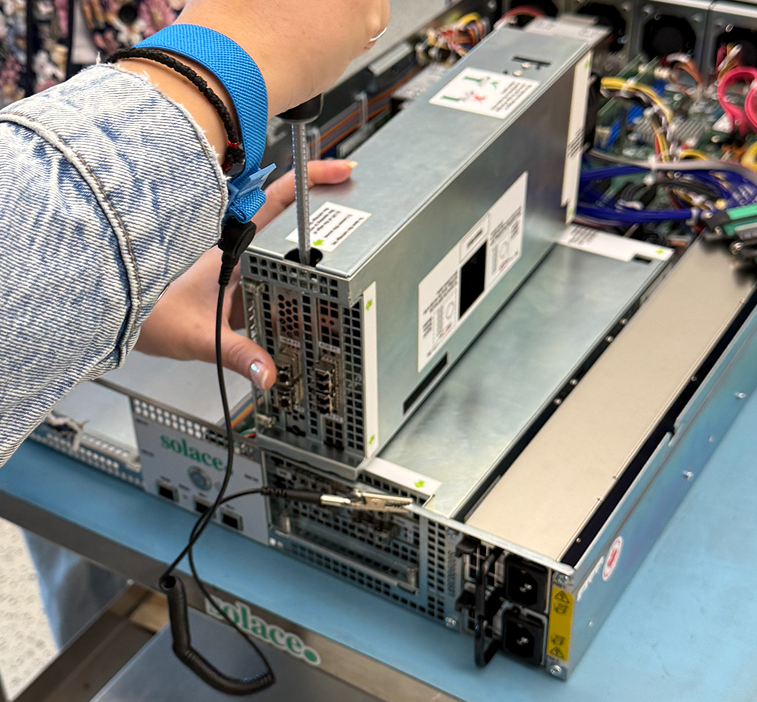
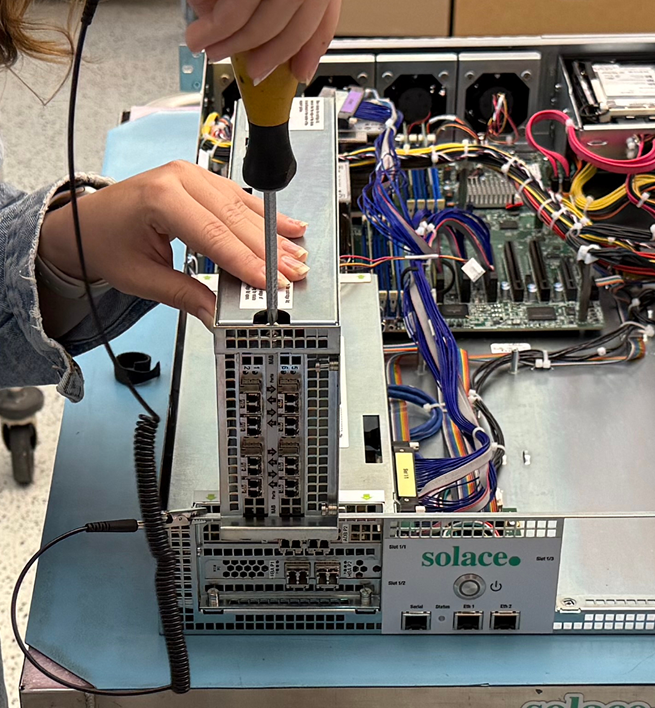
Unscrew the four blade cartridge mounting screws.
-
Lift the blade cartridge by each end (avoid using the jumper access window).
-
Place the cartridge vertically on a flat, stable, static-free surface with the hinged blade cartridge lid facing up.
Positioning the ADB Blade Cartridge
-
Loosen the blade cartridge lid screw.
-
Open the lid to expose the system blades.
Step 4: Replace the ADB
To remove the old ADB:
-
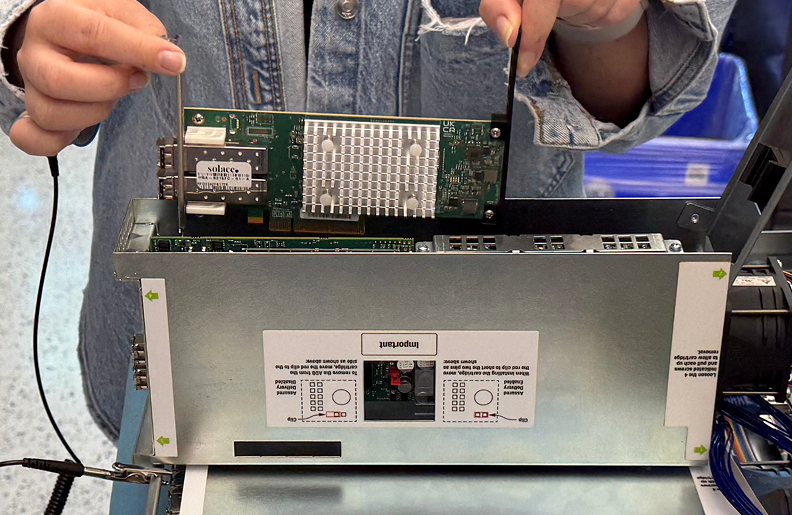
Lift the ADB by the screws on the front and back. Avoid touching any exposed components.
Lifting out the Blade

-
Pull straight up vertically.
-
Carefully maneuver the SFPs to clear the rear of the blade cartridge.
-
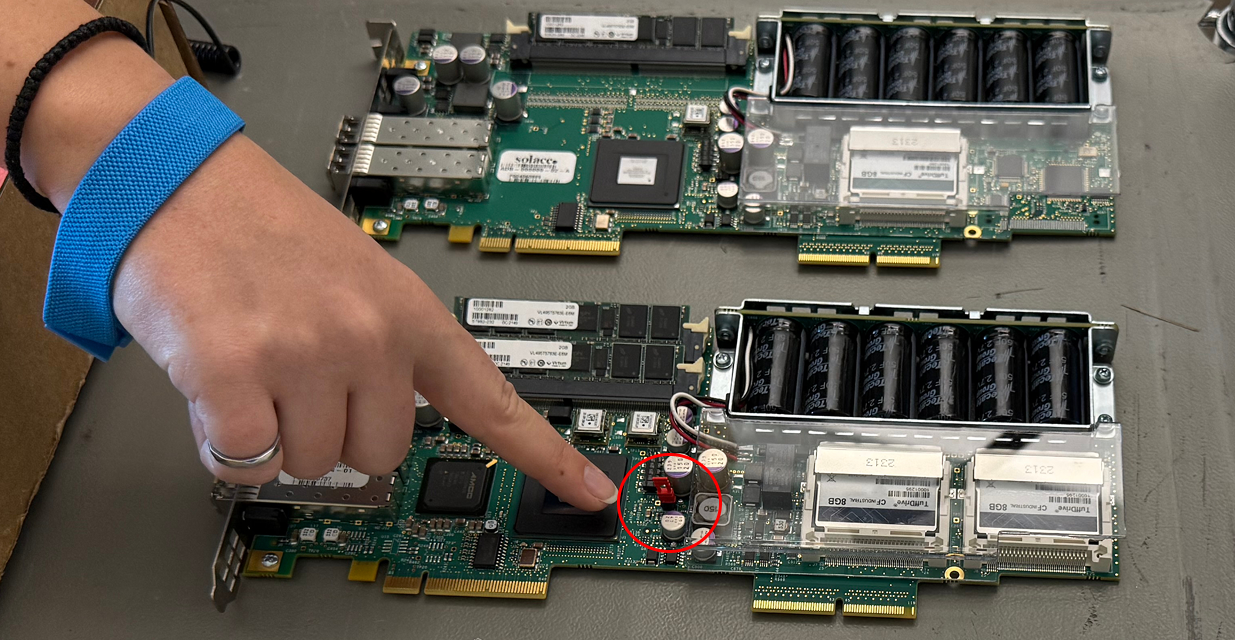
Move the red jumper clip from the removed ADB to the new ADB in the disabled position.
Moving the Jumper Clip to the New ADB
-
Place the removed ADB blade in anti-static packaging.
To install the new ADB:
-
Position the ADB so that the SFPs clear the rear of the blade cartridge.
-
Ensure the back of the ADB goes into the guide at the bottom of the cartridge.
-
Verify that the locking tab on the front fits into the slot at the bottom of the cartridge.
-
Close the hinged blade cartridge lid, ensuring the alignment bracket catches the ADB.
-
Secure the lid (this may require pressure to seat properly).
-
Tighten the blade cartridge lid screw.
Step 5: Reinstall the Blade Cartridge
-
Position the blade cartridge so that the PCI slots face the middle of the chassis.
-
Avoid damaging other PCI cables.
-
Line up the two interior screws first (keep the front of the blade cartridge above the chassis).
-
Install all four mounting screws.
Step 6: Reconnect PCI Cables
For both Slot 1 and Slot 2 PCI cables (starting with Slot 2):
-
Gently wiggle the plastic connector to seat the cable properly.
-
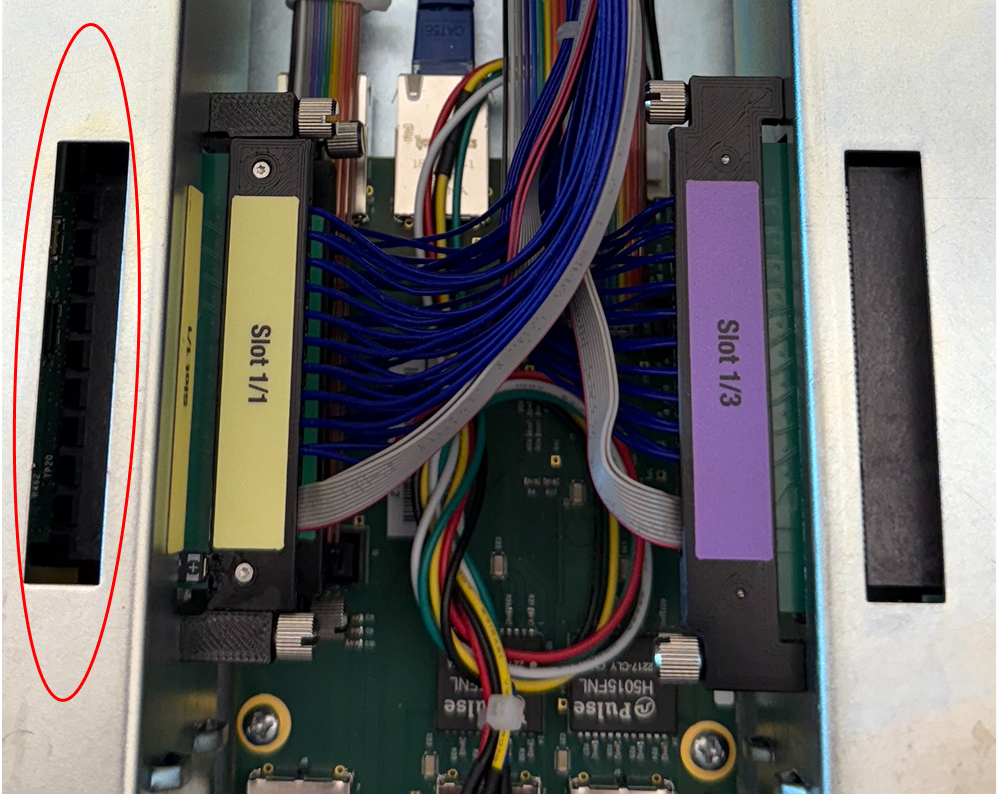
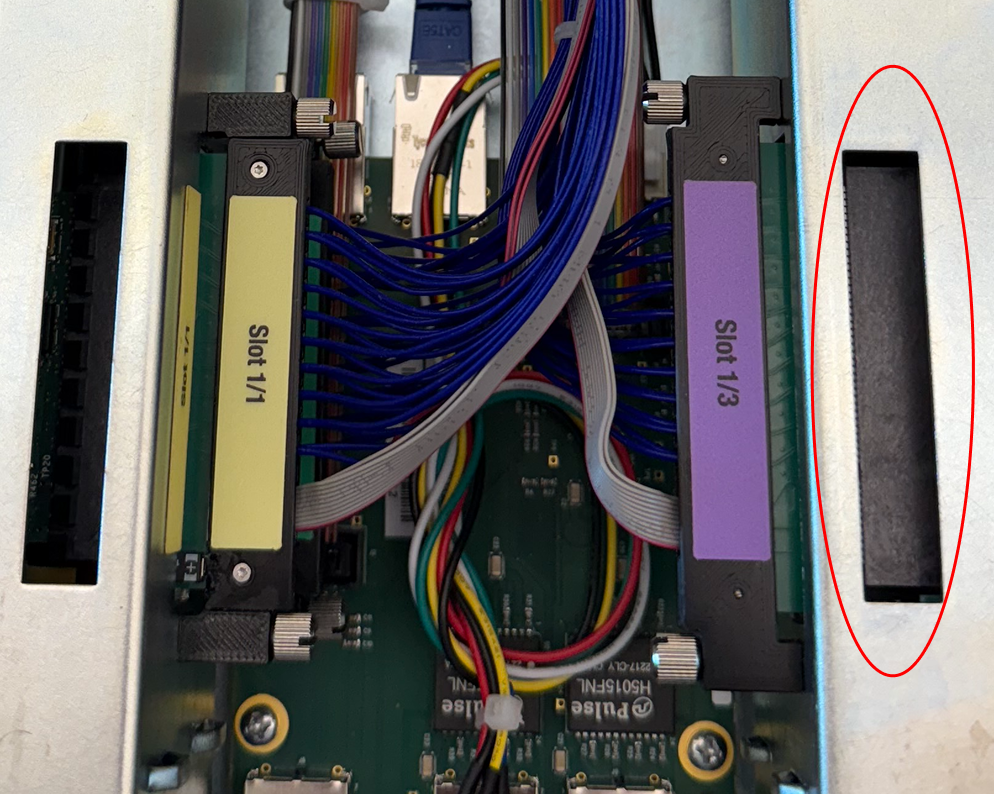
Look through the window on the top of the blade cartridge to verify alignment and seating.
Slot 1 Alignment Window
-
Slowly tighten the thumb screw to avoid cross-threading.
Step 7: Complete the Installation
-
Refasten the Velcro straps around the PCI cables.
-
Move the red jumper clip back to the enabled position (over the two pins).
Enabling the ADB Blade Cartridge

-
Reconnect the fan cable to the motherboard.
-
Double-check all connections to ensure they are secure.
-
Replace and secure the chassis top cover with screws. See Replacing Solace 3530/Solace 3560 Top Covers for details.
-
Restore power to the appliance event broker.
Replacing an HBA
Perform the following steps to physically replace an HBA in a CHS-3560AC-08 appliance event broker:
Step 1: Prepare the Chassis
-
Locate the ADB blade cartridge (identified by ADB on the label). The ADB blade cartridge also contains the HBA.
-
Move the red jumper clip to the disabled position as described by the label on the ADB blade cartridge (the additional jumper clip stored on the motherboard is a spare).
Disabling the ADB Blade Cartridge
-
Disconnect the fan cable from the motherboard.
Disconnecting the ADB Blade Cartridge Fan Cable
-
Undo the Velcro straps that secure the Slot 1 and Slot 2 PCI cables.
Step 2: Remove the PCI Cables
For both Slot 1 and Slot 2 PCI cables (starting with Slot 1):
-
Unscrew the thumb screw .
-
Grip the cable by the plastic connector (avoid using the cable itself).
-
Gently wiggle the plastic connector to disconnect the cable.
-
Carefully hang the cable over the side of the chassis to keep it out of the way.
Step 3: Remove the Blade Cartridge
-
Unscrew the four blade cartridge mounting screws.
-
Lift the blade cartridge by each end (avoid using the jumper access window).
-
Place the cartridge vertically on a flat, stable, static-free surface with the hinged blade cartridge lid facing up.
Positioning the ADB Blade Cartridge
-
Loosen the cartridge lid screw.
-
Open the lid to expose the system blades.
Step 4: Replace the HBA
To remove the old HBA:
-
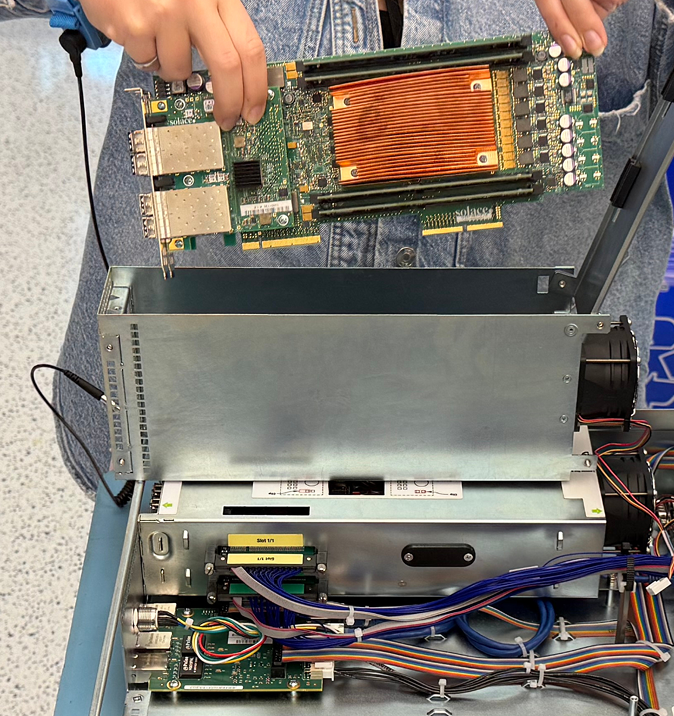
Lift the HBA by its retention bracket and the plastic support. Avoid touching any other exposed components.
Lifting out the Blade
-
Pull up vertically, carefully maneuvering any SFPs to clear the rear of the blade cartridge.
-
Place the removed HBA blade in anti-static packaging.
To install the new HBA:
-
Verify that the new HBA has the plastic support installed. If it does not, remove the plastic support from the old HBA and install it on the new one.
-
Position the new HBA so that the SFPs clear the rear of the blade cartridge.
-
Ensure the plastic HBA support goes into the guide at the bottom of the cartridge.
-
Verify the locking tab on the front fits into the slot at the bottom of the cartridge.
-
Close the lid, ensuring the alignment bracket catches the HBA.
-
Secure the lid (you may need to apply some pressure to seat it properly).
-
Tighten the blade cartridge lid screw.
Step 5: Reinstall the Blade Cartridge
-
Position the blade cartridge so that the PCI slots face the middle of the chassis.
-
Avoid damaging other PCI cables.
-
Line up the two interior screws first (keep the front of the blade cartridge above the chassis).
-
Install all four mounting screws.
Step 6: Reconnect the PCI Cables
For both Slot 1 and Slot 2 PCI cables (starting with Slot 2):
-
Gently wiggle the plastic connector to seat the cable properly.
-
Look through the window on the top of the blade cartridge to verify alignment and seating.
Slot 1 Alignment Window
-
Slowly tighten the thumb screw to avoid cross-threading.
Step 7: Complete the Installation
-
Refasten the Velcro straps around the PCI cables.
-
Move the red jumper clip back to the enabled position (over the two pins).
Enabling the ADB Blade Cartridge
-
Reconnect the fan cable to the motherboard.
-
Double-check all connections to ensure they are secure.
-
Replace and secure the chassis top cover with screws. See Replacing Solace 3530/Solace 3560 Top Covers for details.
-
Restore power to the appliance event broker.
Replacing a NAB
Perform the following steps to physically replace a NAB in a CHS-3560AC-08 appliance event broker:
Step 1: Prepare the Chassis
-
Identify the NAB blade cartridge. Look for the blade cartridge that does NOT have ADB on the label.
-
Disconnect the fan cable.
-
Locate the fan cable that connects the motherboard to the NAB blade cartridge.
Disconnecting the NAB Blade Cartridge Fan Cable
-
Carefully disconnect it.
-
-
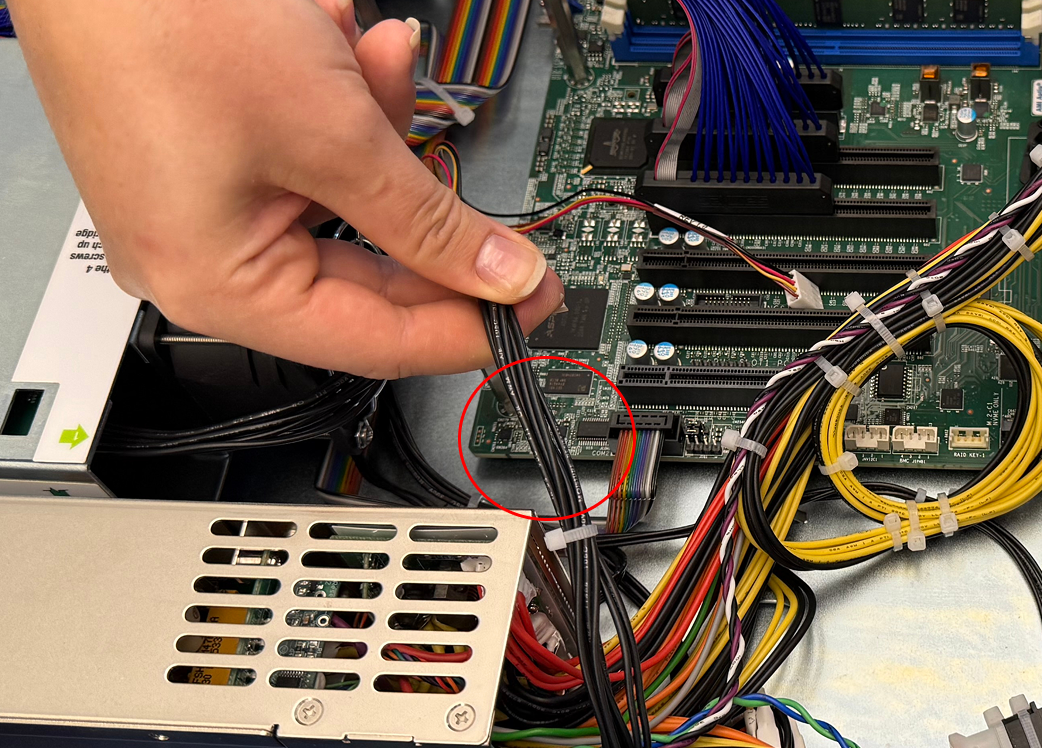
Disconnect the NAB power cable.
-
Push the locking tab on the bottom of the cable before you disconnect it.
-
Gently pull the cable to disconnect it.
Disconnecting the NAB Blade Cartridge Power Cable
-
Tuck the cable out of the way to prevent interference.
-
Step 2: Remove the PCI Cable
-
Undo the Velcro straps that secure the Slot 3 PCI cable.
-
Unscrew the thumb screw.
-
Grip the cable by the plastic connector (avoid using the cable itself).
-
Gently wiggle the plastic connector to disconnect the cable.
-
Hang the cable over the side of the chassis to keep it out of the way.
Step 3: Remove the Blade Cartridge
-
Unscrew the four blade cartridge mounting screws.
-
Carefully lift the blade cartridge by holding each end.
-
Place the cartridge vertically on a flat, stable, static-free surface with the hinged blade cartridge lid facing up.
Positioning the NAB Blade Cartridge
-
Loosen the cartridge lid screw.
-
Open the lid to expose the system blade.
Step 4: Replace the NAB
To remove the old NAB:
-
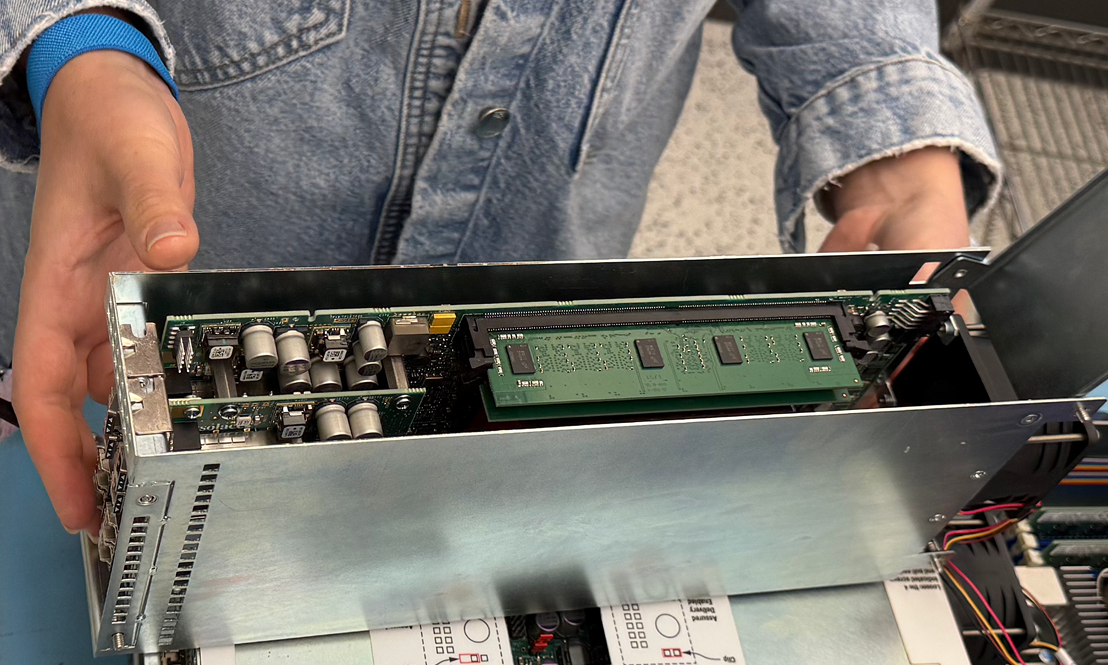
Begin by lifting the old NAB by the end with the SFPs attached.
-
Place your finger under the PCI card retention bracket for leverage.
Preparing to Lift out the Blade
-
Hold the card by the back screw (avoid touching or grabbing the NAB DIMMs).
Lifting out the Blade
-
Place the removed NAB blade in anti-static packaging.
To install the new NAB:
-
Begin by positioning the new NAB so that the SFPs align with the rear of the blade cartridge.
-
Carefully slide the end of the NAB with the SFPs attached into the cartridge at an angle.
-
Close the lid, ensuring the alignment bracket properly catches the NAB.
-
Secure the lid (you may need to apply gentle pressure to seat it properly).
-
Tighten the blade cartridge lid screw.
Step 5: Reinstall the Blade Cartridge
-
Position the blade cartridge so that the PCI slot faces the middle of the chassis.
-
Avoid damaging other PCI cables.
-
Line up the two interior screws first (keep the front of the blade cartridge above the chassis).
-
Install all four mounting screws.
Step 6: Reconnect the PCI Cable
-
Gently wiggle the Slot 3 plastic connector to seat the cable properly.
-
Look through the window on the top of the blade cartridge to verify alignment and seating.
Slot 3 Alignment Window
-
Slowly tighten the thumb screw to avoid cross-threading.
Step 7: Complete the Installation
-
Refasten the Velcro straps around the Slot 3 PCI cable.
-
Reconnect the NAB power cable.
-
Use the alignment window to ensure proper orientation.
-
Push the power cable until it is properly seated.
-
-
Reconnect the fan cable to the motherboard.
-
Double-check all connections to ensure they are secure.
-
Replace and secure the chassis top cover with screws. See Replacing Solace 3530/Solace 3560 Top Covers for details.
-
Restore power to the appliance event broker.