Configuring an Event Broker Service to Use OAuth Identity Provider Authorization
You can configure an event broker service to use OAuth protocols to authorize connecting client applications. This topic assumes that you're familiar with OAuth and the configuration of your identity provider.
To enable OAuth authentication, for your event broker service you need an OAuth profile, and you need to turn on OAuth authentication and provide the name of the OAuth profile you want the event broker service to use.
Configuring an OAuth Profile for an Event Broker Service
To use OAuth authentication, your event broker service needs at least one OAuth profile that includes the settings required by your OAuth provider.
To create an OAuth profile, perform these steps:
- Log in to the Solace Cloud Console if you have not done so yet. The URL to access the Cloud Console differs based on your
- On the navigation bar, select Cluster Manager
 .
. - Select the event broker service that want to configure. If the event broker service is not listed, make sure you have the right environment selected. For more information, see Selecting Environments.
- On the Service Details page, click the Manage tab.
- Click the Access Control tile.
-
On the Client Authentication tab, select the OAuth Profile tab.
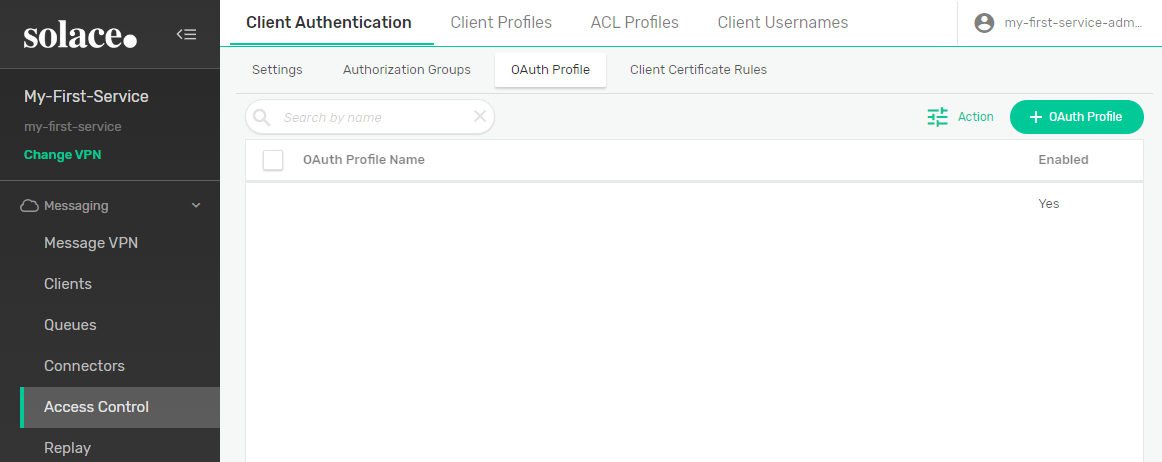
- Click + OAuth Profile.
- Enter an OAuth Profile Name and click Create.
- Set the appropriate options for your OAuth profile provider:
Configuration Description Enabled
Enables the OAuth profile
OAuth Client ID
Identifies the client responsible for the OAuth request. Client IDs configured on the event broker service must match with the OAuth Client ID.
Click Change OAuth Client Secret to set a new secret for the client.
OAuth Role
Select one of the following options;
- Client—Specifies that the event broker service is the OAuth client. This is the default.
- Resource Server—Select this option if you want the event broker service to handle authenticated requests after the connecting service has obtained an access token.
Disconnect on Token Expiration
Specifies that clients disconnect when their token expires. Changing this value affects only new clients connections
Issuer Identifier
Specify the URL for the verifiable identifier for an issuer.
This field is required. If it is not provided, the profile will be inactive.
Endpoints
This section specifies endpoint settings for the OAuth provider. You may need to change only these settings:
- Introspection Endpoint—If you set OAuth Role to Resource Server, the introspection endpoint returns claims associated with the user identified by the access token. Enter the URL for your the OAuth introspection endpoint. Only HTTPS addresses are supported.
- Introspection Request Timeout—This is the maximum time in seconds before the introspection request times out. The default value is 1. Solace recommends using a higher value during testing and reducing the value until you find an appropriate setting.
Authorization Group Claim Name
Specifies the name of the claim that contains the groups that the event broker service uses to authorize the user. After all appropriate token verification has been completed, the event broker service determines the OAuth groups based on this value.
Username Claim Name
Specifies the name of claim containing the username that the event broker service verifies.Enter a string value, such as an email address.
Resource Server
If you set the OAuth Role to Resource Server, this section includes settings for the resource server.
Set the validation options according to your requirements. Generally, most of the options in this section are required by JSON Web Tokens instead of opaque OAuth2 tokens. You may also need to provide the Required Scope.
- Required Scope—Enter a space-separated list of
scopesthat are required by thescopeclaim. If this field is left empty, noscopeverification is performed.
- Click Apply.
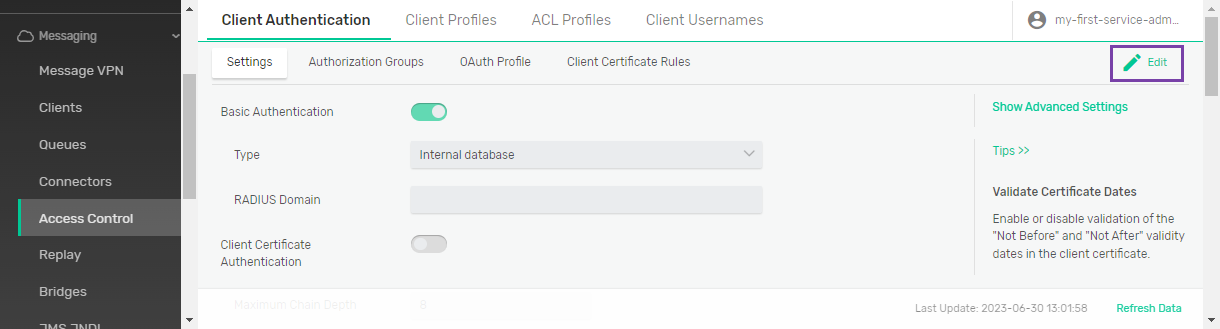
- Select the Settings tab and click Edit
 .
.
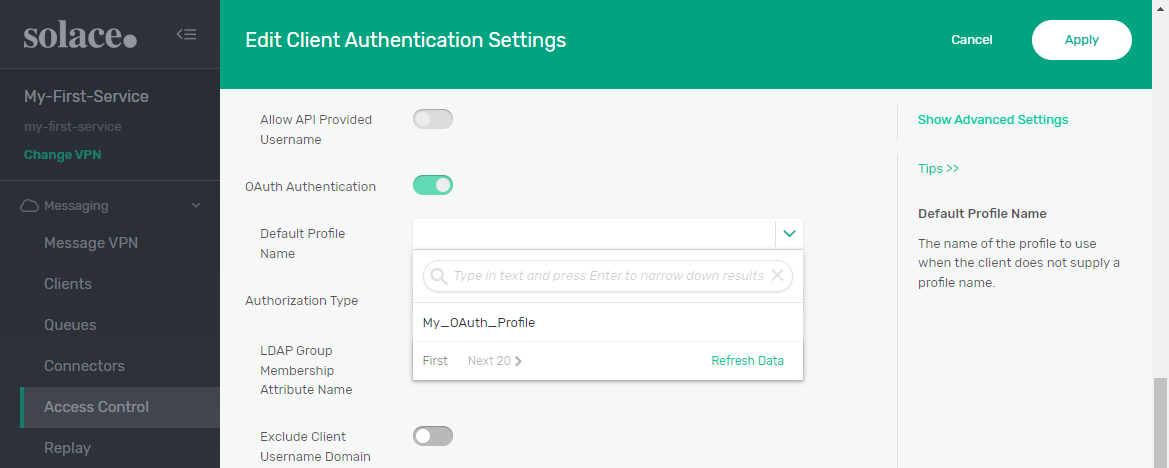
- Below the OAuth Authentication toggle select the name of the OAuth profile you created in the Default Profile Name list.
-
If your event broker service is a version earlier than 10.10, you can't turn on the OAuth Authentication toggle in Broker Manager. To enable OAuth Authentication for your event broker service, click Apply and see Enabling OAuth Authentication for Event Broker Services Earlier Than 10.10.
- If your event broker service is version 10.10 or later, click the OAuth Authentication toggle to turn in OAuth authentication.
- Click Apply.
Enabling OAuth Authentication for Event Broker Services Earlier Than 10.10
To enable OAuth authentication for event broker services earlier than 10.10, set the OAuth profile in Broker Manager, and then perform these steps:
- On the Service Details page for the event broker service, click the Manage tab.
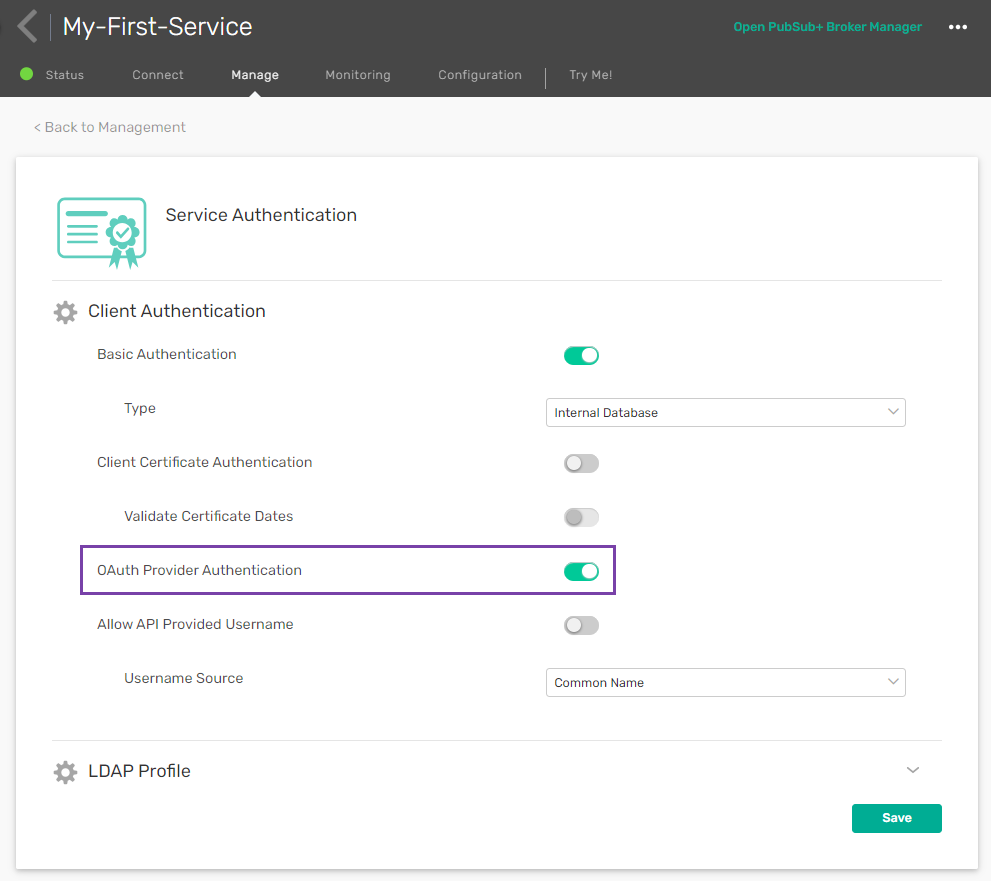
- Click the Authentication tile.
- Click the OAuth Provider Authentication toggle to enable OAuth Provider Authentication for the event broker service.
- Click Save and then click OK to confirm.
- Click Back to Management