Configuring Authentication for Agent Connectivity to Event Broker Services
The Agents you create use basic authentication by default when establishing Messaging Connectivity with event broker services. You can choose to configure more advanced authentication options for your Agents, including client certificate and OAuth authentication. Configuring more advanced authentication methods forces the Agent to authenticate using the configured authentication method.
For more information, see the following sections:
Configuring Agent Authentication
The basic default authentication allows an Agent to authenticate with an event broker service using the event broker service's management username and password. You can find the management username and password under the Management Access section of the Status tab of an event broker service in Cluster Manager. For more information, see Detailed Event Broker Service Information.
You can configure Agents to use more advanced authentication methods when connecting to an event broker service, including:
Configuring OAuth Authentication
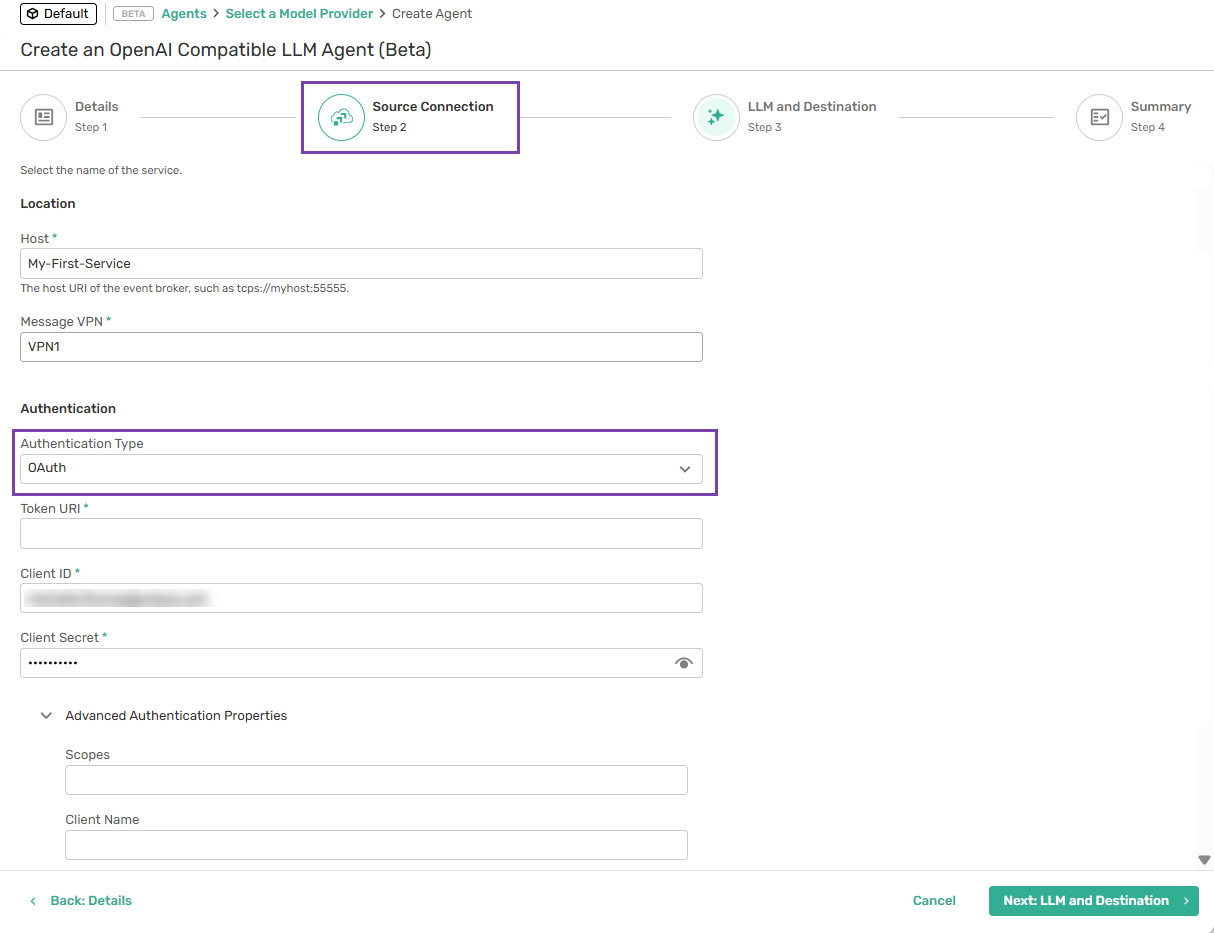
To configure OAuth authentication for an Agent connecting to an event broker service, perform these steps:
-
Create an Agent as outlined in Create an Agent.
-
In the Source Connection step, click the Authentication Type drop-down field and select OAuth.
-
You must complete the Client Username, Token URI, Client ID, and Client Secret fields with information provided by your OAuth Identity Provider (IdP). You can provide additional information about the client certificate using the fields in the Advanced Options section.
Field Definition Token URI The token endpoint (a URL) where the Agent exchanges an authorization code for an access token. Client ID The client ID is an alphanumeric string unique to the application you created in your IdP and is provided when you create the OAuth application. Client Secret The client secret is a string used to sign and validate ID tokens for authentication flows and is provided when you create the OAuth application. Scopes (Optional) Enter scopes to limit the resources and actions the Agent can access on the event broker service. Client Name (Optional) The client name is a label used to identify an application registered with your authorization server. -
Complete the rest of the Create an Agent procedure.
Configuring Client Certificate Authentication
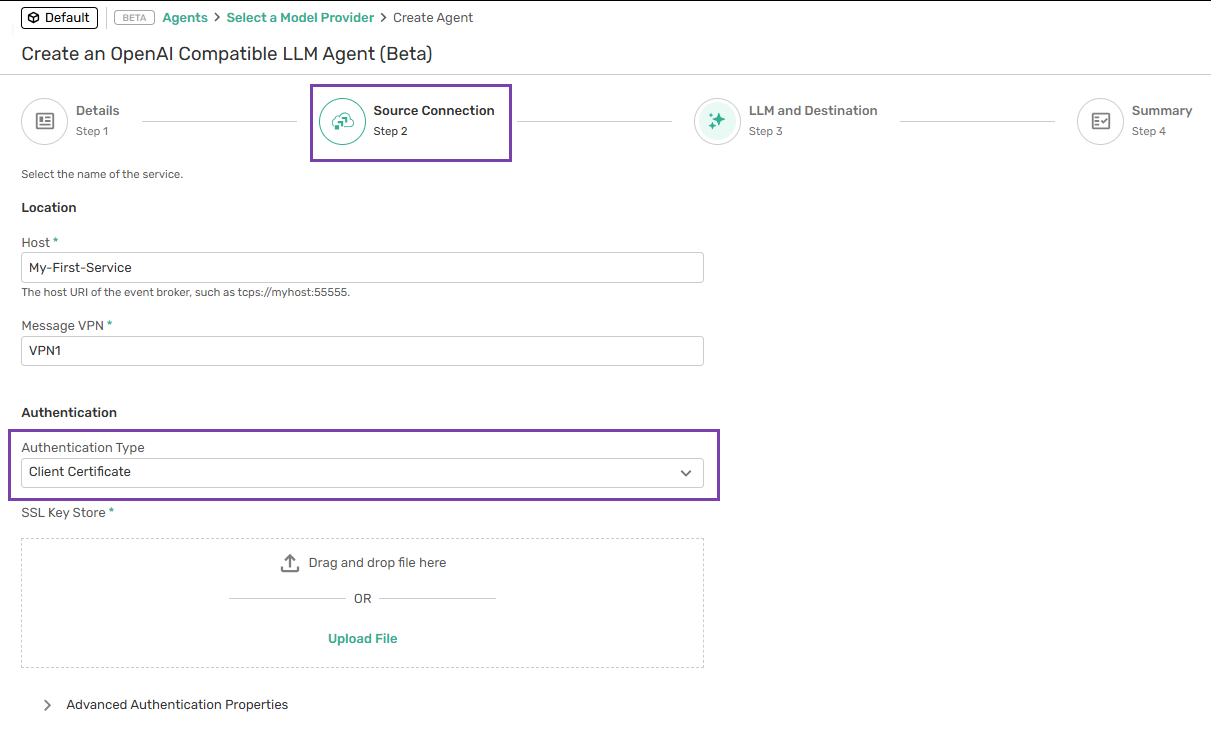
To configure client certificate authentication for an Agent connecting to an event broker service, perform these steps:
-
Create an Agent as outlined in Create an Agent.
-
In the Source Connection step, click on the Authentication Type drop-down field and select Client Certificate.
-
You must complete the SSL Key Store field, and you can complete the Client Username field if required. You can provide additional information about the client certificate using the fields in the Advanced Options section.
Field Definition Client Username (Optional) Enter a username. If a username is not provided, the Agent will get the username from the client certificate.
This is typically used in conjunction with the client certificate to identify the user. It may be part of the certificate’s subject field or used separately in the application layer for additional authentication.
SSL Key Store Click Upload File and then navigate to and select the SSL Key containing the client certificate.
This is a secure storage location where the client’s private key and certificate are stored. The key store ensures that the private key is kept secure and can only be accessed by authorized users.
Key Store Format Select the key store format. Solace supports the following key store formats:
-
JKS (Java KeyStore)
-
PKCS12
For information about creating key store keys, see the OpenSSL documentation.
Key Store Password Enter the key store password.
This password protects the key store itself. It is required to access the contents of the key store, including the private key and certificate.
Private Key Alias Name Enter the private key alias name used to identify the client certificate in the key store.
This is an identifier used within the key store to reference the specific private key and certificate pair. It allows the client to select the correct key and certificate when multiple pairs are stored in the key store.
Private Key Password Enter the private key password.
This password protects the private key within the key store. It is required to decrypt and use the private key for creating digital signatures during the authentication process.
-
-
Complete the rest of the Create an Agent procedure.
Viewing Agent Authentication Configuration
You can view the authentication configuration for an existing Agent. To view the authentication of a Agent, perform the following steps:
-
Log in to the Solace Cloud Console if you have not done so yet. The URL to access the Cloud Console differs based on your
-
On the navigation bar, select Agentic AI
 .
. -
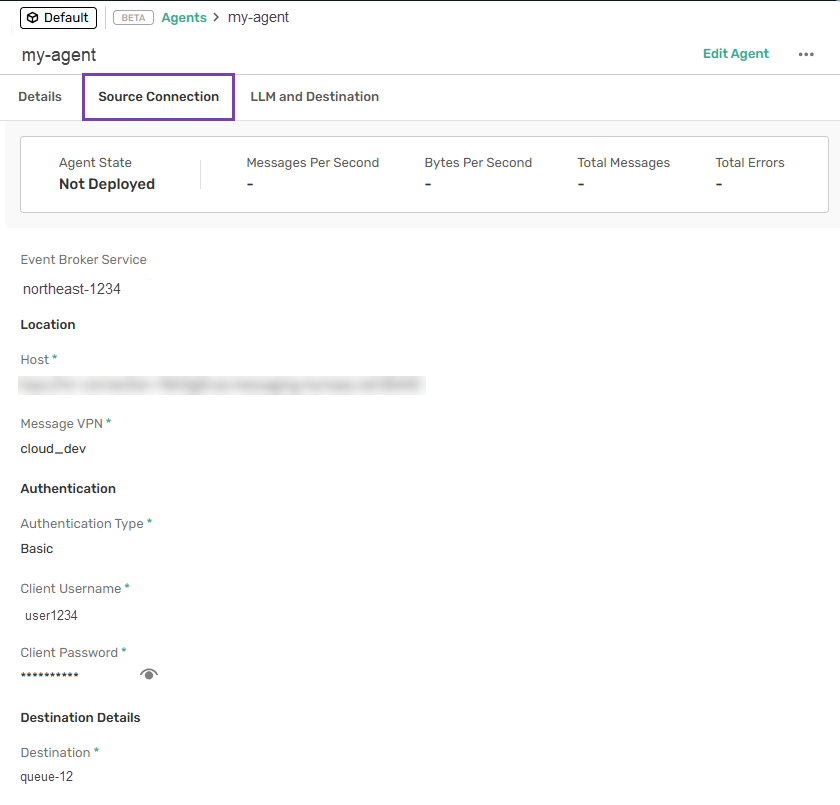
On the Agents page, click the name of the Agent to open the Agent Details page.
-
Click the Source Connection tab.
The Agent authentication information is shown under the Authentication section:
Editing Agent Authentication Configuration
You can update or change the authentication used by an undeployed Agent. To edit the authentication information of an undeployed Agent, see Editing an Agent.