Configuring OAuth Profiles for Management Access to Event Broker Services
You can configure management access to your event broker services using OAuth profiles. OAuth profiles allow users and machines (other computers and applications) to connect and authenticate using single sign-on (SSO) through an OAuth identity provider (IdP). An event broker service can have up to three OAuth profiles. Using OAuth profiles, you can map custom roles in your IdP to existing roles in Solace Cloud. Users and machines connecting to your event broker services have permissions granted by the mapped roles.
Before configuring OAuth profiles using the REST APIs for Solace Cloud you must:
- review the Considerations for Configuring OAuth Profiles for Authentication
- configure your OAuth identity provider
If you want to configure management access to event broker services using the same SSO authentication as the Cloud Console, see Configuring Single Sign-On for Event Broker Services.
Depending on whether you are configuring access for individual users or machines (event broker service as resource server for other event broker services, computers, or applications) you must then:
- configure an OAuth profile for user based authentication
- configure an OAuth profile for machine-to-machine based authentication
Performing both procedures creates two OAuth profiles on your event broker service.
Considerations for Configuring OAuth Profiles for Authentication
Here are some considerations when configuring OAuth profiles for your event broker services:
Configuring OAuth profiles on event broker services to enable SSO through your IdP is only possible using the Solace Cloud REST API .
You can create a maximum of three OAuth profiles per event broker service.
You must configure your OAuth identity provider correctly. For more information, see Configuring Your OAuth Identity Provider.
Event broker services support two OAuth profiles per IdP, one for user authentication, and one for machine-to-machine authentication.
You require an API token generated from the Cloud Console by an account with the Administrator or Mission Control Manager roles. The API token must have the following permissions:
Get My Services with Management Credentials
Create Services
For more information see Creating an API Token.
Configuring Your OAuth Identity Provider
Using OAuth profiles for authenticating management access to your event broker service for users depends upon OAuth 2.0 and OpenID Connect (OIDC). OAuth profiles for machine-to-machine authentication depend upon OAuth client credential grants. Numerous identity providers (IdP) provide these tools; some more well-known examples include:
Using OAuth profiles requires that you configure your IdP correctly. There is a configuration process for each type of authorization, with each having similar requirements:
-
User-based authentication
-
Machine-to-machine based authentication for connecting where the event broker service is a resource server for other connecting event broker services, computers, or applications.
We outline the configuration process and requirements for each authorization type below. If you need help configuring your IdP, refer to their OpenID Connect documentation for authenticating users and their client credential grants documentation for authenticating machines.
- User-Based Authentication
- For user-based authentication, the general IdP configuration process includes:
adding a login flow
adding roles and users, including verifying user email addresses, and assigning users to the created roles
creating an OAuth application
configuring the URLs
- When configured correctly, your IdP provides the following information at a minimum:
A client ID
A client secret
An OpenID Connect Discovery or Configuration endpoint where your IdP publishes metadata. This is typically an URL ending in
.well-known/openid-configuration.
- Record the provided information, as it is required to set up authentication using the REST APIs in Configuring OAuth Profiles for Role-Based Authentication for an Event Broker Service.
- Machine-to-Machine Setup
- To configure SSO authentication so connecting machines (other event broker services, computers, and applications) use the event broker service as a resource server, you must complete the following general IdP configuration process:
Set up an API, including providing it with the Hostname URL (located under DMR Cluster in the Detailed Service Information page) and assign permissions to it.
Create a machine-to-machine OAuth application and assign an API and credential permissions to it.
- When configured correctly, your IdP may provide the following information:
A client ID (required for validation using an introspection endpoint)
A client secret (required for validation using an introspection endpoint)
The discovery endpoint where your IdP publishes metadata. It is typically an URL ending in
.well-known/openid-configuration.
- Record the information you require to set up authentication using the REST APIs in Configuring OAuth Profiles for Machine-to-Machine Authentication for an Event Broker Service. You don't need the client ID and client secret if configuring validation of the token using JSON Web Key Sets (JWKS).
For more information about configuring your OAuth IdP correctly, see your OAuth provider documentation .
Configuring OAuth Profiles for Role-Based Authentication for an Event Broker Service
You can configure event broker services to authenticate connecting users through your OAuth identity provider (IdP) by creating OAuth profiles on the event broker service. The OAuth profile contains information the event broker service requires to enable SSO through your IdP. You can map existing roles in Solace Cloud through the OAuth profiles to custom roles in your IdP, providing role-based permissions to authenticated users. Role-based mappings allow you to provide direct access to the event broker service while restricting permissions to roles assigned through your (IdP) configuration.
In the procedures below, we create an OAuth profile, secure redirects from your IdP, and then map roles with the claim values. We then map these roles to existing permissions in Solace Cloud, providing the users with permissions to perform various tasks in Broker Manager, depending on the permissions granted to the role.
Before configuring your OAuth profiles for authenticating user log in, ensure you have configured your OAuth identity provider correctly. To configure the OAuth profile on your event broker service, perform these steps:
Creating an OAuth Profile on the Event Broker Service
You require the following information from your IdP to complete this procedure:
-
A client ID
-
A client secret
-
(Optional) Custom claims from your IdP if mapping roles
-
The OpenID Connect Discovery or Configuration endpoint where your IdP publishes metadata. This is a URL typically ending with
.well-known/openid-configuration.
Complete the following steps to create the OAuth profile on the event broker service.
-
Determine the unique identifier for the event broker service you want to enable role-based authentication for using one of the following methods:
-
In Cluster Manager, select the event broker service and get its unique identifier from the last segment in the URL. For example,
9c5vurtex4bis the identifier fromhttps://console.solace.cloud/mc/services/9c5vurtex4b. -
Use the Get list of event broker services REST endpoint to find the unique identifier (id) of the event broker service.
For example, on the Get list of event broker services page, paste your API token into the Bearer field and then click Try It!. To find your event broker service named MyPrimaryService, you can find that string in the name object and its corresponding id object is the unique identifier for the service.
-
- Create the OAuth profile on the event broker service by issuing a POST request to the following URL:
https://${ENDPOINT}/SEMP/v2/config/oauthProfilesReplace the variables in the string above with the definitions listed in the table below:
Variable Definition ENDPOINTThe URL to the event broker service:
${CLOUD_HOST}/api/v2/missionControl/eventBrokerServices/${SERVICE_ID}/brokerWhere:
CLOUD_HOST—The base REST API URLSERVICE_ID—The unique identifier of the event broker service where you want to create the roles. You can find the ID either:- at the end of the URL for your event broker service, for example:
https://console.solace.cloud//services/k8vv6x131e1, - using a GET call. See Getting the Connection Details for the Event Broker Service Using the REST API.
- at the end of the URL for your event broker service, for example:
- Azure:
https://login.microsoftonline.com/organizations/v2.0/.well-known/openid-configuration - SAP Cloud Identity Services:
https://accounts.sap.com/.well-known/openid-configuration 400—Something is wrong with the request. For example, there is a typo or the requested object cannot be found.
401—Something is wrong with the client authentication. For example, the password is incorrect or the user does not exist.
403—The necessary permissions are not enabled on the API token.
Provide the following JSON objects in the body of the POST request:
{
  "accessLevelGroupsClaimName": "{CUSTOM_CLAIM}",
  "clientId": "${CLIENT_ID}",
  "clientRedirectUri": "",
  "clientRequiredType": "JWT",
  "clientScope": "openid email",
  "clientSecret": "${CLIENT_SECRET}",
  "clientValidateTypeEnabled": false,
  "defaultGlobalAccessLevel": "none",
  "defaultMsgVpnAccessLevel": "none",
  "displayName": "",
  "enabled": true,
  "endpointAuthorization": "",
  "endpointDiscovery": "${ENDPOINT_DISCOVERY}",
  "endpointDiscoveryRefreshInterval": 86400,
  "endpointIntrospection": "",
  "endpointIntrospectionTimeout": 1,
  "endpointJwks": "",
  "endpointJwksRefreshInterval": 86400,
  "endpointToken": "",
  "endpointTokenTimeout": 1,
  "endpointUserinfo": "",
  "endpointUserinfoTimeout": 1,
  "interactiveEnabled": true,
  "interactivePromptForExpiredSession": "",
  "interactivePromptForNewSession": "select_account",
  "issuer": "",
  "oauthProfileName": "${PROFILE_NAME}",
  "oauthRole": "client",
  "resourceServerParseAccessTokenEnabled": true,
  "resourceServerRequiredAudience": "",
  "resourceServerRequiredIssuer": "",
  "resourceServerRequiredScope": "",
  "resourceServerRequiredType": "at+jwt",
  "resourceServerValidateAudienceEnabled": true,
  "resourceServerValidateIssuerEnabled": true,
  "resourceServerValidateScopeEnabled": true,
  "resourceServerValidateTypeEnabled": true,
  "sempEnabled": false,
  "usernameClaimName": "sub"
}
Replace the variables in the JSON body above with the definitions listed in the table below
| Variable | Definition |
|---|---|
CUSTOM_CLAIM
|
You define custom claims in your IdP. The JSON Web Token (ID Token) issued as part of the authorization process contains the custom claim. You can use the custom claim to map permissions. |
CLIENT_ID
|
The client ID is an alphanumeric string that is unique to the application you created in your IdP. It is provided by your IdP when you create the OAuth application. |
CLIENT_SECRET
|
The client secret is a string used to sign and validate ID tokens for authentication flows. This is provided by your IdP when you create the OAuth application. |
ENDPOINT_DISCOVERY
|
This is the OpenID Connect Discovery or Configuration endpoint where your IdP publishes metadata. It is typically a URL ending in If you do not have an OpenID Connect Discovery endpoint configured, you must configure the other endpoints manually. |
PROFILE_NAME
|
The name of the OAuth profile. The profile name can be anything, but should describe the function of the OAuth profile. The OAuth profile name must be unique from other OAuth profiles on the event broker service. |
A successful POST request returns code 200.
You can test that the OAuth profile was successfully created by issuing a GET request to the following url:
https://${ENDPOINT}/SEMP/v2/config/oauthProfilesReplace the ENDPOINT variable with the ${CLOUD_HOST}/api/v2/missionControl/eventBrokerServices/${SERVICE_ID}/broker URL outlined at the start of this procedure.
The GET returns a list of OAuth roles if your POST call completed successfully.
A failed REST API call returns one of the following codes:
Securing the Redirects From Your Identity Provider
After creating an OAuth profile on the event broker service, it is important for security purposes to specify which hostnames can make token requests to the OAuth server.
To specify the allowed hostnames, issue a POST request to the following URL:
https://${ENDPOINT}/SEMP/v2/config/oauthProfiles/${PROFILE_NAME}/clientAllowedHosts
Replace the variables in the string above with the definitions listed in the table below:
| Variable | Definition |
|---|---|
ENDPOINT
|
The URL to the event broker service: Where:
|
PROFILE_NAME
|
The name of the OAuth profile you created in Creating an OAuth Profile on the Event Broker Service. |
Provide the following JSON objects in the body of the POST request:
{
    "allowedHost": "${VMR_HOST}:{SEMP_PORT}",
    "oauthProfileName": "${PROFILE_NAME}"
}
Replace the variables in the JSON body above with the definitions listed in the table below:
| Variable | Definition |
|---|---|
VMR_HOST | The event broker service's hostname. You can find the hostname under DMR Cluster in the Detailed Service Information or using the Get a specific event broker service by identifier API and selecting The URL for the request must use the appropriate REST API base URL, for example |
SEMP_PORT | The port number for Secured Broker Management Host (SEMP) communication on the event broker service. You can find the SEMP port number by using the procedure to edit port configuration in the Cloud Console. For more information, see Editing the Existing Port Configuration for an Event Broker Service. |
PROFILE_NAME | The name of the OAuth profile you created in Creating an OAuth Profile on the Event Broker Service. |
A successful POST request returns a code 200.
A failed REST API request returns one of the following codes:
400—Something is wrong with the request. For example, there is a typo or the requested object cannot be found.
401—Something is wrong with the client authentication. For example, the password is incorrect or the user does not exist.
403—The necessary permissions are not enabled on the API token.
Mapping OAuth Profile Roles for Authentication
After securing redirects, you can create roles for the OAuth profile and map them to roles in your identity provider (IdP). You can create up to three OAuth profiles per event broker service and assign access to the profiles as needed. After you create roles for the OAuth profile, you map these roles through the IdP to existing Mission Control roles in Solace Cloud. The role mappings allow you to define the permissions users have on particular event broker services based on the role they authenticate with when accessing that service.
You can create roles that provide the following access levels for the OAuth profile.
- Mission Control Manager
- Mission Control Editor
- Mission Control Viewer
For more information about the permissions associated with the roles, see Mission Control Roles and Permissions.
Creating a Role
To create a role, issue a PUT request to the following URL:
https://${ENDPOINT}/SEMP/v2/config/oauthProfiles/${PROFILE_NAME}/accessLevelGroups/${ACCESS_LEVEL_EDITOR_GROUP_NAME}
Replace the variables in the string above with the definitions listed in the table below:
| Variable | Definition |
|---|---|
ENDPOINT | The URL to the event broker service: Where:
|
PROFILE_NAME | The name of the OAuth profile you created when Creating an OAuth Profile on the Event Broker Service. |
ACCESS_LEVEL_EDITOR_GROUP_NAME | The claim value that is mapped to the access level for the group. |
Enter the following JSON object in the body of the PUT request:
{
  "description": "SolaceAdmin Group",
  "globalAccessLevel": "{GLOBAL_LEVEL}",
  "groupName": "${ACCESS_LEVEL_GROUP_NAME}",
  "msgVpnAccessLevel": "{VPN_LEVEL}",
  "oauthProfileName": "${PROFILE_NAME}"
}
Replace the variables in the JSON body above with the definitions listed in the table below:
| Variable | Definition |
|---|---|
GLOBAL_LEVEL | The access level for managing globally scoped features. Use one of the following values:
|
ACCESS_LEVEL_GROUP_NAME | The claim value that is mapped to the editor level access for the group. |
VPN_LEVEL | The Message VPN access level associated with the role:
|
PROFILE_NAME | The name of the OAuth profile. The profile name can be anything, but should describe the function of the OAuth profile. The OAuth profile name must be unique from other OAuth profiles on the event broker service if you have configured multiple OAuth profiles. |
A successful PUT request returns a code 200.
A failed REST API call returns one of the following codes:
400—Something is wrong with the request. For example, there is a typo or the requested object cannot be found.
401—Something is wrong with the client authentication. For example, the password is incorrect or the user does not exist.
403—The necessary permissions are not enabled on the API token.
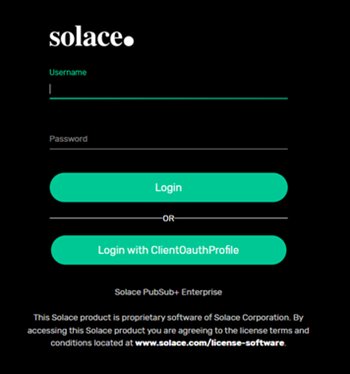
When configured successfully, users logging into an event broker service see a log in screen with the option to log-in with a username and password, using SSO through your OAuth IdP
If you no longer require a role you have created, you can delete it. See Deleting an OAuth Profile on an Event Broker Service.
Configuring OAuth Profiles for Machine-to-Machine Authentication for an Event Broker Service
You can configure event broker services so that machines (other event broker services, computers, and applications) connecting to them authenticate with OAuth. You do this by creating an OAuth profile on the event broker service, and configuring it so that the event broker service acts as a resource server for the connecting applications. You can only create one OAuth profile on the event broker service for machine-to-machine authentication. Machines connecting to your event broker service receive authentication using an OAuth client credentials grant.
Before configuring your event broker services to use SSO for machine-to-machine authentication, ensure you have configured your identity provider (IdP) correctly. You also require an API token with the permissions outlined in Considerations for Configuring OAuth Profiles for Authentication.
You require various information to complete this procedure depending on whether token validation will be performed by an introspection endpoint, or JWKS:
-
A client ID (required for validation using an introspection endpoint)
-
A client secret (required for validation using an introspection endpoint)
-
The URL to your IdP
-
The discovery endpoint where your IdP publishes metadata. It is typically an URL ending in
.well-known/openid-configuration.
If you have already configured an OAuth profile for role-based authentication, this procedure will create a second OAuth profile on your event broker service. You must use a different, unique name for the second OAuth profile.
To configure OAuth authentication for machine-to-machine connections to your event broker service services, follow these steps:
-
Create the OAuth profile on the event broker service by issuing a POST request to the following URL:
https://${ENDPOINT}/SEMP/v2/config/oauthProfiles CLOUD_HOST—The base REST API URLSERVICE_ID—The unique identifier of the event broker service where you want to create the roles. You can find the ID either:- at the end of the URL for your event broker service, for example:
https://console.solace.cloud//services/k8vv6x131e1, - using a GET call. See Getting the Connection Details for the Event Broker Service Using the REST API.
- at the end of the URL for your event broker service, for example:
- Azure:
https://login.microsoftonline.com/organizations/v2.0/.well-known/openid-configuration - SAP Cloud Identity Services:
https://accounts.sap.com/.well-known/openid-configuration -
You can test the connection by getting a token from your IdP and adding it to the authentication header. See your OAuth provider documentation for information on how to get a token.
If you're having trouble connecting, check that your introspection endpoint is returning token information. For more information, see Token Introspection Endpoint in the OAuth documentation.
-
(Optional) After the configuration is successful, you can disable basic authentication for the event broker service.
-
(Optional) When you no longer need the machine-to-machine based OAuth profile, you can delete it. See Deleting an OAuth Profile on an Event Broker Service.
Replace the variables in the string above with values listed in the table below:
| Variable | Definition |
|---|---|
ENDPOINT | The URL to the event broker service: Where: |
Enter the following JSON object, which defines the OAuth profile for machine-to-machine authentication, in the body of the POST request:
{
  "clientId": "${CLIENT_ID}",
  "clientRedirectUri": "",
  "clientRequiredType": "JWT",
  "clientScope": "openid email",
  "clientSecret": "${CLIENT_SECRET}",
  "clientValidateTypeEnabled": false,
  "defaultGlobalAccessLevel": "read-only",
  "defaultMsgVpnAccessLevel": "read-write",
  "displayName": "",
  "enabled": true,
  "endpointAuthorization": "",
  "endpointDiscovery": "${ENDPOINT_DISCOVERY}",
  "endpointDiscoveryRefreshInterval"   : 86400,
  "endpointIntrospection": "",
  "endpointIntrospectionTimeout": 10,
  "endpointJwks": "",
  "endpointJwksRefreshInterval": 86400,
  "endpointToken": "",
  "endpointTokenTimeout": 10,
  "endpointUserinfo": "",
  "endpointUserinfoTimeout": 10,
  "interactiveEnabled": false,
  "interactivePromptForExpiredSession": "",
  "interactivePromptForNewSession": "select_account",
  "issuer": "${PROFILE_NAME}",
  "oauthProfileName": "${PROFILE_NAME}",
  "oauthRole": "resource-server",
  "resourceServerParseAccessTokenEnabled": true,
  "resourceServerRequiredAudience": "${CLIENT_ID}",
  "resourceServerRequiredIssuer": "${ISSUER}",
  "resourceServerRequiredScope": "SolaceAdmin",
  "resourceServerRequiredType": "at+JWT",
  "resourceServerValidateAudienceEnabled": true,
  "resourceServerValidateIssuerEnabled": true,
  "resourceServerValidateScopeEnabled": false,
  "resourceServerValidateTypeEnabled": false,
  "sempEnabled": true,
  "usernameClaimName": "sub"
}
Replace the variables in the JSON body above with the definitions listed in the table below:
| Variable | Definition |
|---|---|
CLIENT_ID
|
Optional—The client ID is an alphanumeric string that is unique to the application you created in your IdP and is only required when validating a token by introspection endpoint. It is provided by your IdP when you create the OAuth application. |
CLIENT_SECRET
|
Optional—The client secret is a string used to sign and validate ID tokens for authentication flows and is only required when validating a token by introspection endpoint. This is provided by your IdP when you create the OAuth application. |
ENDPOINT_DISCOVERY
|
This is the OpenID Connect Discovery or Configuration endpoint where your IdP publishes metadata. It is typically a URL ending in If you do not have an OpenID Connect Discovery endpoint configured, you must configure the other endpoints manually. |
PROFILE_NAME
|
The profile name can be anything, but should describe the function of the OAuth profile. The OAuth profile name must be unique from other OAuth profiles on the event broker service if you have configured multiple OAuth profiles. |
ISSUER
|
This is the URL for your IdP Issuer endpoint. |
A successful POST request returns a code of 200.
You can test the successful creation of the profile by issuing a GET request to the following URL:
https://${ENDPOINT}/SEMP/v2/config/oauthProfiles
Replace the ENDPOINT variable with the ${CLOUD_HOST}/api/v2/missionControl/eventBrokerServices/${SERVICE_ID}/broker URL outlined at the start of this procedure.
Specify the Path Parameter fields as follows:
| Path Parameter | Definition |
|---|---|
serviceId | The unique identifier of the event broker service where you want to create the roles. You can determine the unique identifier for an event broker service using the Cloud Console or by using a GET call. See Get a list of event broker services. |
The GET request returns a list of profiles if your POST request created them successfully.
Disabling Basic Authentication for Event Broker Service Management
You can disable management access to your event broker service after creating and configuring OAuth profiles to better secure them. Disabling management access includes:
-
Pre-authenticated log in when accessing the event broker service manager quick settings or Broker Manager. See Disabling Basic Authentication for Event Broker Service Management.
-
Basic authentication for management access for Mission Control roles, requiring SSO to be used when logging into Broker Manager. See Disabling Basic Authentication for Management Access to Event Broker Services Using the REST API.
Disabling Pre-Authentication Using the Cloud Console
You can disable pre-authentication for event broker services. This is an organization wide change. Once disabled, users must authenticate when launching Broker Manager from the Cloud Console and can do so using the OAuth profiles you created earlier. For more information, see Pre-Authentication for Broker Manager
- Log in to the Solace Cloud Console if you have not done so yet. The URL to access the Cloud Console differs based on your
- Click User & Account, select Account Details, and then click the Account Settings.
- In the Security Settings section click the Solace Pre Authentication toggle to disable pre-authentication.
Disabling Basic Authentication for Management Access to Event Broker Services Using the REST API
Disabling basic authentication for management access without enabling OAuth profiles disables all access to the event broker service.
You can disable basic authentication for management access to an event broker service for Mission Control roles. Disabling basic authentication for management access to an event broker service disables access to Broker Manager for users with the following roles:
-
Administrator
-
Mission Control Manager
-
Mission Control Viewer
-
Mission Control User
Disabling management access forces connecting users or machines (computers and applications) with the listed Mission Control roles to authenticate with single sign-on using either the OAuth profiles you configured on the event broker service or LDAP credentials. If you disable basic authentication, you should also consider disabling pre-authentication.
To disable authentication for management access issue a PUT request to:
https://{CLOUD_HOST}/api/v2/missionControl/eventBrokerServices/{SERVICE_ID}/sempBasicAuth
Replace the variables in the string above with the definitions listed in the table below:
| Variable | Definition |
|---|---|
CLOUD_HOST
|
|
SERVICE_ID
|
The unique identifier of the event broker service, for example, |
Enter the following JSON object in the body of the PUT request:
{
     "enabled": "false"
}
| Path Parameter | Definition |
|---|---|
serviceId
|
The unique identifier of the event broker service where you want to create the roles. You can determine the unique identifier for an event broker service using the Cloud Console or by using a GET call. See Get a list of event broker services. |
enabled
|
Select the value to indicate whether basic OAuth authentication should be enabled or disabled, either:
|
Deleting an OAuth Profile on an Event Broker Service
You can delete OAuth profiles when you no longer need them.
To delete an OAuth profile, issue a DELETE request to:
https://${ENDPOINT}/SEMP/v2/config/oauthProfiles/${PROFILE_NAME}
Replace the variables in the string above with the definitions listed in the table below:
| Variable | Definition |
|---|---|
ENDPOINT | The URL to the event broker service: Where:
|
PROFILE_NAME | The name of an OAuth profile you created in Creating an OAuth Profile on the Event Broker Service. |