Creating Your First Queue
After Getting Started with Solace Cloud and Trying Out Your Event Broker Service, you may want to create a queue so you can send and receive some Guaranteed messages. This tutorial walks you through creating a queue. You will also make sure the queue is working by connecting a publisher and publishing a matching message to that queue.
This tutorial shows you how to do the following tasks:
- Create a Queue
- Map a Topic to a Queue
- Publish a Message to the Queue
- Confirm the Message Is in the Queue
Create a Queue
To create a queue, do the following:
- Log in to the Solace Cloud Console if you have not done so yet. The URL to access the Cloud Console differs based on your
- On the navigation bar, select Cluster Manager
 .
. - Select the event broker service that you want to configure. If the event broker service is not listed, make sure you have the right environment selected. For more information, see Selecting Environments.
- On the Service Details page, click the Manage tab.
-
In the Broker Manager Quick Links menu, select Queues.
Broker Manager opens in a separate tab in your browser and displays the Queues tab.
- Click +Queue.
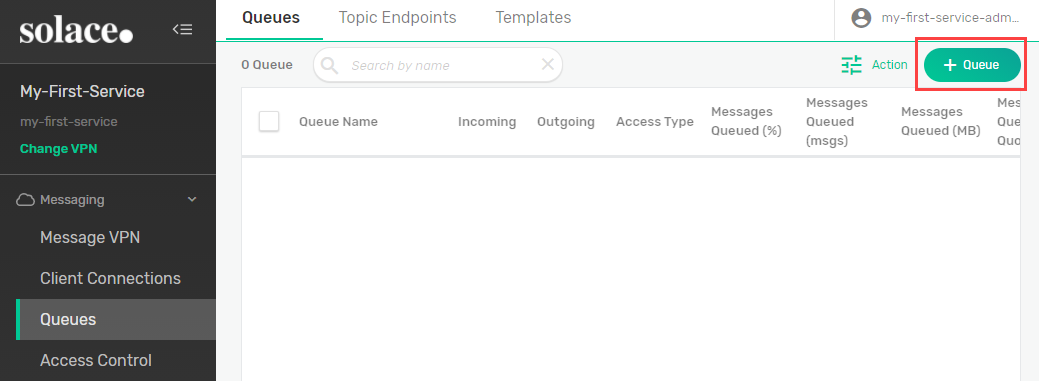
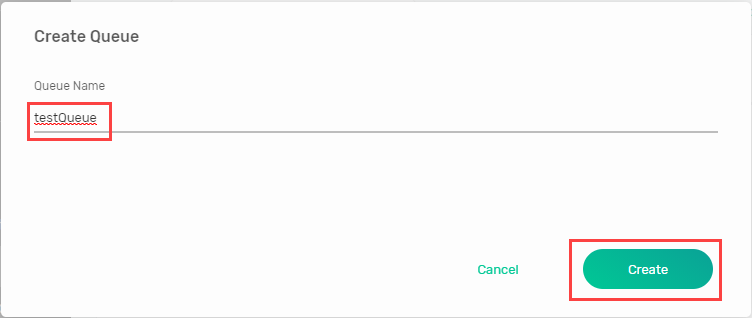
- Enter a name for your queue and click Create. You can use most characters in your queue name, including spaces. Some punctuation marks ('<>*?&;) are not allowed. If you use a slash (/) in the name, it cannot be the first character.
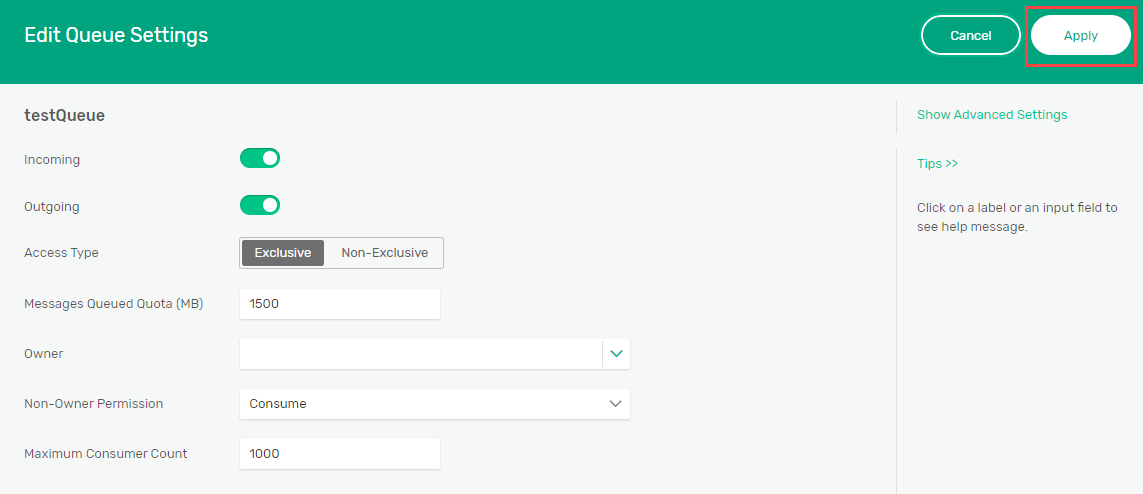
- On the Edit Queue Settings page, click Apply to accept all the default settings.
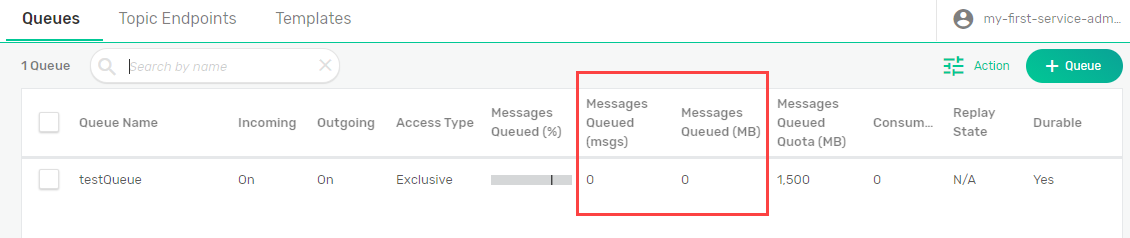
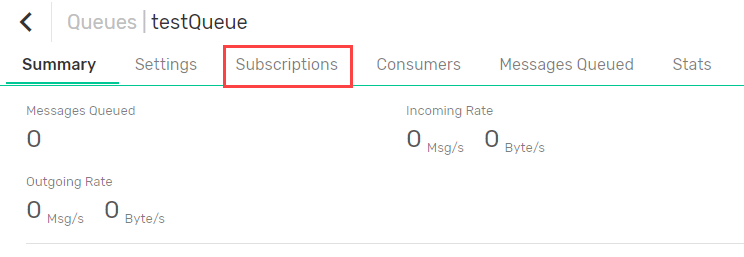
- Your new queue displays on the summary page. The queue is empty, so you will see zeros (0) in both the Messages Queued columns.
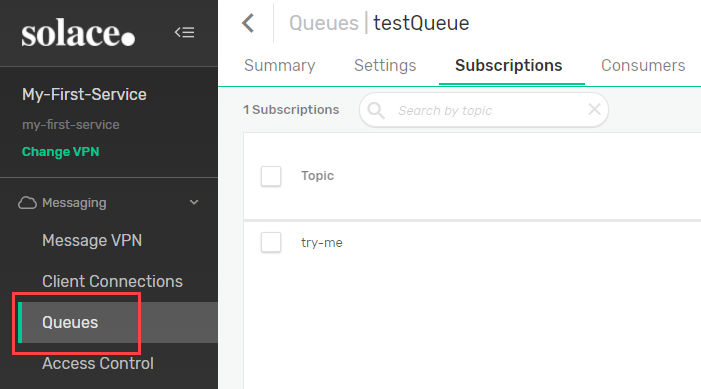
Map a Topic to a Queue
While it is possible to publish directly to a queue by its name, it's best to map a topic to a queue for more flexibility. You map a topic to a queue by subscribing to the topic from the queue.
To subscribe to a topic from a queue, perform these steps:
- From the queue summary, click anywhere in the row describing the queue to open the Queue Detail pages.

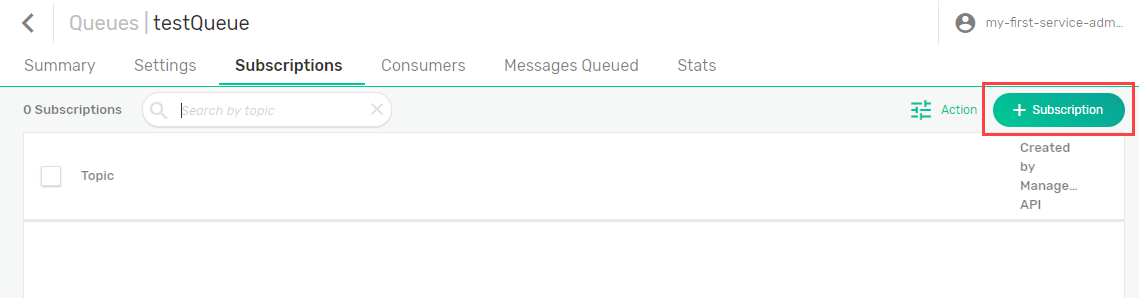
- From the queue detail page, select the Subscriptions tab.
-
On the Subscriptions tab, click +Subscription.
- Enter the topic
try-meas the subscription and click the Create button. This is the default topic of the Try Me! tool.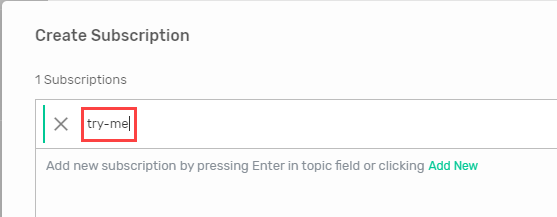
- The topic
try-meis now mapped to the queue. Messages published to that topic will go into the queue.
Publish a Message to the Queue
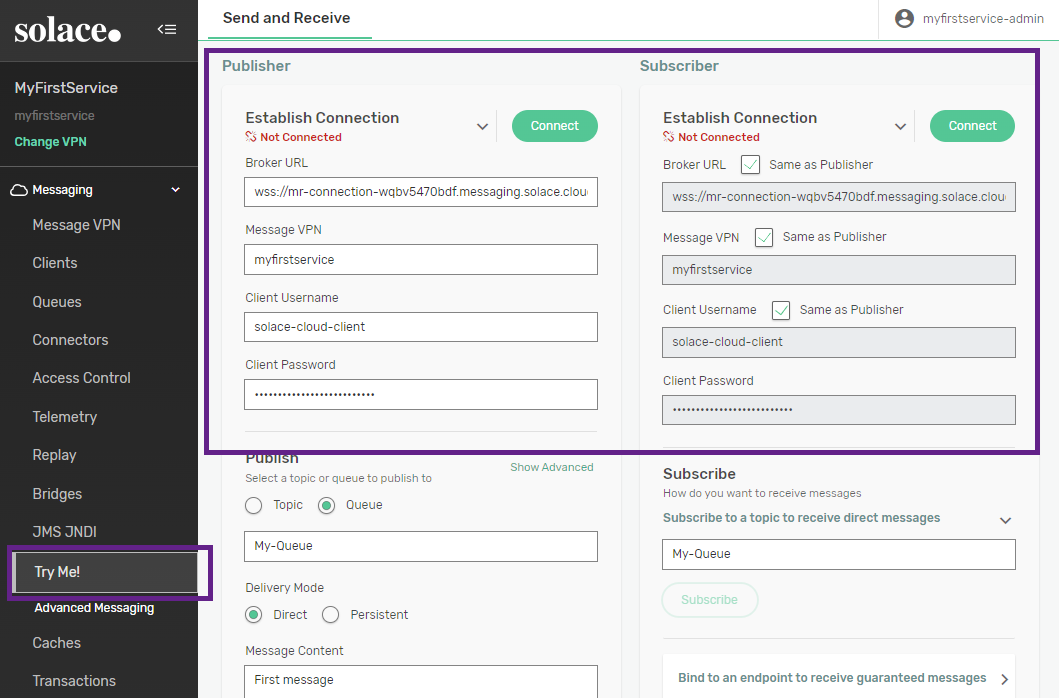
We will use the Broker Manager Try Me! tool to publish a message into our queue. We are not going to use a subscriber connection.
To publish a message to the queue, follow the steps below.
-
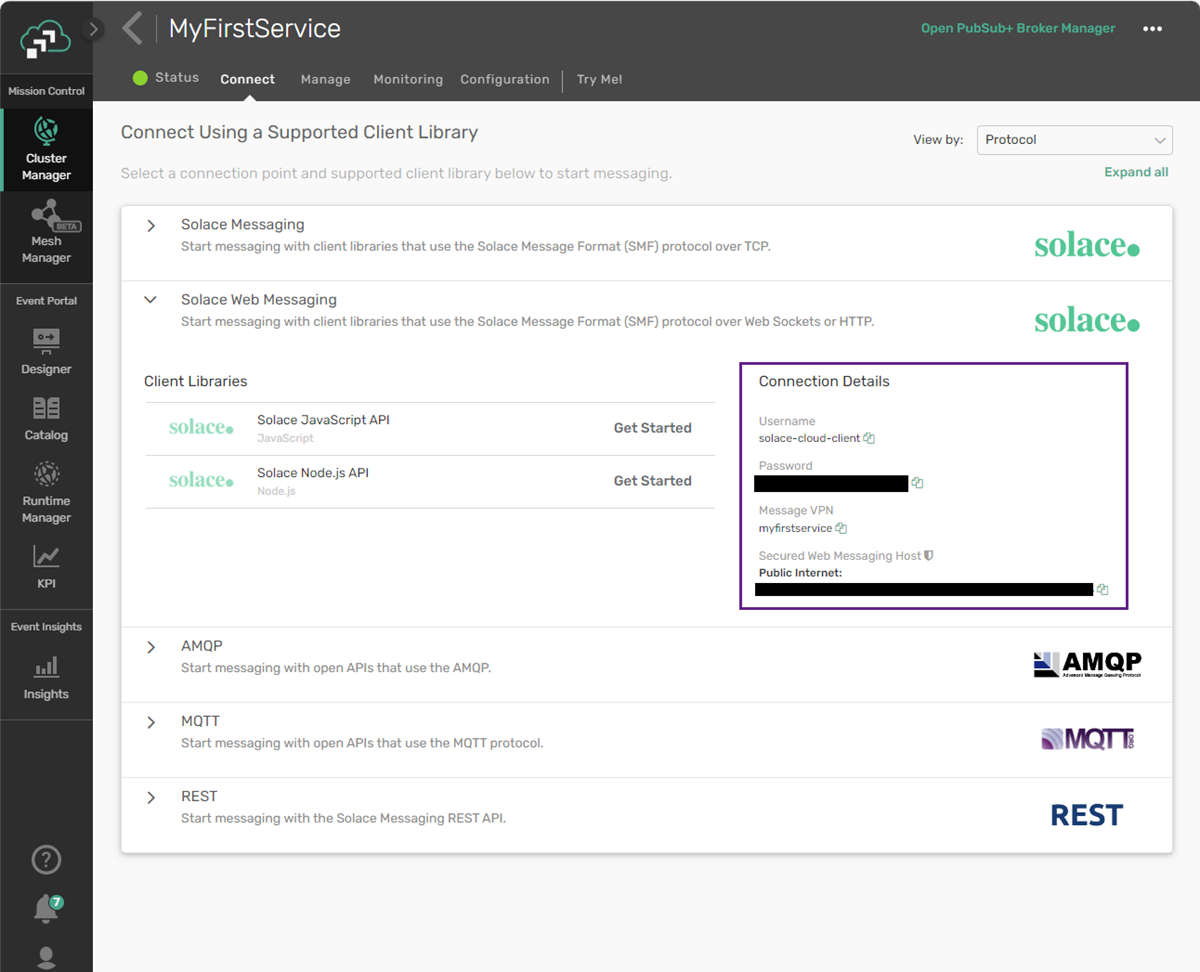
On the Service Details page select the Try Me! tab.
-
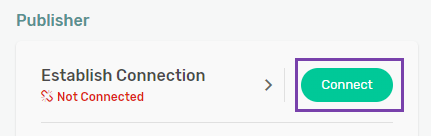
To connect to the event broker service copy the following connection information from the Service Details page into the Broker Manager under Establish Connection:
- Copy the value for Client Username and paste it into the Client Username field.
- Copy the value for Client Password and paste it into the Client Password field
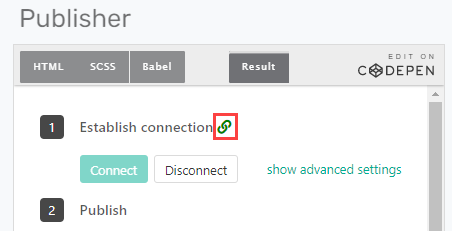
- In the Publisher panel, click Connect.
- Validate that the publisher is connected.
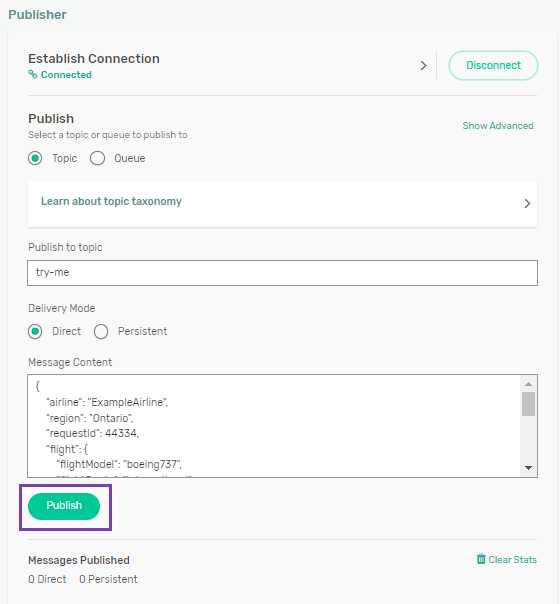
- In the Publisher panel, click Publish to publish a message with try-me as the topic name.
Confirm the Message Is in the Queue
In Broker Manager, you can confirm that the message is in the queue.
- In the Broker Manager, on the Queues page, your queue is listed on the summary page.
- Verify that the Messages Queued column shows 1 message (or more if you published multiple messages), and that a non-zero value is shown in the Messages Queued Quota (MB) column.
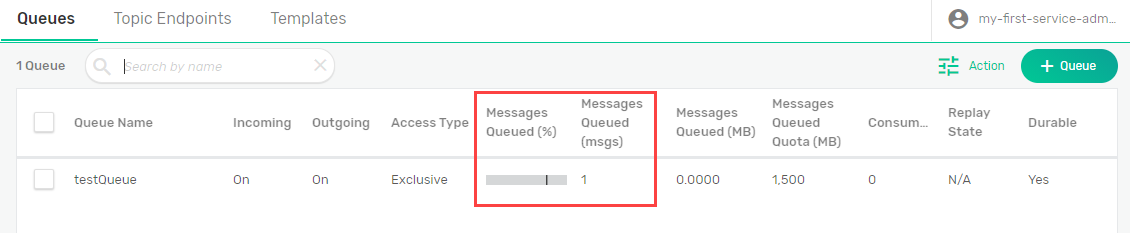
Congratulations! Your queue is working.
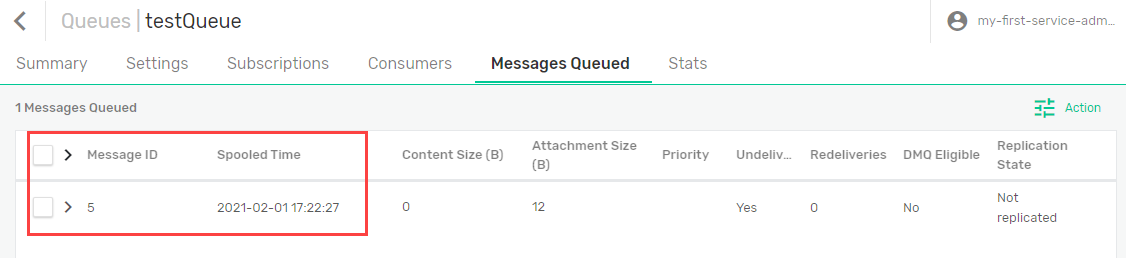
- To see more details about the message in the queue, click anywhere in the row describing the queue, then select the Messages Queued tab.
For example, you can see the message ID assigned to the message and the time when it was published.
Next Steps
Well done. You have now created a queue in your event broker service and published a message to it. Want to learn more?
- Learn how to Consume Messages from a Queue.
- See the other APIs you can use for Developing Applications with Solace Cloud
- Learn how to manage your event broker service with SEMP
- Learn more about queues and Guaranteed Messages.