Creating an Event Mesh
Before you can create an event mesh or edit and existing one, you must fulfill the following prerequisites:
- You require the Mission Control Manager role. Contact the Administrator for your account if you require this role. For more information about the role requirements, see Considerations for Working with Event Meshes.
- The Enterprise event broker services that you want to include in the event mesh must already exist. Creating an event mesh requires a minimum of two event broker services. After you create your event broker services, you use Mesh Manager to specify the nodes that are in your event mesh.
- If you are connecting a DMR cluster with multiple nodes in it, you must identify one event broker service to be the gateway node.
-
Creating and using an event mesh requires that your event broker services have specific Access Control List (ACL) Profile properties configured to
allow. See Configuring ACL Profile Properties When Using the Event Mesh.
For more information about event meshes and before you create an event mesh, see Understanding Event Meshes and Mesh Manager and Considerations for Working with Event Meshes.
Once an event broker service is part of an event mesh, you cannot delete the event broker service unless you remove the event broker service from the event mesh it is part of.
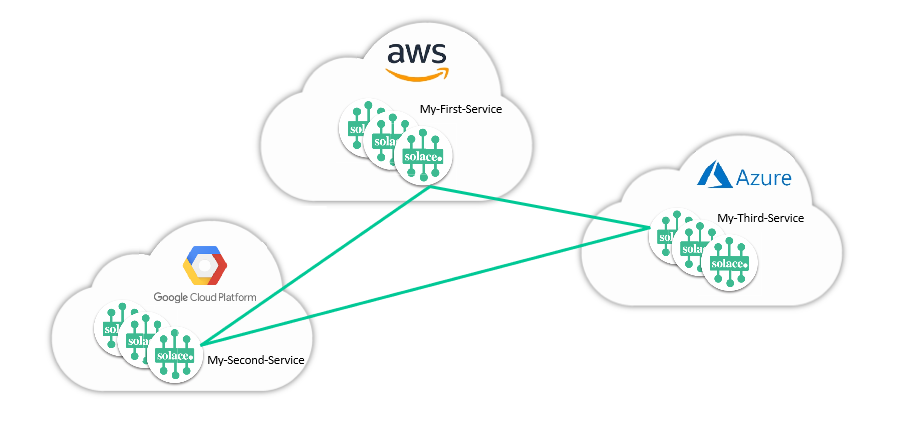
The following example illustrates how to create an event mesh with these characteristics:
- Three Enterprise event broker services connected in a full mesh (where every event broker service is connected to others in the event mesh), called MyFirstService, MySecondService, and MyThirdService. For illustrative purposes, the event broker services run in separate data centers and with different cloud providers.
- Each event broker service is the only node in the DMR cluster and hence is the event broker service (gateway node) we use for the event mesh.
Creating an Event Mesh Using Mesh Manager
To create an event mesh, perform these steps:
-
Log in to the Solace Cloud Console if you have not done so yet. The URL to access the Cloud Console differs based on your
- On the navigation bar, select Mesh Manager
 .
. - Click Create Event Mesh.
- On the Create Event Mesh page, in the Event Mesh Name field, enter a name for your event mesh. The name must be unique from other existing event meshes, and must be no more than 50 characters.
- Click Add Service.
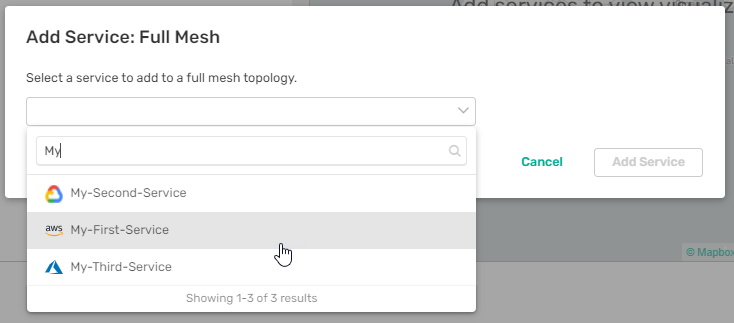
- In the Add Service: Full Event Mesh dialog, in the Destination Service field, select the event broker service to add to the event mesh using one of the following methods:
- Enter the first few letters of the event broker service name to filter the list. When you see the correct one in the list, select it, and then click Add Service.
- Scroll and select the name of your service in the drop-down menu, then click Add Service.
-
After you return to the Create Event Mesh page, click Add Service again and on the Add Service: Full Event Mesh dialog, select another event broker service. In most cases, you can accept the suggested initiating links.
You can optionally click the Switch Initiator
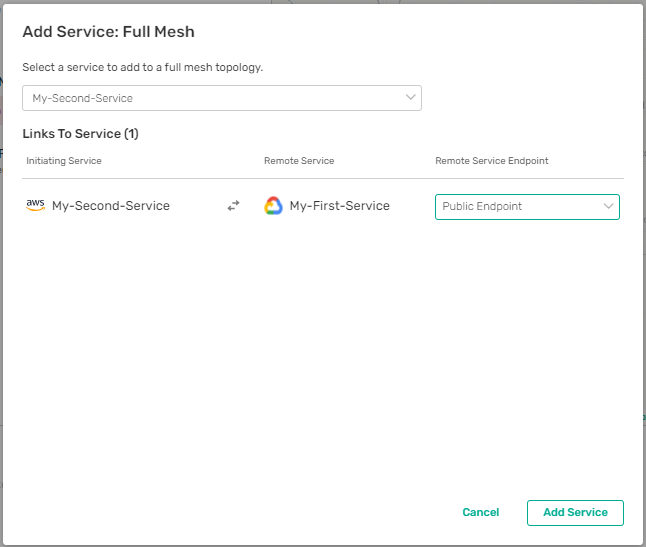
 icon to change which event broker service begins the creation of the DMR link. For more information about choosing the initiating service, see Switch the Initiator for a Link on the Event Mesh. For example, if one of the event broker services has a private endpoint and the other event broker service has a public endpoint, you must change the initiating service to be the one with the private endpoint. On the remote endpoint, you can only select the endpoint if you have more than one endpoint available, otherwise, only the single endpoint is shown and automatically selected for you.
In the image below, MyFirstService has only a Public Endpoint and is selected automatically:
Repeat this step until you've added all the event broker services that you want to your event mesh. You can add a maximum of 15 event broker services to an event mesh.
-
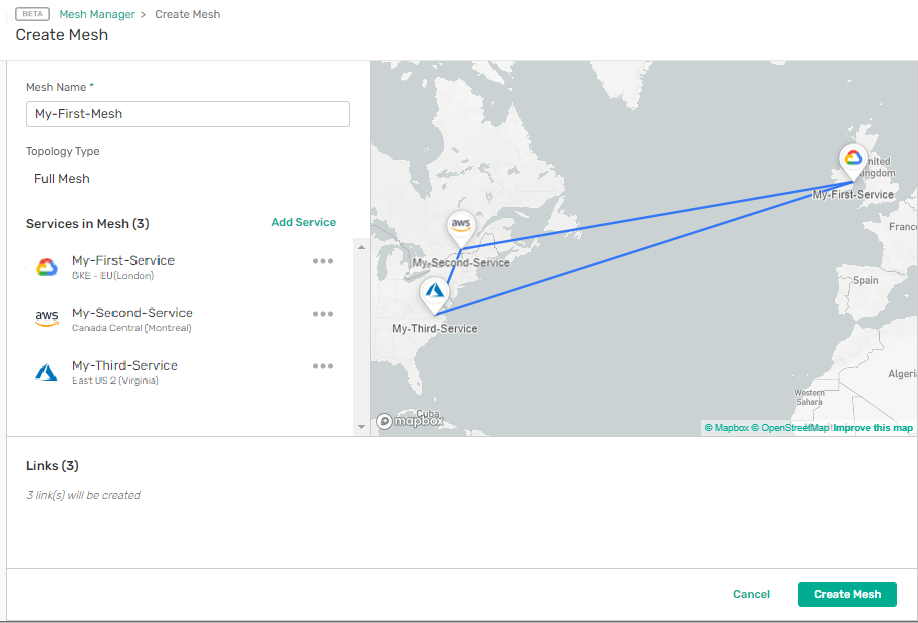
After you return to the Create Event Mesh page, you'll see the links under Services in Event Mesh.
As you add services, the map on the right updates to show all the connections in your event mesh. Newly added services display a blue left-edge. When you're ready, click Create Event Mesh.
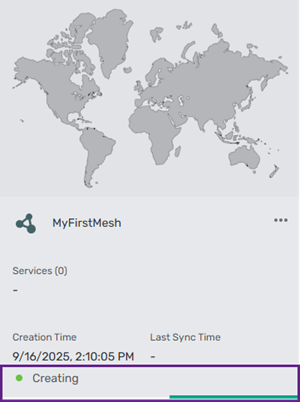
You return to the Event Manager: Event Meshes page with a new grayed-out tile representing your new event mesh. The new event mesh tile shows Creating with a progress bar at the bottom. Creating an event mesh can take up to five minutes.
You can wait on the same page or come back later to check the event mesh creation progress. For more information, see Checking the Progress of Event Mesh Updates.
When the event mesh is ready, the tile becomes active, listing information about your event mesh.