High Availability in Solace Cloud
Event broker services
To learn more about HA redundancy, see High Availability for Software Event Brokers.
You can test the HA redundancy of your HA event broker service, and how your client applications respond to HA failovers by performing a High Availability Switchover for Event Broker Services.
HA Concepts
Solace Cloud implements HA using an active/standby model with an arbiter node (monitoring node) for split-brain detection. This setup requires three event broker instances:
- Primary messaging node
- Backup messaging node
- Monitoring node
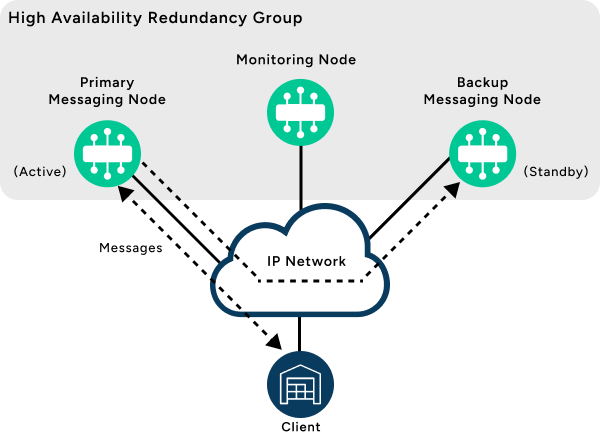
The primary and backup messaging nodes both run under the messaging node role, while the monitoring node runs under the monitoring node role. The role is fixed by the configuration and never changes. The HA group is fronted by a network load balancer that routes traffic to-and-from the active event broker service in the HA group (either the primary or backup).
When in operation, the messaging nodes assume one of these active/standby roles: Primary or Backup. At any one time, one event broker service is the primary and the other is the backup.
With this model, a primary messaging node provides messaging services to clients, while a backup event broker waits in standby mode—it only provides service should the primary event broker fail. A third event broker acts as a monitoring node, to act as a tie-breaker and prevent split-brain scenarios that would otherwise cause both the primary and backup messaging nodes to become active simultaneously.
Upon a failover, connections to the event broker are switched over from the Primary to the Backup messaging node automatically.
Subsequently, a failover occurs in the following sequence:
- The backup event broker service takes over messaging activity.
- Once the failed primary event broker service comes back online, it resynchronizes to match the currently active backup event broker service.
- The primary messaging node takes on the standby role.
HA in Public and Private Clouds
To ensure that an HA group is adequately provisioned, pods run on different worker nodes. Additionally, the pods can be spread over multiple availability zones (AZ) when available. The following diagram shows a Kubernetes cluster that has worker nodes over three AZs. The Mission Control Agent schedules the messaging nodes over two AZ and the monitor node on a third AZ. For each HA service, the primary pod is deployed in one AZ, the backup pod in a second AZ, and the monitoring pod in a third AZ. This guarantees that pods for the same HA service are not running on the same hardware.

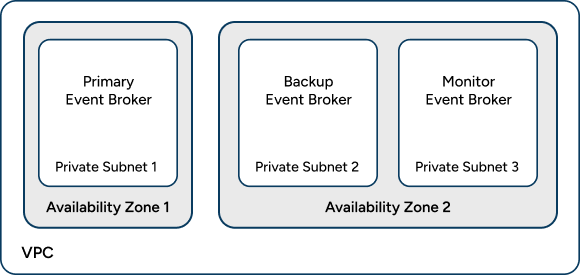
Similarly, when deploying an HA group in virtual private clouds such as AWS, there are two network topologies available.
-
For regions with three or more AZ:

-
For regions with two AZ:
Connecting to a Cloud HA Group
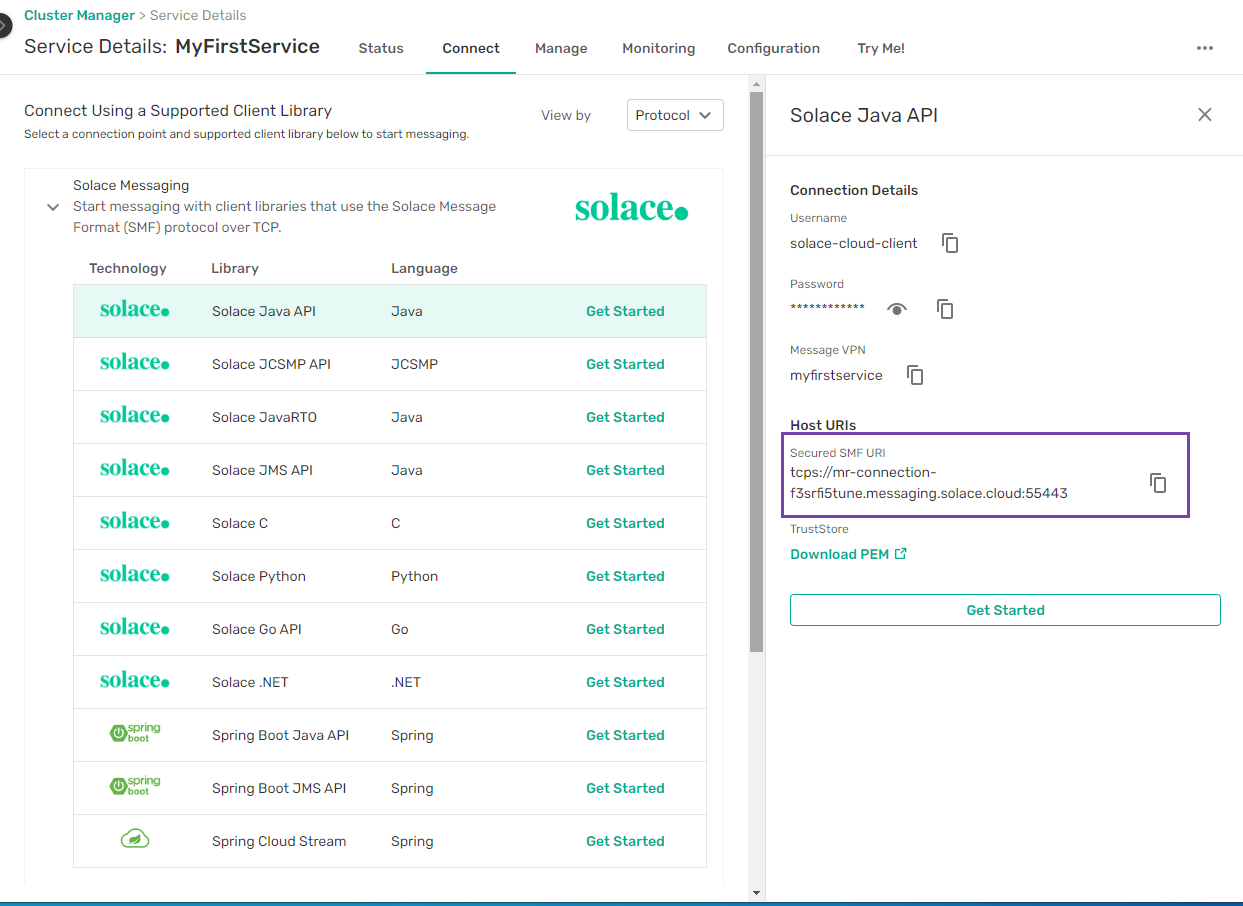
Typically, event broker services are fronted by load balancers in deployments of Solace Cloud. When a load balancer is used, it abstracts the switchover between primary and backup in the event of a failure for HA configurations. For this reason, client applications can connect to an event broker service using a single-DNS entry, whether they use Solace Messaging APIs or third-party messaging APIs, such as MQTT.
If a load balancer is not used, a host-list is required. Host lists are a feature supported by Solace Messaging APIs. Third-party APIs do not natively have host-lists, though you can choose to implement this functionality.
HA and Service Types
The following service types deploy an HA redundancy group by default:
- Professional (Standard account)
- Enterprise (Enterprise account)
Solace Cloud automates all of the configuration and setup when you create your event broker service. Once the event broker service is created, applications can use the DNS name entry provided in the connectivity tab in the console.
HA-Link Security
When a new enterprise event broker service is created, the communication between the primary and backup messaging nodes are encrypted by default, including the HA mate link and Config-sync. When you create an event broker service, you can disable encryption so that the communication is in plain text between the primary and backup event brokers. For more information see Configuring High Availability Mate-Link Encryption. Solace recommends that you do not disable the encryption unless you trust the security restrictions of the VPC in the cloud providers or on-premises. Config-sync always remains encrypted.
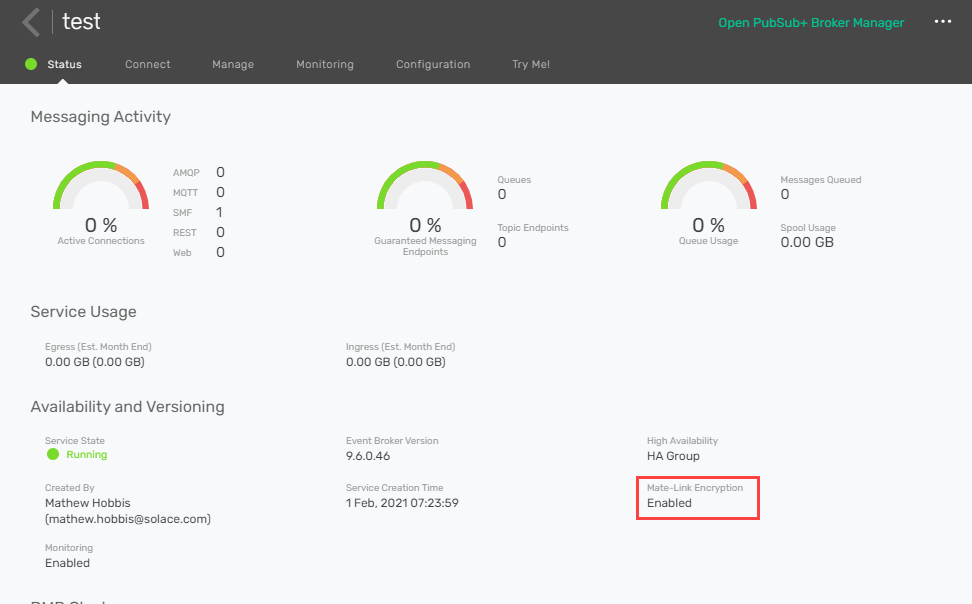
The status of the mate-link encryption for an event broker service is shown in Cluster Manager on the Status tab.
Modifying the HA Mate-Link Encryption Status
If you have an existing event broker service without mate-link encryption enabled, you can enable enable it. To modify the HA mate-link encryption status for an existing event broker service perform these steps:
- Log in to the Solace Cloud Console if you have not done so yet. The URL to access the Cloud Console differs based on your
- On the navigation bar, select Cluster Manager
 .
. - Select the event broker service that you want to configure. If the event broker service is not listed, make sure you have the right environment selected. For more information, see Selecting Environments.
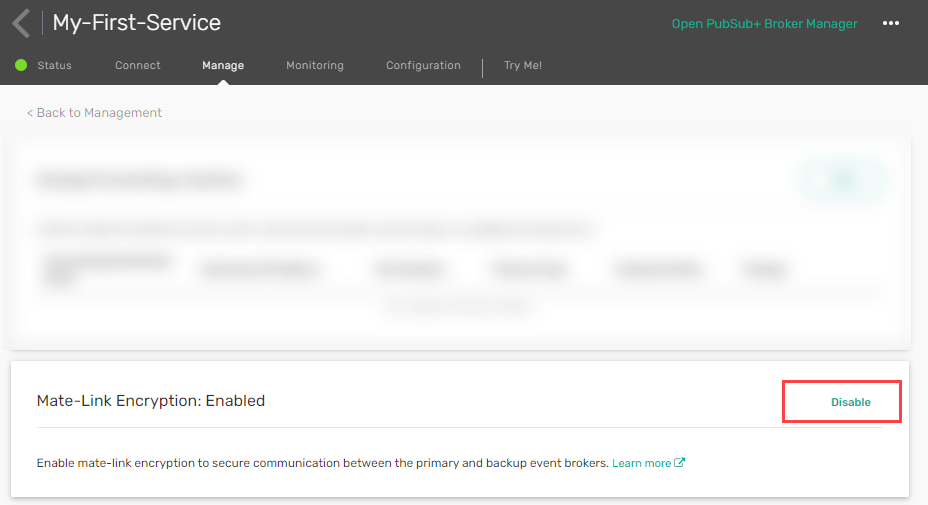
- On the Service Details page, click the Manage tab.
- On the Management Settings menu, select Authentication and Security.
- On the Mate-Link Encryption tile, select Enable or Disable.