Twinax Cable Insertion & Removal
The SFP+ ports used in 10 Gigabit Ethernet (10GigE) NABs can be used with Twinax (twinaxial) cables when the pre-installed SFP+ modules are removed from the NAB ports.
The following types of Twinax cables can be used:
- Active limiting Twinax cables with SFP+ connector ends (5–10 m in length)
- Passive Twinax cables with SFP+ connector ends (0.5–7 m in length)
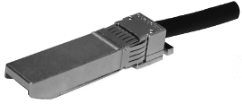
Below is an example of a suitable Twinax cable with a SFP+ connector end. (Twinax cables with SFP+ connector ends are not supplied by Solace.)
Twinax SFP+ Connector
- Always follow ESD prevention procedures when inserting or removing SFP or SFP+ modules. Use an anti-static device. If no anti-static device is available, ground yourself by touching the metal part of the appliance event broker chassis.
- Always wear a grounded wrist strip when working on appliance event broker equipment.
- Treat all assemblies, components, and interface connections as static-sensitive.
- Avoid working in carpeted areas and keep body movement to a minimum while removing or installing SFP modules to minimize the buildup of static charge.
Inserting Twinax Cables
To insert a Twinax cable into a SFP+ port of a 10GigE NAB when the pre-installed SFP+ module is removed from the port, do the following:
- Insert the SFP+ connector end of the Twinax cable into the SFP+ port.
- Gently press the SFP+ connector end into the port until it is firmly seated.
Removing Twinax Cables
To remove a Twinax cable from the SFP+ port of a 10GigE NAB, do the following:
- Gently pull the latch release on the SFP+ connector end of the Twinax cable to disengage the connector end.
- Grasp the SFP+ connector end of the cable between your thumb and index finger, and carefully pull the it towards you out from the port.