Managing Users with the Solace Cloud REST API
Many of the procedures on this page can be performed using the feature-rich and consistent Solace Cloud v2 REST API instead of the v0 APIs. For more information, see the Solace v2 REST API Reference.
With the Solace Cloud REST API and API token support for user management, you can create, update, and delete users programmatically.
This tutorial shows you how to:
- Create and invite a user to Solace Cloud. For more information, see Creating a User.
- Getting Users in an Account. For more information, see Getting All Users from Your Account.
- Retrieve the user's information. For more information, see Getting the Details of a User.
- Determine available roles and assign one or more roles to the user. For more information, see Assigning Roles to a User.
- Delete a user from your account. For more information, see Deleting a User.
Before you Begin
Before you can start this tutorial, you'll require the following:
- An Enterprise Account for Solace Cloud. Only Enterprise Accounts support multiple users; REST endpoints in this example cannot be used otherwise.
- Your account must be assigned the Administrator role.
- An API token with at least the following permissions under Account
Management:
- Get Users
- Get Roles
- Create Users
- Delete Users
- Set Roles
For more information, see Creating an API Token.
-
A way to send REST messages from your development environment. We use Postman in this tutorial. You can use the Solace Blogs – Solace Cloud User Management Postman collection and click the Run in Postman button to import the collection to Postman, which permits you to easily work through the steps in this tutorial. Alternatively, you can simply make each call by specifying it REST API in Postman after you've set up the environment in Postman to use your API token. For more information about setting up Postman, see Managing API Tokens.
At this time, the documentation on the Solace Blogs about the REST API for Solace Cloud may be out of date. Refer to the documentation on this website for instructions about using the Solace Cloud REST API.
After you've set up the environment in Postman to use your API token, you can simply make each call by specifying the REST API. To check that API token is set up correctly to use Bearer authorization in Postman, select the Headers tab to validate that it is using Bearer Authorization and set it to use the
apiTokenenvironment variable that you had set up earlier. For example, you can see that Authorization is set up to use Bearer and theapiTokenin the following illustration: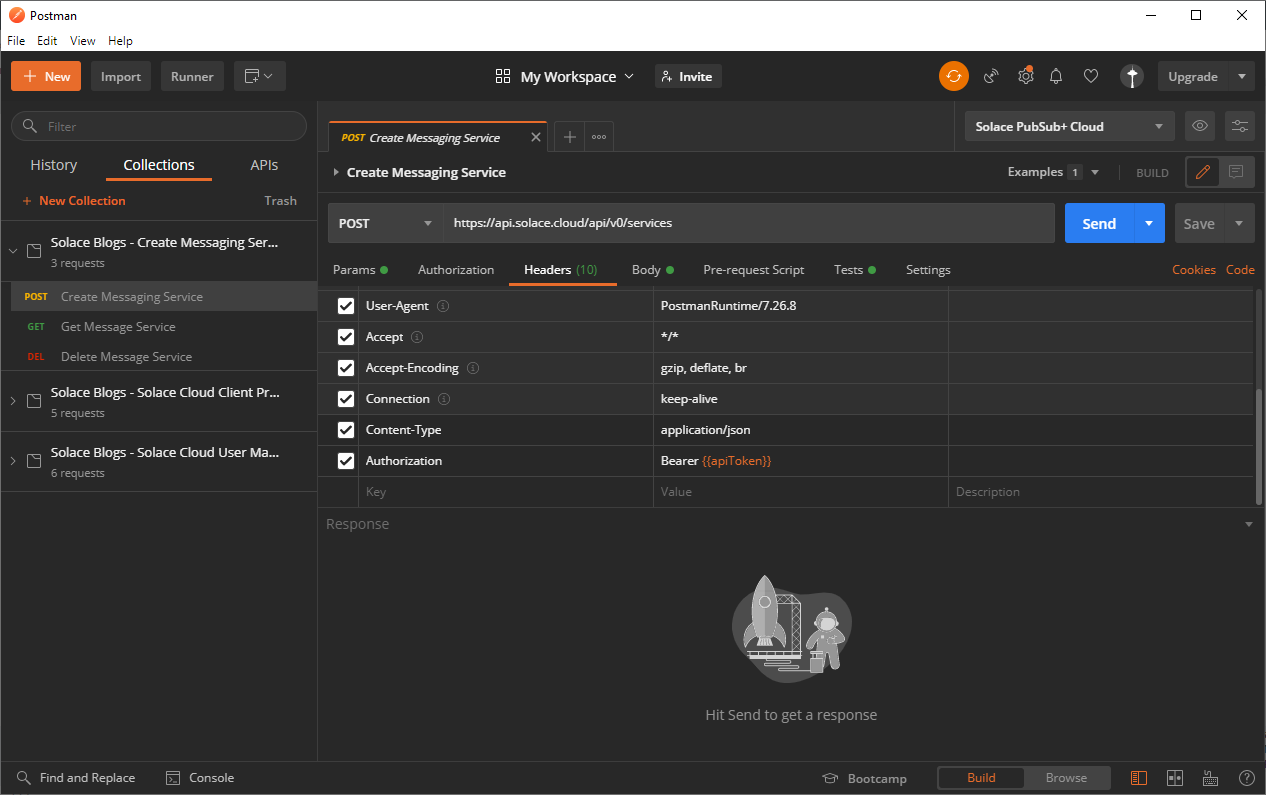
Creating a User
You can use the Solace Cloud REST API to create a user. To create a user, follow these steps:
- In the Postman Collection Solace Blogs – Solace Cloud User Management, select the request POST Invite User. The POST request would be to the URL,
https://api.solace.cloud/api/v0/users. - In the Body, modify the
emailobject's value to the email address of the user you wish to invite, then click the Send button.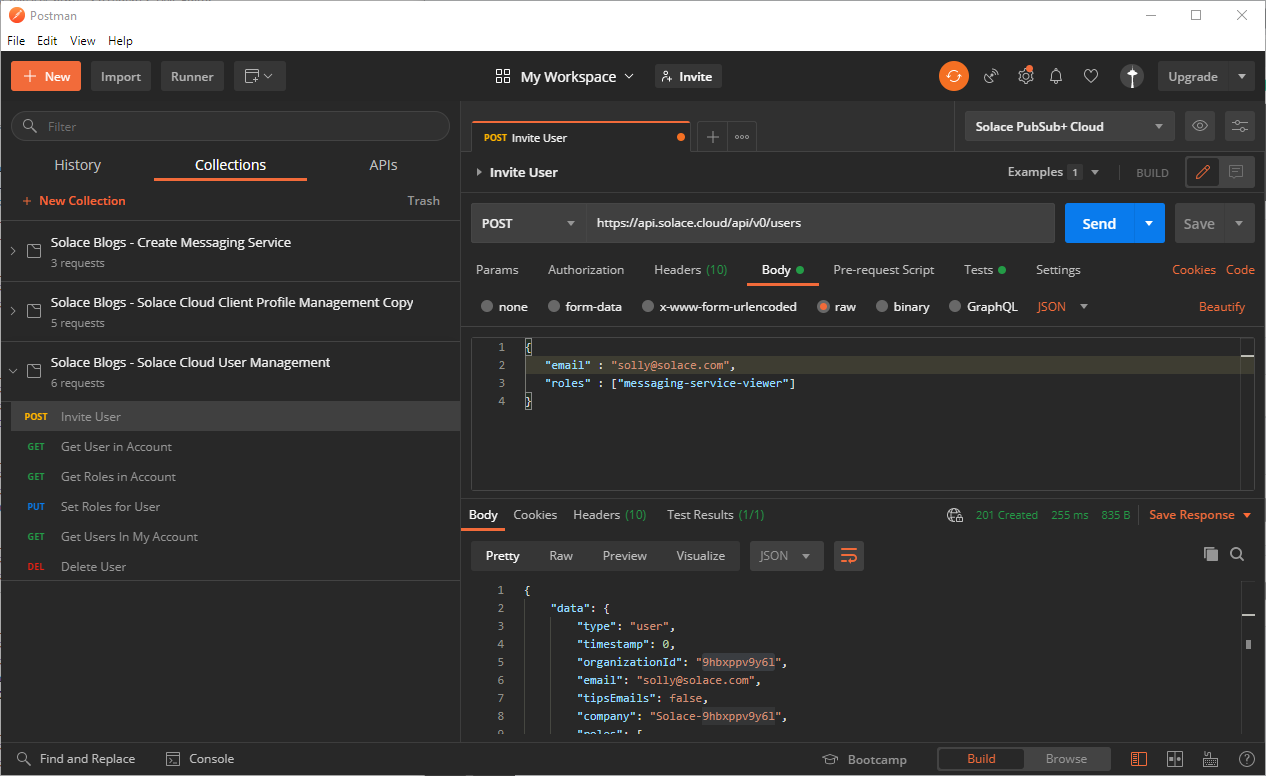
You should see a JSON response confirming that the specified user was invited.
- Go to the Solace Cloud Console, click User & Account
 on the navigation bar, select Account Details, and then select the User Management tab. On the page, you should see the invited user.
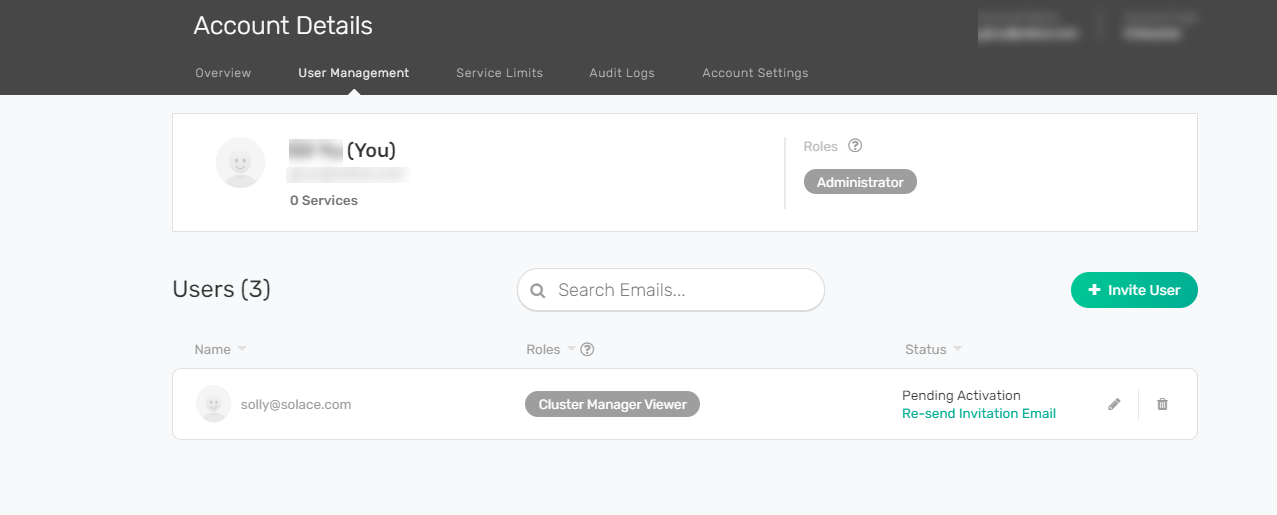
You have just successfully invited another user. The user for the email address you specified should receive an invitation email that guides them through the rest of the activation process.
Getting All Users from Your Account
You can perform this procedure using our feature-rich and consistent v2 REST API. See the Get a list of users in your account in the Solace Cloud v2 REST API Reference for more information.
You can get a list of all the users for an account for which the API token was created. To find all the users in an account, follow these steps:
- In the Postman Collection Solace Blogs – Solace Cloud User Management, select the request Get Users in My Account. The GET request would be to the URL,
https://api.solace.cloud/api/v0/users. - Click Send.
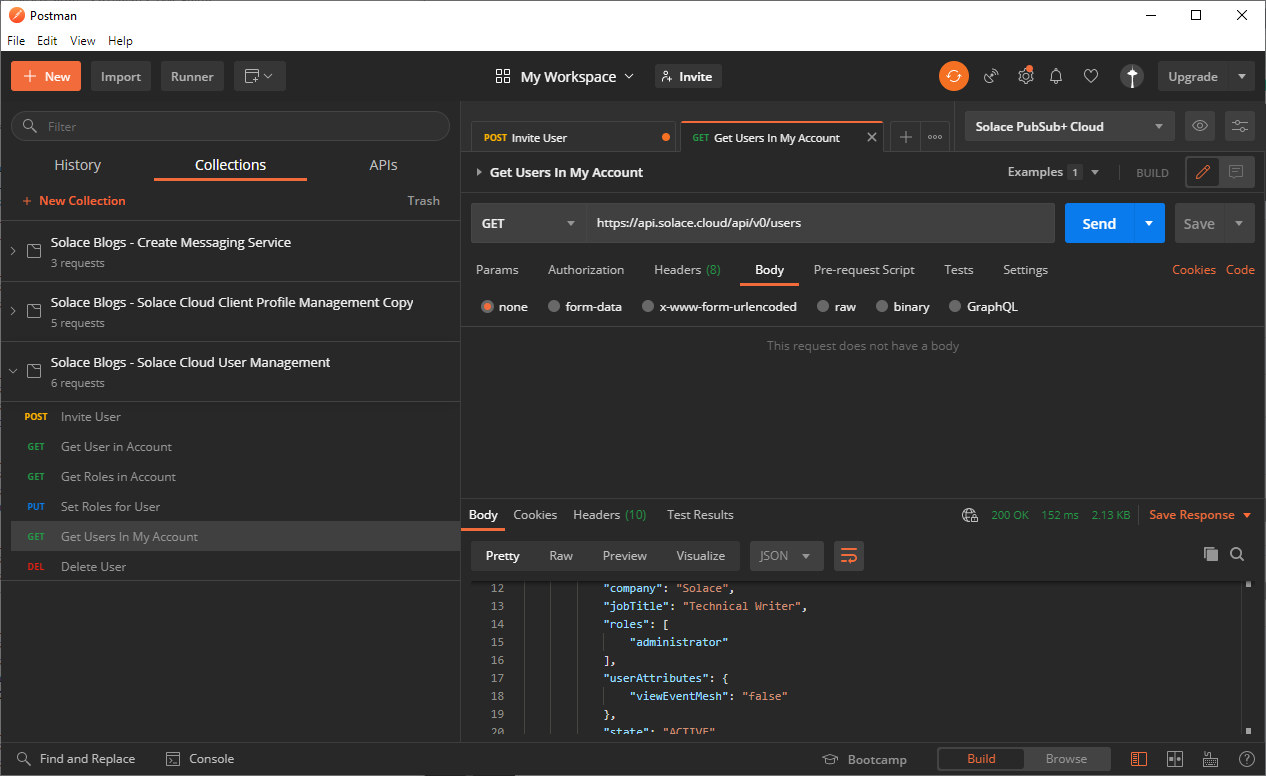
You should see the details for all user in the response. An important part of the information is the
userId, which is used for the other commands.
Getting the Details of a User
You can perform this procedure using our feature-rich and consistent v2 REST API. See the Get a list of users in your account in the Solace Cloud v2 REST API Reference for more information.
Once you know the user, you can retrieve details about the user based on the userId value. You can use the Get Users in My Account command to find that information. To get the details of a user, follow these steps:
- In the Postman Collection Solace Blogs – Solace Cloud User Management, select the request Get User in Account. The GET request would be to the URL,
https://api.solace.cloud/api/v0/users/{userId}. - Modify Get request URL and replace the
{userId}with the userID value you want. In this case, we put16kpvpyui5vp. - Click Send.
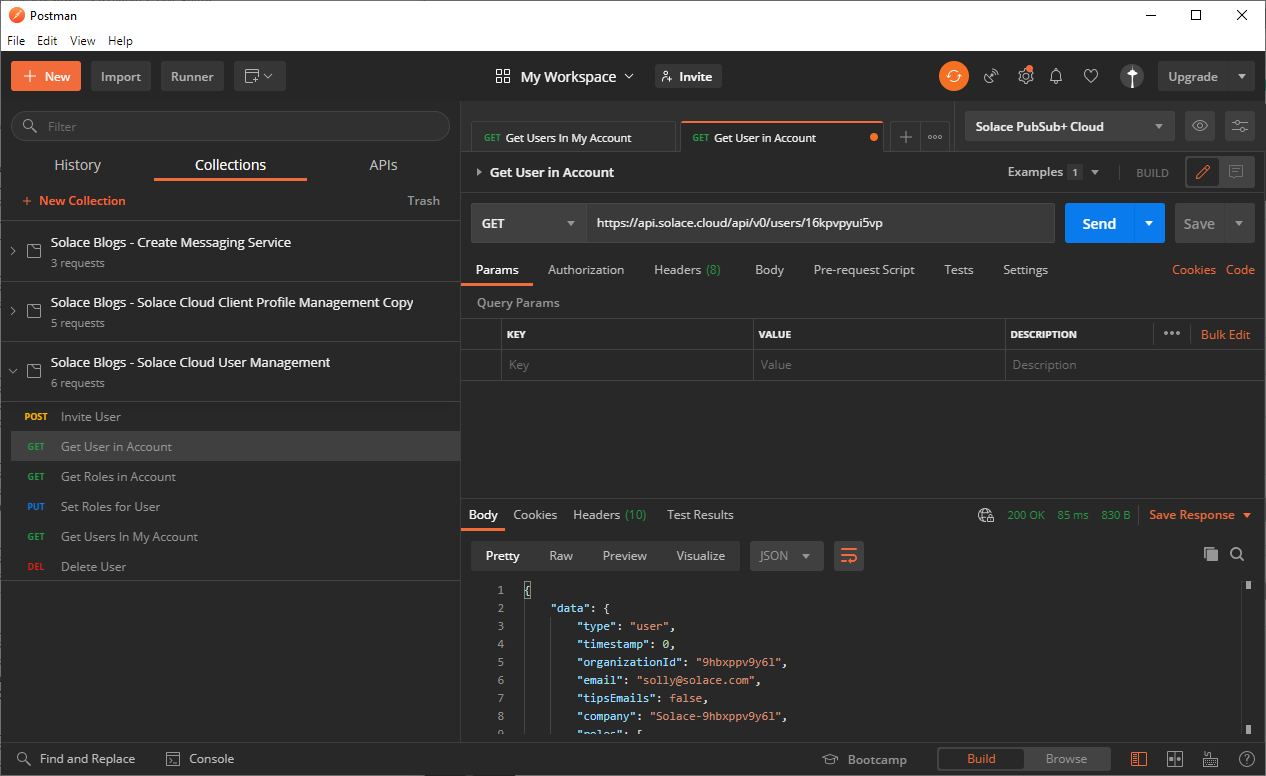
You should see the details of the specified user in the response.
Assigning Roles to a User
One you've created and retrieved the details of your user, you can try change the roles assigned to a user. First, we'll want to determine the roles that are available for assigning. To determine the roles available that you can assign, use these steps:
- In the Solace Blogs – Solace Cloud User Management Postman Collection, select the Get Roles in Account request. The GET request would be to the URL,
https://api.solace.cloud/api/v0/organization/roles. -
Click Send.
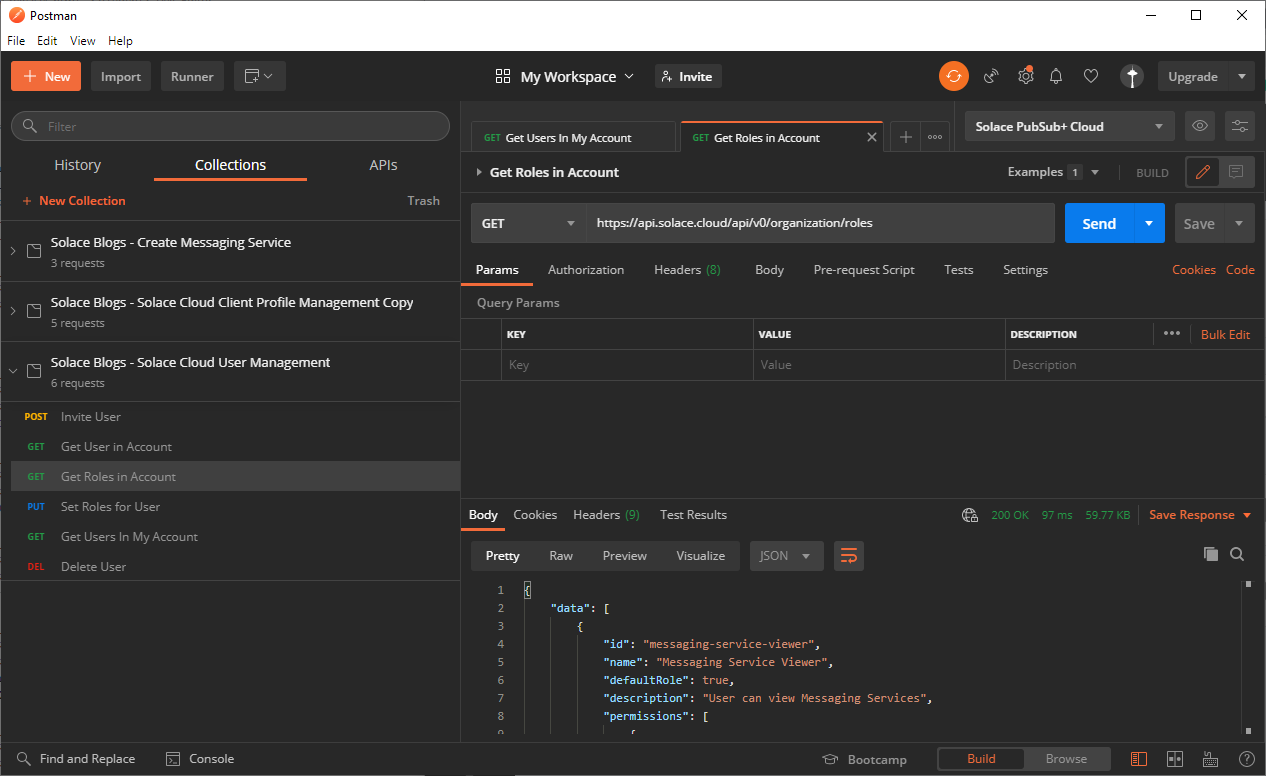
You should be see a list of available roles, each with a list of permissions they contain.
Now, use the following steps to set the roles for a user:
-
In the Solace Blogs – Solace Cloud User Management Postman Collection, select the PUT Set Roles for User request. The PUT request would be to the URL,
https://api.solace.cloud/api/v0/users/{userId}/roles -
Modify PUT request URL and replace the
{userId}with value of the user you want to assign roles to. In the body of the request, set the see the valuemessaging-service-editorandbilling-administratorfor theidfield. Multiple roles are simply specified as an additionalid. This ID corresponds to one of the roles returned from the previous Get Roles in Account request. When you send the request, the user's existing roles are replaced with the ones you've specified. - Click Send.
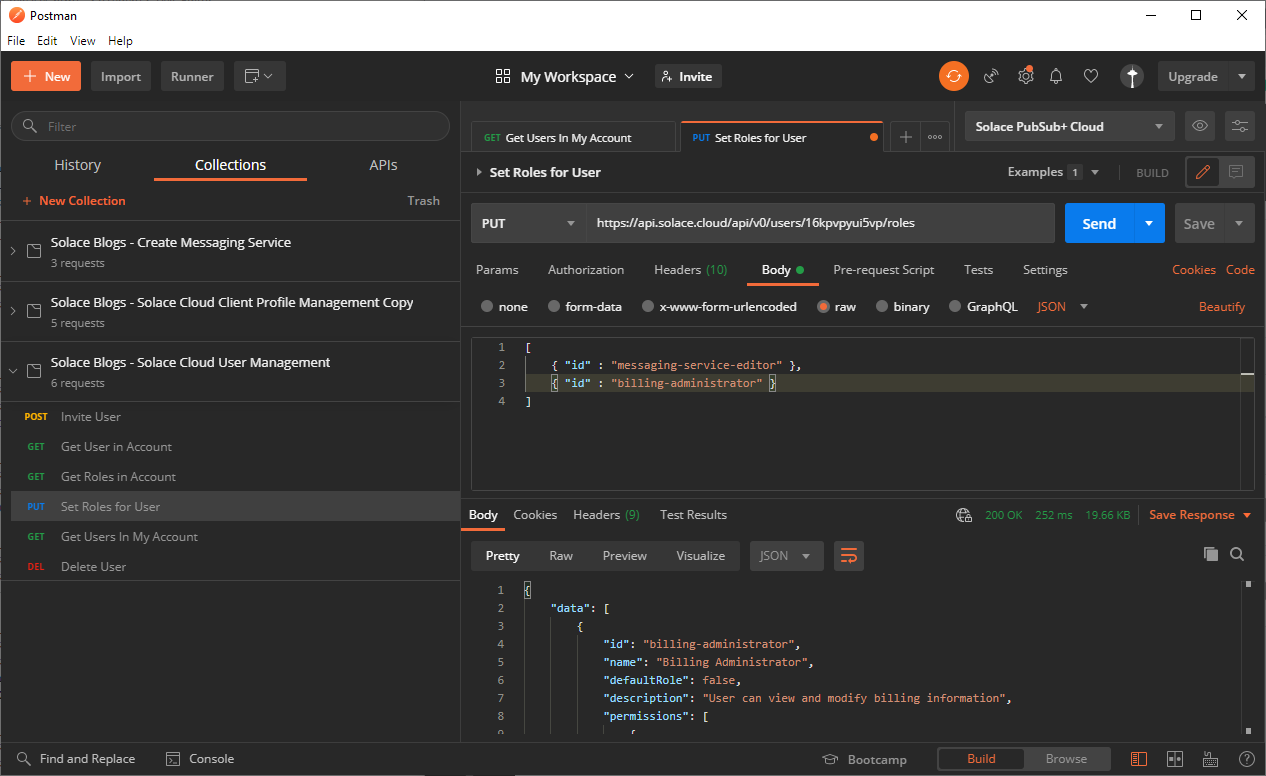
You should receive a
200 OKresponse that confirms roles were successfully assigned to the user.
Deleting a User
You can delete a user. It's typical to delete users that you've used for testing and that you may want to remove as part of clean-up. To delete a user, follow these steps:
- In the Solace Blogs – Solace Cloud User Management Postman Collection, select the Delete User request. The DELETE request would be to the URL,
https://api.solace.cloud/api/v0/users/{userId} - Modify Delete request URL and replace the
{userId}with the identifier of the user that you want to delete. - Click Send.
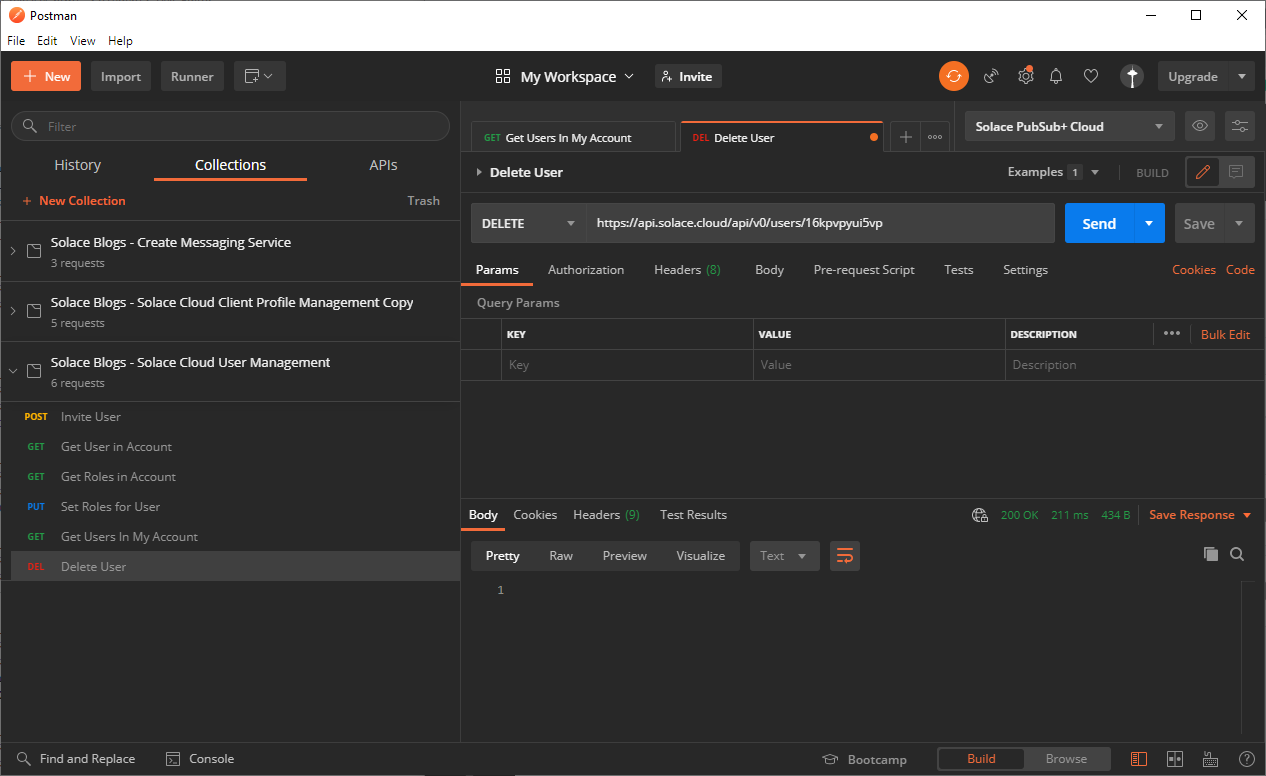
You should receive a
200 OKresponse that confirms deletion of the user was successful.