Step 2: Solace EDA Basics
You've completed the first part of the tutorial: Step 1: Set Up Your First Event Broker.
In step 2, you'll learn how events, messages, and topics work to propagate information through your event-driven architecture (EDA). Understanding the interrelationships of events, messaging, exchange patterns, event brokers, and topics is essential in establishing a responsive EDA for your organization.
In an EDA, an event signifies a change of state, such as a sensor signaling a change in temperature, a field changing in a database, a ship changing course, a bank deposit being completed, or a checkout button being clicked in an e-commerce app. When an event happens, an application sends a message. Messaging is the conduit that facilitates message exchanges between participants – namely, publishers and subscribers. So, in simple terms, events flow across event brokers as messages from publishers that send messages when events happen to subscribers that need to know about the event.
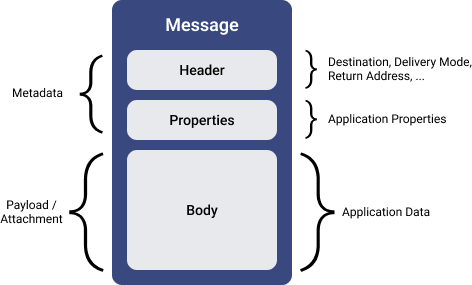
Messages have a simple structure consisting of metadata and a payload. A message has three parts: the header and properties contain the metadata for the message. The body includes the message payload, or the information about the event that the message is conveying.
In a Solace EDA, event messages are usually published to topics, which allow event brokers to route them where they need to go. The topic is included in an event message as a string composed of one or more levels added to the message header. However, a topic is more than just a string providing address or routing info. Topics function as organized channels for categorizing and directing events to the appropriate recipients. You can also think of a topic as a hierarchical definition of the subject of an event message. A well-defined topic structure is critical to enabling re-use of your events and getting the most value out of your EDA.
To continue your Solace journey, we'll examine the concept of topics and their syntax. In Solace EDAs, topics follow a hierarchical structure consisting of multiple levels, each of which provides contextual details about the event. This structure allows a topic to describe the event itself.
Topic Architecture
A typical topic structure includes these elements:
Domain / Noun (object) / Verb (action) / Property
-
Domain represents the organizational element responsible for the system. Some examples could be a company name, business unit, application domain, or a combination of these elements.
-
Noun (object) represents the subject of the information carried by the event, which could be a system or a type of record.
-
Verb (action) represents a performed or intended action related to the noun.
-
Property represents supplementary information to clarify the context. This can be anything related to the object such as version, location, qualifier, identifier, and other relevant data. It's common for the topic to have multiple properties.
Consider the following topic examples. The braces "{ }" indicate a variable in the topic that is replaced in the message by data specific to the event.
- coffeeshop / order / new / v1 / {source} / {country} / {storeId} / {requestId}
-
This example could result in an event topic of coffeeshop / order / new / v1 / mobile / ca / 3244 / 829222 where:
-
the domain is coffeeshop
-
the noun is order
-
the verb is new
-
the properties are v1 / mobile / ca / 3244 / 829222
-
- acme / retail / supplyChain / partnerOrder / shipped / v1 / {department} / {upcCode}
-
This example could result in an event topic of acme / retail / supplyChain / partnerOrder / shipped / v1 / home / 987654321 where:
-
the domain is acme / retail / supplyChain
-
the noun is partnerOrder
-
the verb is shipped
-
the properties are v1 / home / 987654321
-
- cyberdyne / skynet / terminator / created / v1 / {model_num} / {microprocessor} / {terminatorId}
-
This example could result in an event topic of cyberdyne / skynet / terminator / created / v1 / T800 / neuralnetv1 / T1234567Z where:
-
the domain is cyberdyne / skynet
-
the noun is terminator
-
the verb is created
-
the properties are v1 / T800 / neuralnetv1 / T1234567Z
-
You likely noticed that reading the topics gives you a logical understanding of the event itself and the data its payload probably includes. For more extensive information about constructing topics, see Topic Architecture Best Practices. You can also watch our Solace Developer Advocate walk through how topics are implemented on Solace event brokers and how event brokers filter and route messages based on subscriptions and wildcard characters.
Topic Subscriptions
Subscribers, also known as consumers, use topic subscriptions to tell the event broker which topics to receive messages from. Consumers can subscribe to one or many topics. To enable consumers to subscribe to exactly the topics they want, Solace event brokers allow both static subscriptions and the use of single and multi-level wildcards.
Let's look more closely at the coffee shop example topic where the source, country, storeId and requestId are variables that capture the event details:
coffeeshop / order / new / v1 / {source} / {country} / {storeId} / {requestId}
In this example:
-
source is the order medium, such as web or mobile
-
country is a 2-letter country code
-
storeId identifies the store that the order is placed to
-
requestId identifies the order request, which serves as the key for order interaction
A consumer could specify a single topic such as mobile orders, in the US, for store 3244 and request 829222. For example:
coffeeshop / order / new / v1 / mobile / us / 3244 / 829222
However, more often a consumer needs to receive messages for many topics. In the previous example, a consumer likely would want to subscribe to orders from a specific store but would also likely want to subscribe to events for all order requests rather than just for a single requestId. To subscribe to multiple topics, consumers can use two wildcard characters: * and >.
*>
When * appears by itself at a level within a topic subscription, it indicates a wildcard match at that level. For example, flight/*/ea1234 matches the topics flight/boarding/ea1234flight/departed/ea1234.
The > character is used at the last level of a subscription to indicate a “one or more” wildcard match. For example, flight/boarding/> doesn't match the topic flight/boarding, but it does match flight/boarding/ea1234 and flight/boarding/ea321/yow/fra.
To learn more about wildcard rules and their use in topic subscriptions, see Wildcard Characters in Topic Subscriptions.
Consider these subscription examples for the coffee shop topic:
-
coffeeshop / order / new / v1 / mobile / ca / 3244/ * subscribes to all new coffeeshop order events of version v1 from the mobile app to Canadian store number 3244.
-
coffeeshop / order / * / v1 / mobile / ca / > subscribes to all coffeeshop order events of version v1 from the mobile app to any store in Canada.
-
coffeeshop / order / * / v1 / * / * / > subscribes to all coffeeshop order events of version v1 from any source to any store in any country
-
coffeeshop / order / > subscribes to all coffeeshop order events.
-
> subscribes to all events flowing across your event broker.
These examples show how using the * and > wildcards in a subscription allows consumers use simple, yet flexible filtering to get exactly the events they want to receive. This filtering allows consumers to process only events of interest and avoid spending resources processing events that they would just discard.
For more information, watch our Solace Developer Advocate walk through smart topics and wildcards.
Try It Now
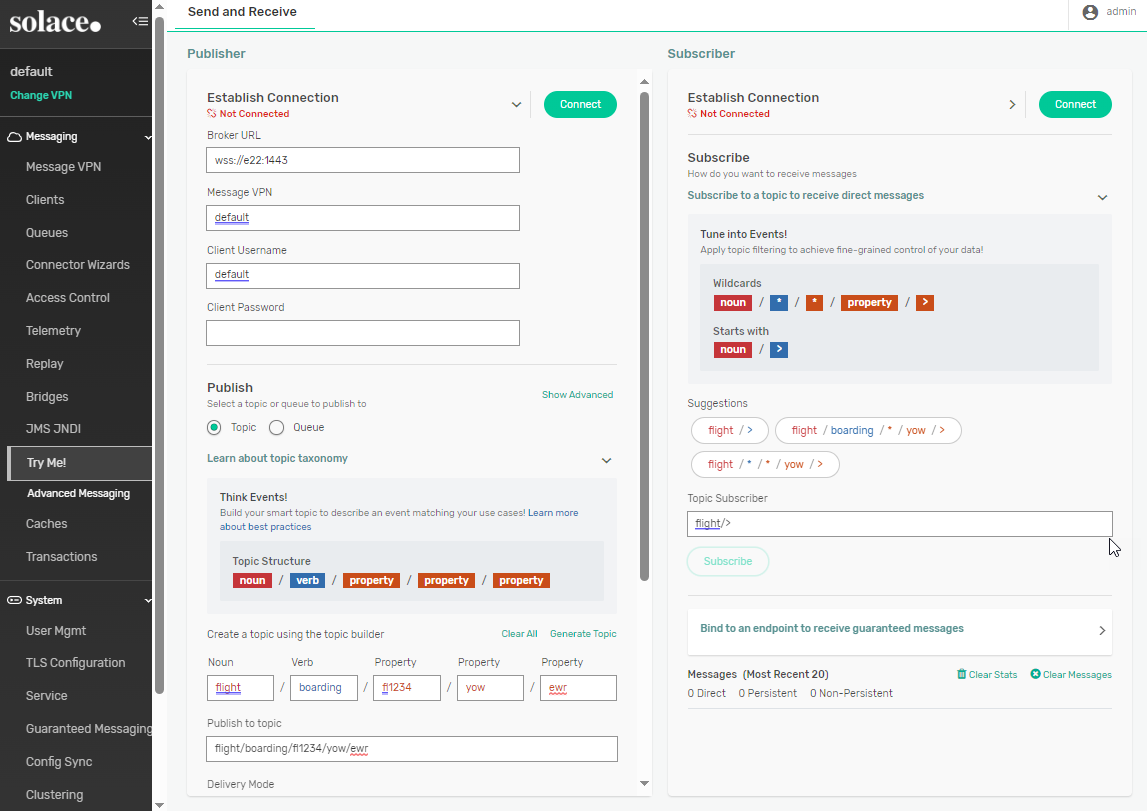
It's time to see topics and subscriptions in action using the Try Me! tool in Broker Manager.
The steps to open Broker Manager and set up the Try Me! tool differ depending on whether you are using a Software Event Broker or Solace Cloud.
Software Event Broker
To use the Try Me! tool in for a software event broker, perform these steps:
-
Open a browser and navigate to
http://<localhost>:8080.Where
<localhost>is the IP address or hostname of your event broker. - Log in using the credentials you set when setting up the event broker. The default username and password are both
admin. - In the Message VPN list, click default.
- On the left navigation bar, select Try Me!
-
The software event broker has a default messaging client username (default) that doesn’t require a password to connect. If you haven’t changed any usernames, passwords, or URLs, you can use the provided default values to connect the Publisher and Subscriber to the event broker.
Now let's publish and subscribe to messages.
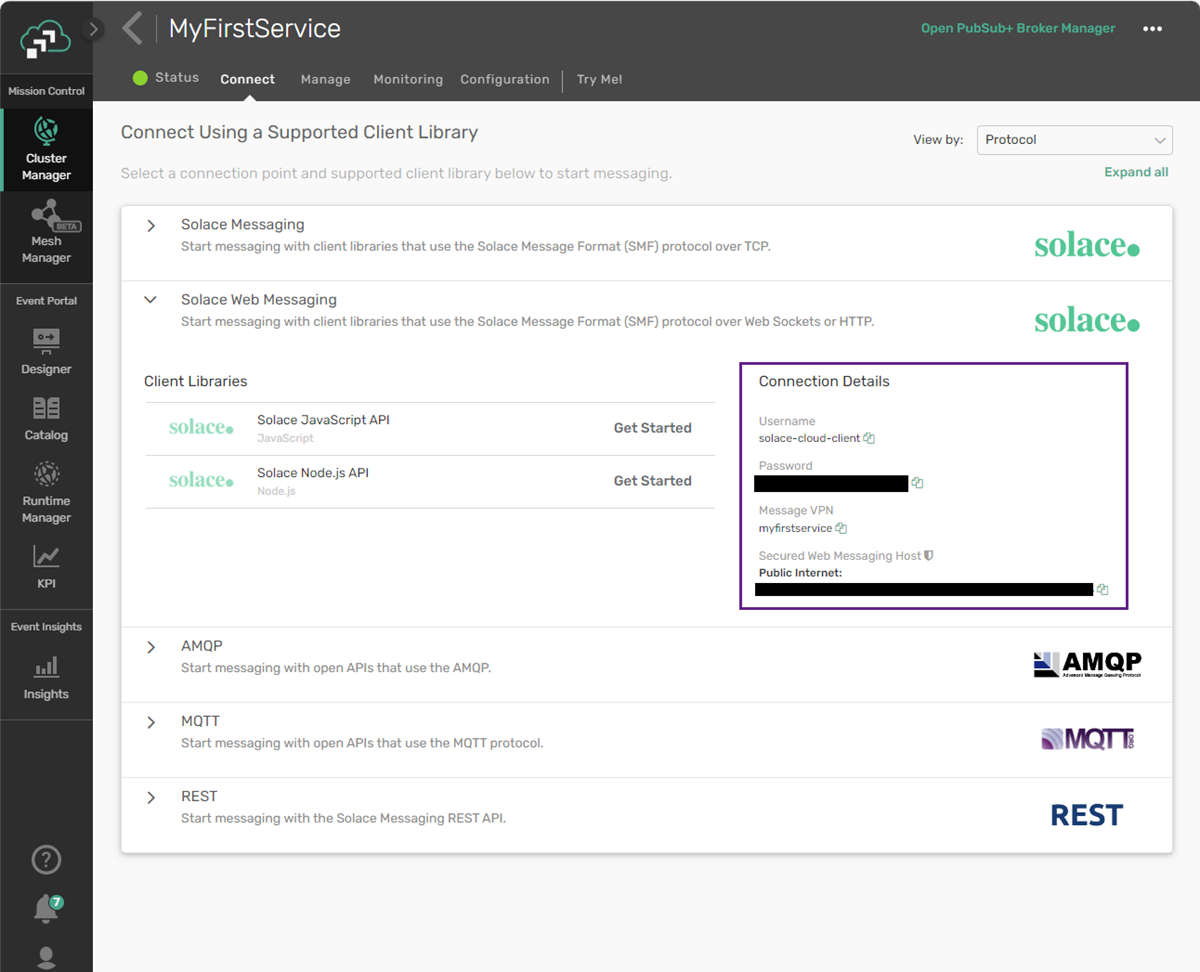
Solace Cloud
To use the Try Me! tool for an event broker service, perform these steps:
- In your browser, visit the Solace Cloud login page.
- Enter the email address and password that you used when you signed up and click Sign in.
- From the navigation bar, select Cluster Manager
 .
. - On the Services page, in the top-left, select the environment that contains your event broker service.
- Click the card for your event broker service. The event broker service details page opens.
- On the Service Details page, select the Try Me! tab.
- Click Open Broker Manager. Broker Manager opens in a new browser tab.
- In the Publisher panel, in the Establish Connection section, click the expand icon
 .
. -
To connect to the event broker service copy the value for Client Password from the Try-Me! tab into Broker Manager and paste it into the Client Password field under Establish Connection.
If you didn't select the latest version when you created the event broker service, you may also need to copy and paste the value for Client Username.
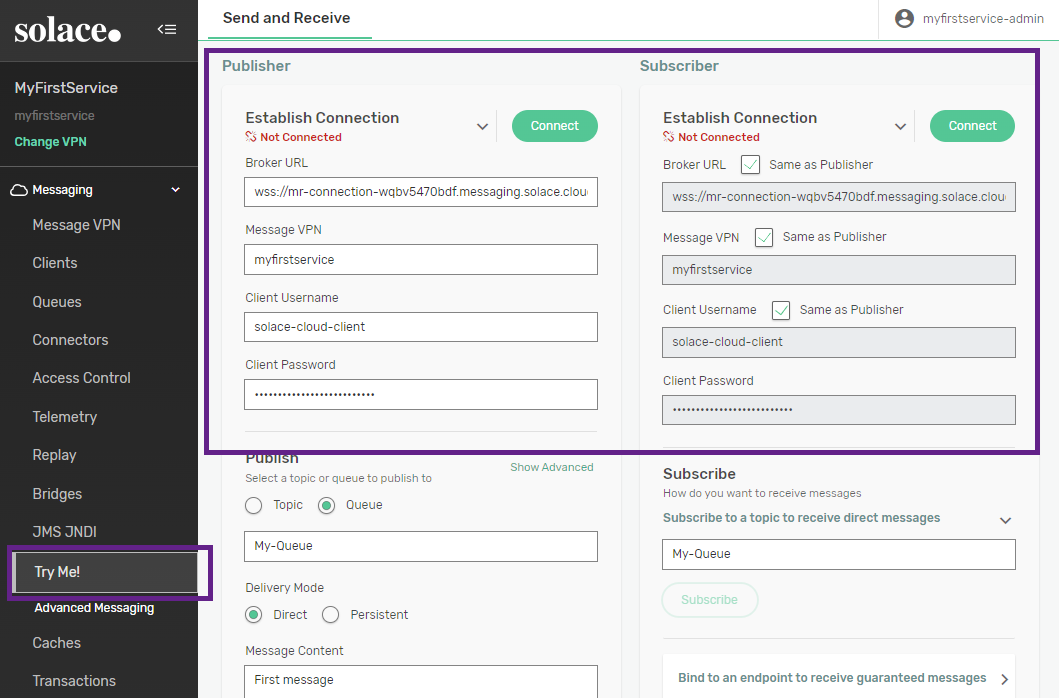
- In the Subscriber panel, make sure that Same as Publisher is selected for each field.
- Under the Publisher panel, click Connect. Once the connection is established, in the Subscriber panel, click Connect.
Publish and Subscribe to Messages
Now that you've set up the TryMe! tool in Broker Manager, you can subscribe to and receive published messages by performing these steps:
- To configure the Publisher to publish messages to a topic, perform these steps:
- Select Topic as the Publish option.
- Click Clear All to delete the topic builder example.
- In the Publish to topic field, enter:
coffeeshop/order/new/v1/mobile/ca/437/44334 - Set Direct as the Delivery Mode.
Copy the following JSON content into the Message Content field.
{
  "source": "mobile",
  "device": "app-android",
  "country" : "Canada",
  "region" : "Ontario",
  "storeID" : 437,
  "requestId": 44334,
  "customer": {
    "name": "John Doe",
    "email": "john.doe@example.com",
    "phone": "123-456-7890"
    },
  "items": [
    {
      "productID": "COF001",
      "productName": "Americano",
      "quantity": 2,
      "size": "Medium",
      "options": ["Extra Shot", "Whipped Cream"]
    },
    {
      "productID": "PST001",
      "productName": "Chocolate Croissant",
      "quantity": 1
    }
  ],
  "totalPrice": 12.50,
  "pickupTime": "2024-01-05T14:30:00",
  "specialInstructions": "Please make it extra hot."
}
-
To configure the Subscriber, in the Topic Subscriber field, enter
coffeeshop/order/new/v1/*/ca/>and click Subscribe.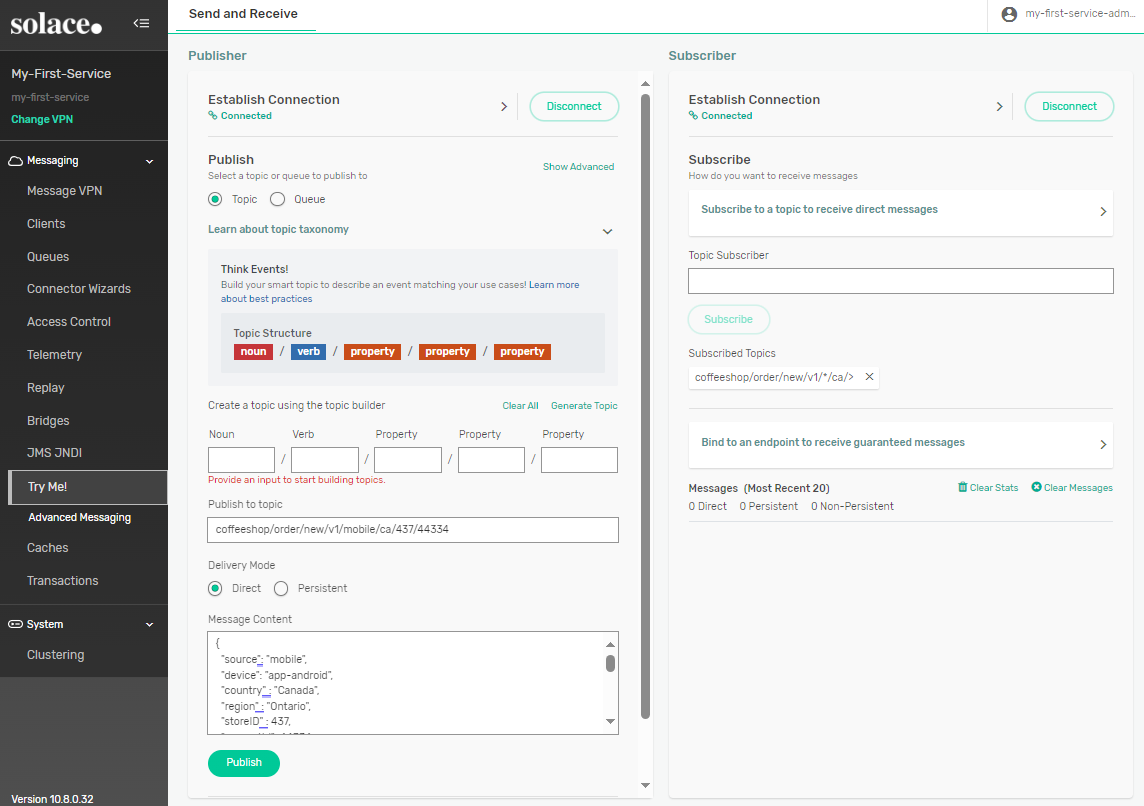
- Click Publish.
The event is published by the Publisher and received by the Subscriber.
You've now seen how a simple publish-subscribe operation works using subscriptions with wildcards. You can try altering the topic and subscription to see what the subscriber receives and doesn't receive.
Tutorial Steps
You've completed the second step in the tutorial. Click the link to the next lesson to continue.
| Step | Description |
|---|---|
|
|
Set up Your First Event Broker - Complete |
|
|
Solace EDA Basics - Complete |
|
|
Set Up the Solace Try-Me CLI Tool - Next Lesson |
|
|
Try a Publish-Subscribe Message Exchange Pattern |
|
|
Try a Request-Reply Message Exchange Pattern |
|
|
Explore Consumer Scaling Patterns |
|
|
Next Steps |
You can return to the main Tutorial page at any time.